
Rebarreling a Savage Axis II .25-’06 XP Hardwood Rifle
Share the post "Rebarreling a Savage Axis II .25-’06 XP Hardwood Rifle"
I decided to rebarrel my Savage Axis II .25-’06 XP Hardwood Rifle because I didn’t like the group size it produced using a good scope and very good ammunition.
If you haven’t already read my blog posting about reworking a 6.5 Creedmoor Savage Axis rifle, you may want to do so before reading this post because I’m not going to repeat the information about the rebarreling or scope mounting processes. I’ll just address the differences between the work I did on the Axis, which was much more extensive, and what I did on the Axis II.
The Axis and Axis II rifles are nearly identical, except the Axis II comes from the factory with their AccuTrigger and a Bushnell scope, whereas the Axis comes with a standard trigger and a Weaver scope (see the Savage Arms descriptions here). As in the case with the Axis rifle, I won the Axis II at an NWTF benefit banquet. Unfortunately, the similarities between the rifles extended to the conditions of their rifle bores!
I already had an excellent .25-’06 Ruger M77 Mk 1 rifle that I purchased at an auction many years ago. The seller said he sold it because it wouldn’t shoot accurately anymore, so I was able to buy it for a very low price. I took a look down the bore of the gun (this was in my pre-borescope days) before I bought it, and could hardly see the rifling for all the copper bullet material stuck in the grooves, so I figured the gun would be “a shooter” if I could get the bore cleaned of all that metal. After several days and iterations of using an electrochemical bore cleaning system that stripped progressive layers of copper, burned powder, and lead out of the bore I had a clean gun that returned to its previous glory. It is a “tack-driver.” So, I knew the caliber could produce very good and accurate results.
My excitement about winning a new .25-’06 turned to disappointment over a week or so when my new Axis II spewed bullets downrange into really crappy groups, even when combined with a quality SIG scope. It was as inaccurate as my old M77 before I de-metaled its bore! With the Axis II being a new gun, I didn’t think bore metal deposits would be a problem. This time, though, I had a borescope rather than my naked eyeballs to use for a bore examination. After checking all the other things that could be affecting the gun’s accuracy (bad scope, loose scope mountings, barrel in contact with the forend, loose/improperly torqued stock-to-receiver bolts and ammo variations), I borescoped the barrel and discovered similar problems to those I found with my Axis rifle. The craters and cavities in the one-third of the bore closest to the muzzle were worse than in the Axis
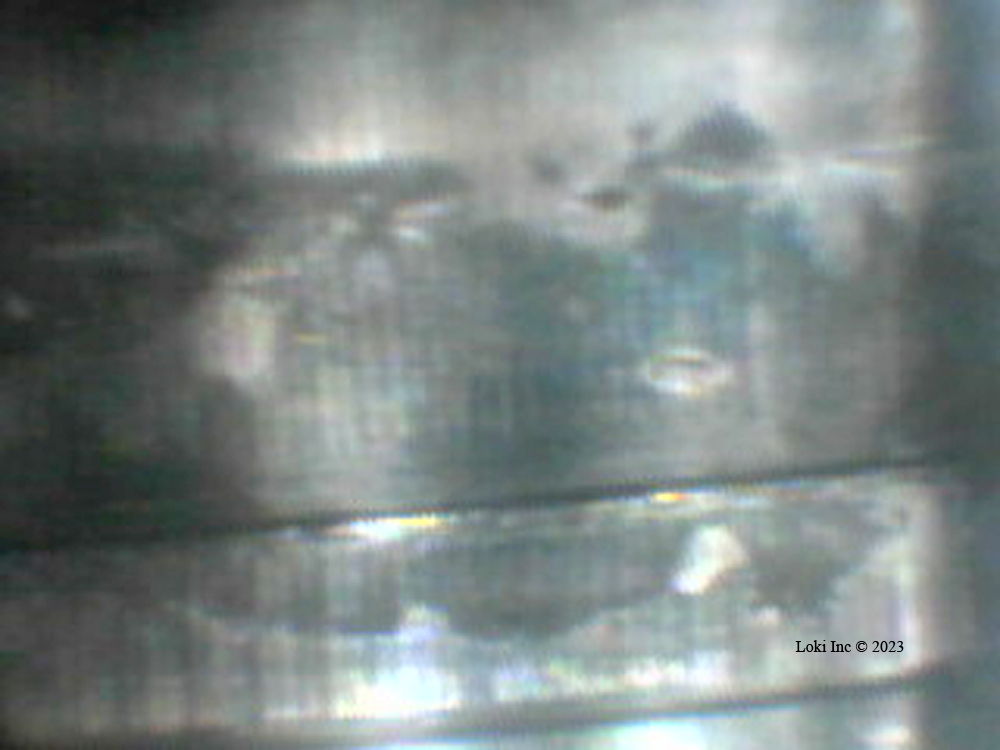
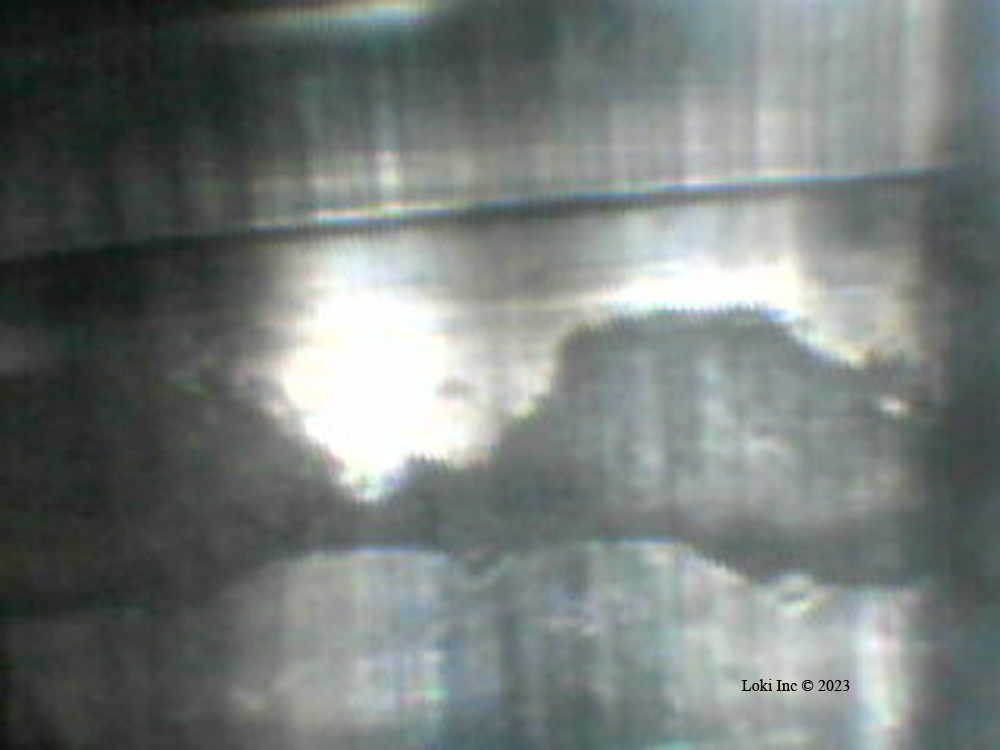
Cavity in bore
This mystifies me, as Savage rifles have a reputation for accuracy, and the two others I own (an older Classic Model 110 in .270 Winchester, and a 110 Precision in .338 Lapua Magnum) were very accurate right out of the box. I don’t know why the two rifles I won at benefit banquets were problem children.
Rebarreling a Savage Axis II .25-’06 XP Hardwood Rifle
The Axis II’s cost to me so far was just the raffle ticket, so I decided to invest some time and money into improvements. The XP stock is pillar bedded, and made of a nice hardwood with two darker cross pins fore and aft of the magazine well, and I like the AccuTrigger. I hoped that all I needed to replace was the rifle’s barrel, so I searched online and found an E R Shaw (now called Shaw Custom Barrels) .25-’06 barrel kit with a factory contour Savage barrel for sale. Shaw barrels are well known for accuracy, and the kit included a GO gauge and a NO-GO gauge as well as a Savage barrel nut wrench.
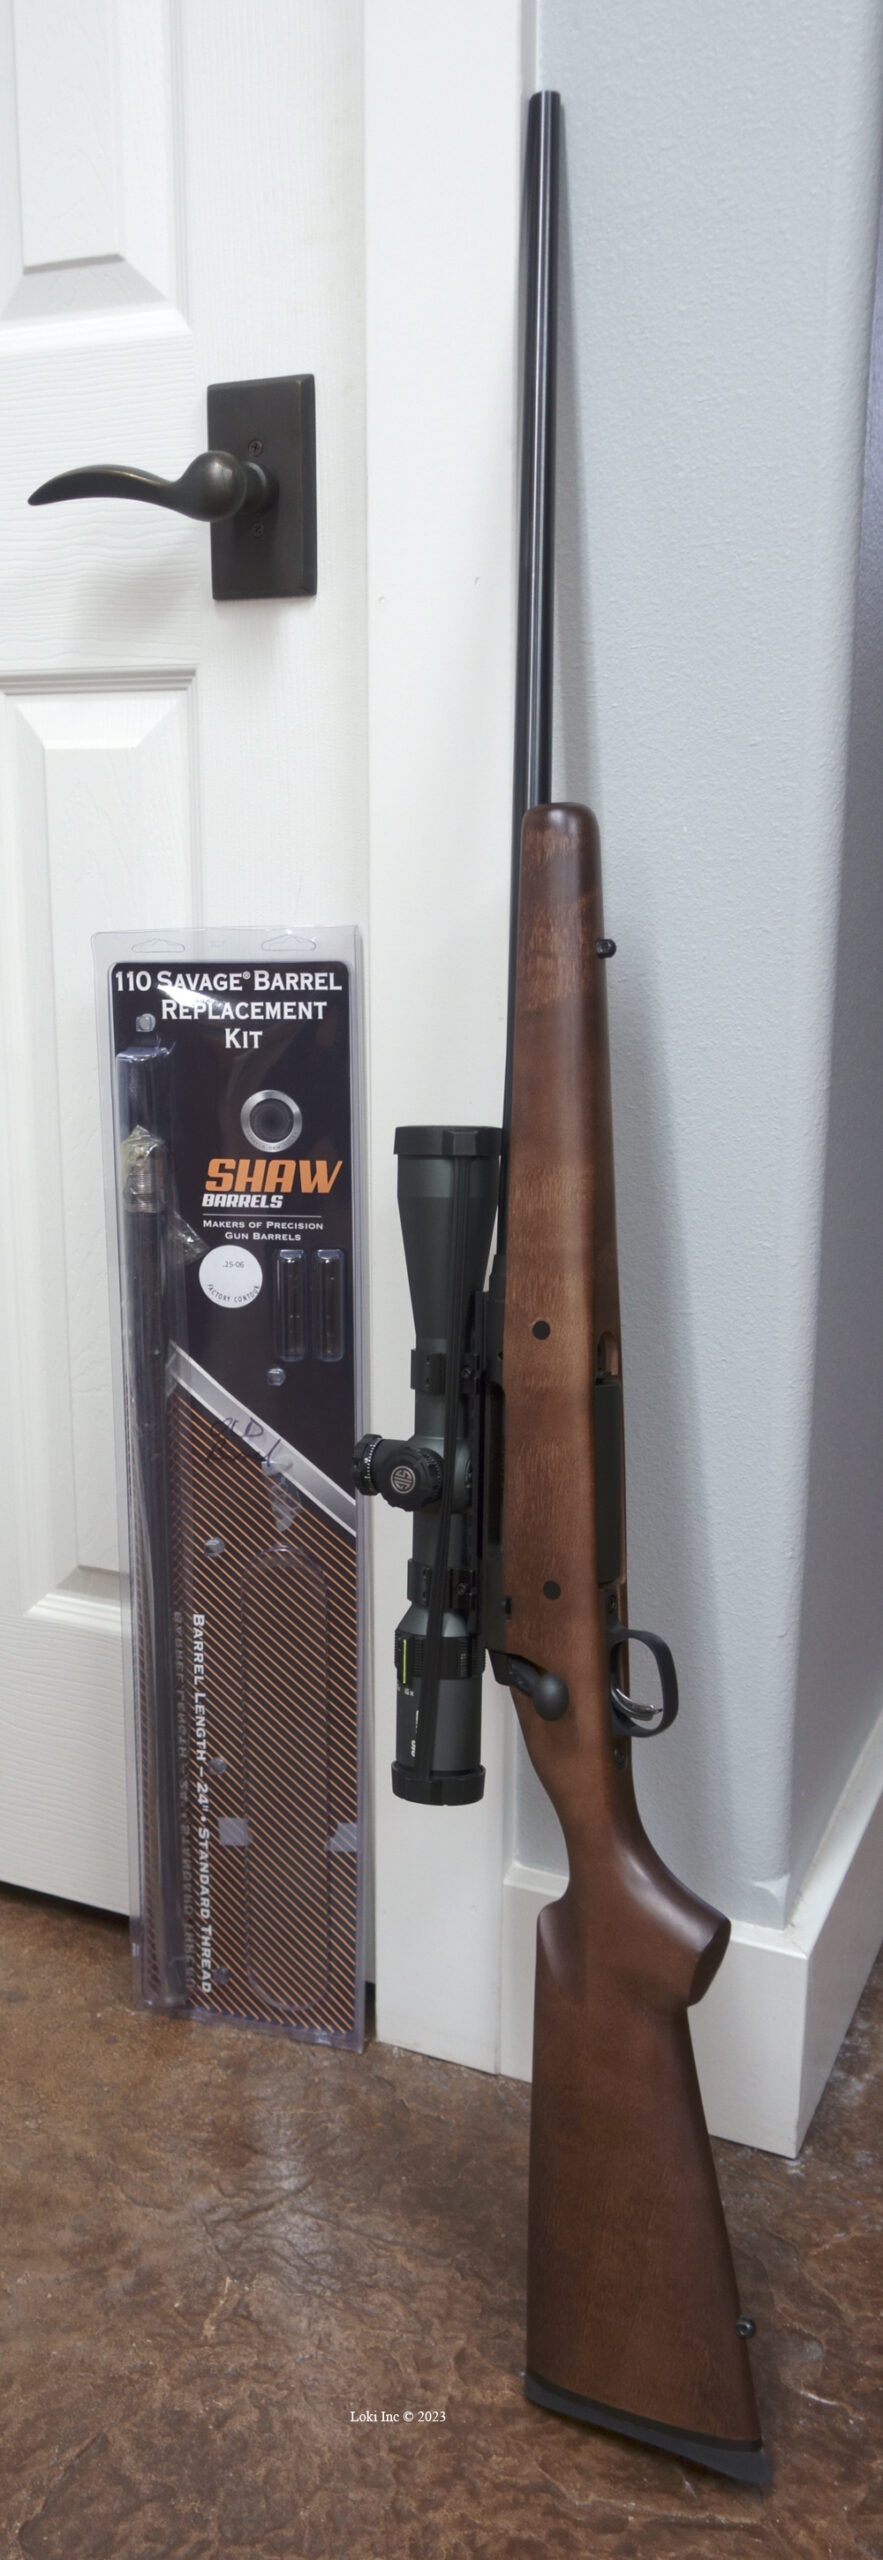
Original Savage Axis II rifle with Shaw barrel kit
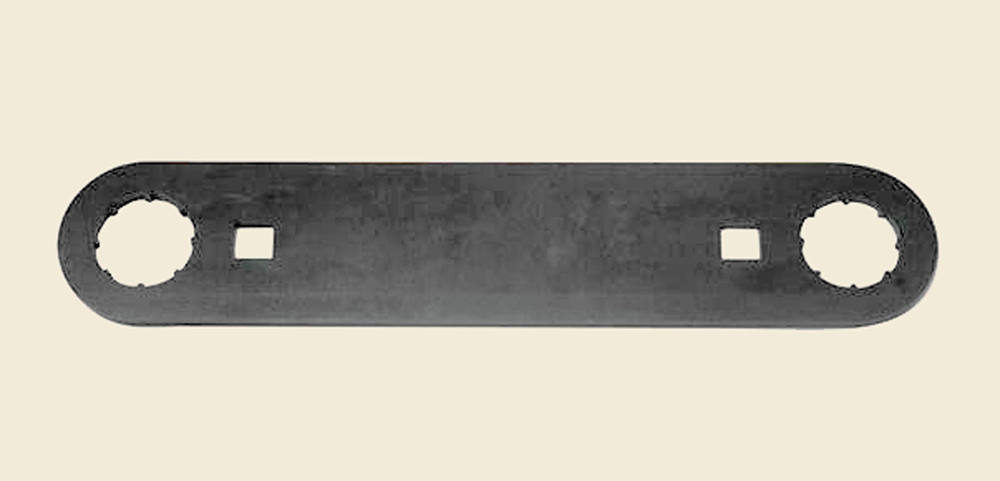
Savage barrel nut wrench-2
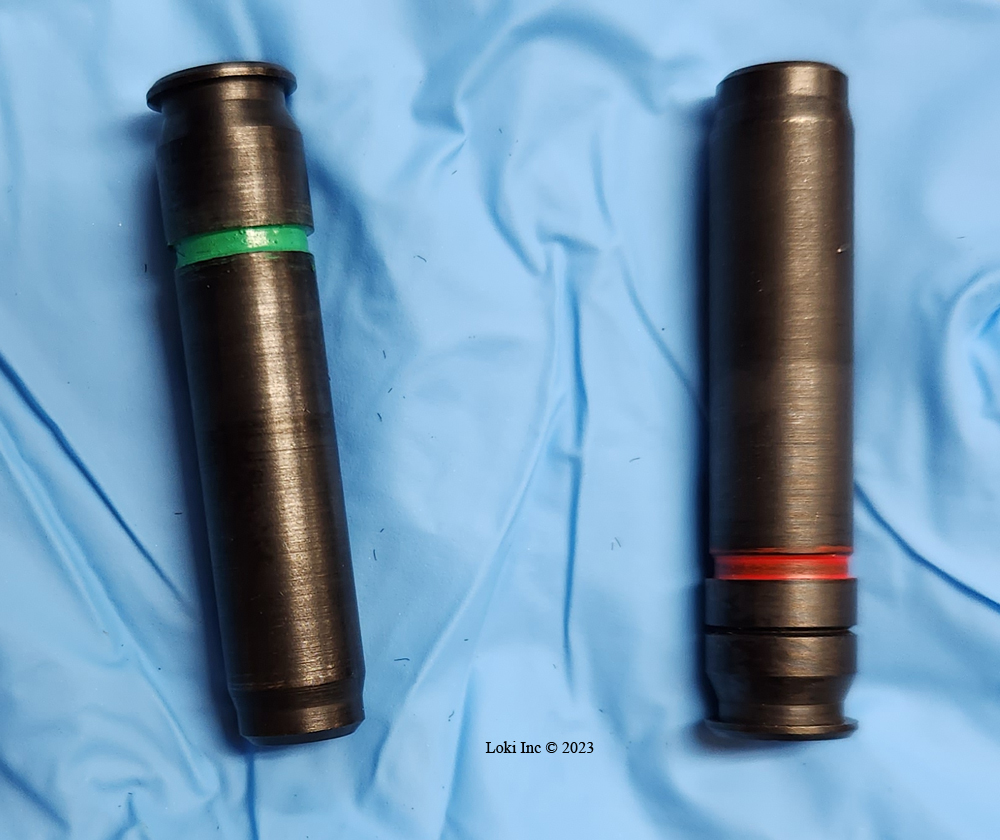
Headspace gauges – GO on the left, NO GO on the right
One of the many good things about the kit was its detailed set of instructions on installing the barrel. Even though I have installed Savage and Mauser barrels before, and knew the process, I still followed Shaw’s instructions to ensure I didn’t mess-up something. It behooves anyone barreling a firearm to be sure of the process, to avoid creating a dangerous situation with the wrong headspace.
Rebarreling the Axis II went smoothly. After removing the scope and its mounts from the receiver of the rifle, I removed the barreled action from the gunstock. I clamped my barrel vise in my big mechanic’s bench vice, and then after fiddling around a bit to decide which bushing to use in the barrel vise, I put some rosin on the rifle’s barrel. You don’t always have to use rosin to keep the barrel from slipping in the vise, but the inserts in my vise weren’t a perfect fit on the barrel so I needed to use rosin. At that point, to remove the barrel it was a matter of using the barrel nut wrench to remove the nut, and then sliding the barrel out of the action. Installing a new barrel included several important details, as addressed in the Shaw installation instructions, so I followed them closely. The barrel nut should only go on in one way, and the gun’s recoil lug has one way to install it. To achieve the required 75 to 100 ft-lbs of torque on the barrel nut with the GO gauge installed in the gun, I inserted the square driver part of my big torque wrench into the square cutout in the barrel nut wrench, and used the torque wrench/barrel nut wrench combination to tighten down the nut.
Even though the new barrel was noted to be the factory contour, when I seated the barreled action into the gunstock I noticed some interference between the barrel and portions of the stock’s barrel channel. As I mentioned in my 6.5 Creedmoor rebarreling blog, I prefer to have a business-card-thick gap between the barrel and the stock for the entire length. So, I got out my barrel channel scrapers and enlarged the forestock channel wherever needed to achieve that gap. I put a little sanding sealer onto the newly exposed wood in the channel to help seal it against moisture.
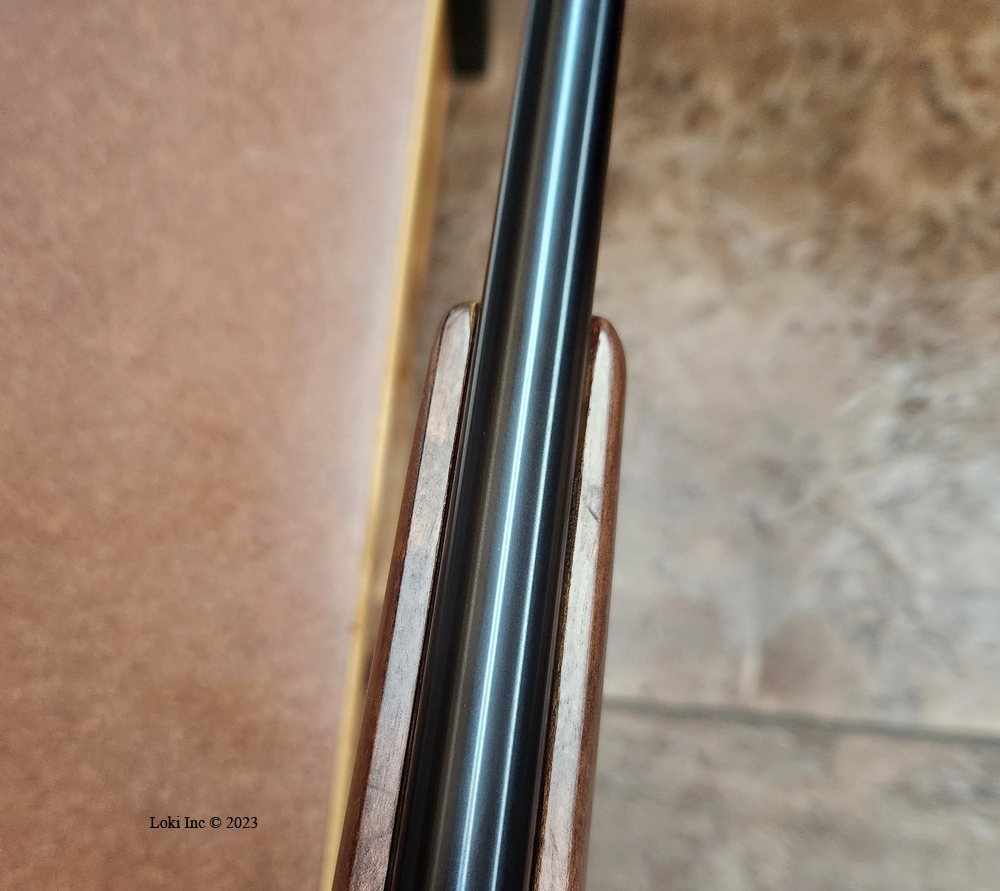
Barrel in forend showing gap
After re-assembling the rifle and re-mounting my scope on it, I thoroughly cleaned the gun’s bore.
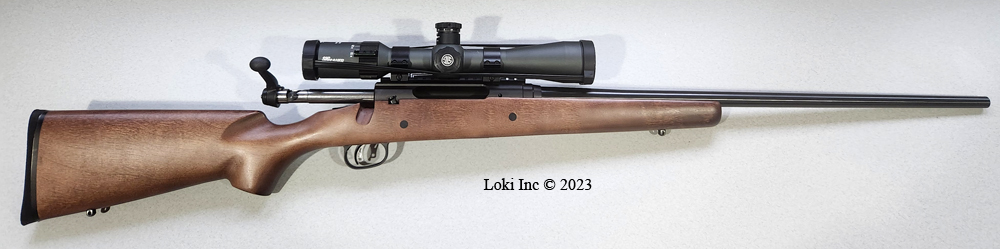
Completed rifle Savage
I was anxious to take the Axis II to the range to see if my work had made any improvement on the rifle’s accuracy, so I grabbed a couple of boxes of different brands of ammo, plus some of my handloads.
On the range, the rifle shot very well – its accuracy was a vast improvement over what I was able to achieve with the gun and its original barrel. Rebarreling it was worth the effort!
Recent Posts
July 27, 2026 September 23, 2025.22 Caliber Suppressor Cleaning
August 20, 2025Trophy Hunting – Is it Ethical?
August 6, 2025 July 25, 2025On-Target Performance of Subsonic Ammo in Suppressed Rifles – Hype Versus Reality