
New front sight for S&W Model 327 or TRR8
Share the post "New front sight for S&W Model 327 or TRR8"
I’ve had a S&W Model 327 TRR8 for several years, now, and it is one of my favorite guns to carry when I’m out and working on my Missouri Ozarks property. I never know when I might come across a four- (or two-) legged varmint that needs to be shot. Unfortunately, I had to replace the gun’s front sight.
Light in weight for a Smith N-Frame because of its scandium alloy frame, the TRR8’s stainless steel cylinder holds eight rounds of .357 Magnum ammo (or .38 Special if you wish for a bit less recoil) that can be full-moon clipped together for quick reloading of the chambers. Since I handload my ammunition, I typically chamber 158 grain JHP rounds loaded to a velocity that I know from experience will expand effectively in raccoon, groundhog, and armadillo-sized animals. As backups, I put two ammo carriers on my belt that can each hold a full-moon clip of .357; one clip has 180-grain solids hot-loaded for black bears, and the other has 140-grain FTX polymer tipped bullets loaded for deer-sized animals.
You can also single-feed the chambers, as the extractor star can pick up the cartridge rims for easy extraction. It’s called a TRR8 because it’s a “tactical rail revolver”, the cylinder holds 8 rounds, and the gun is finished in black.
If you wish to do so, you can install a short piece of Picatinny rail atop the gun for optical sights and another section underneath to attach a light, as the barrel shroud is drilled and tapped at the factory. I chose not to do either, as I want a rugged gun that I can carry in a hip holster when I’m dragging myself through briars and thorny bushes, and when I’m driving a cab-less tractor through the same sort of stuff. More stuff hanging on a gun means more stuff to hang-up in the holster, or in brush when I’m drawing-down on something.
My gun was from Smith’s Performance Center, and they fine-tuned the action so everything about it is smooth – it has a consistent, slick double-action trigger pull, and the hammer release during the single-action pull is like the proverbial “break of a glass rod.” I’ve lost count of how many armadillos, prairie dogs (during a trip to northern New Mexico) and other varmints I’ve killed with the revolver. While carrying it as a backup to my primary arm, I even killed an eight-point whitetail buck with it when (due to a failure on my part) my .30-’06 rifle was out of action.
So, what’s not to like about the TRR8? The interchangeable front sight, in my opinion, is a bad concept. I like iron sights on pistols, and the gun comes with a gold bead Patridge-type front sight blade that worked very well for me. I say “worked” because I lost two of them over the past few years due to the interchangeable design. As it turns-out, holster carry is anathema to this sort of front sight. My holster happens to have an open end at the part where the pistol’s muzzle resides, so twice at times unbeknownst to me when I re-holstered my gun out in the woods, the front sight blade caught on something inside the holster and removed itself. Of course, the blade proceeded to fall through the bottom opening of the holster to be lost in the leaf litter on the forest floor.
Unfortunately, I only had two sight blades from the start. The second time this happened was in the midst of the great Covid-everyone-stay-at-home-and-close-your-business lunacy. I called Smith & Wesson to order a replacement sight blade only to be told that they didn’t have any and didn’t know when they would have any more.
New Front sight for S&W Model 327 or TRR8
What to do? Well, with necessity being the Mother of Invention, I decided to build my own sight blade out of a piece of sheet brass scrap I had left over from another project. Of course, I could have used a hacksaw and needle files to make the blade, but I decided making the blade would be a good time to use my mini-mill and practice my detailed machining skills.
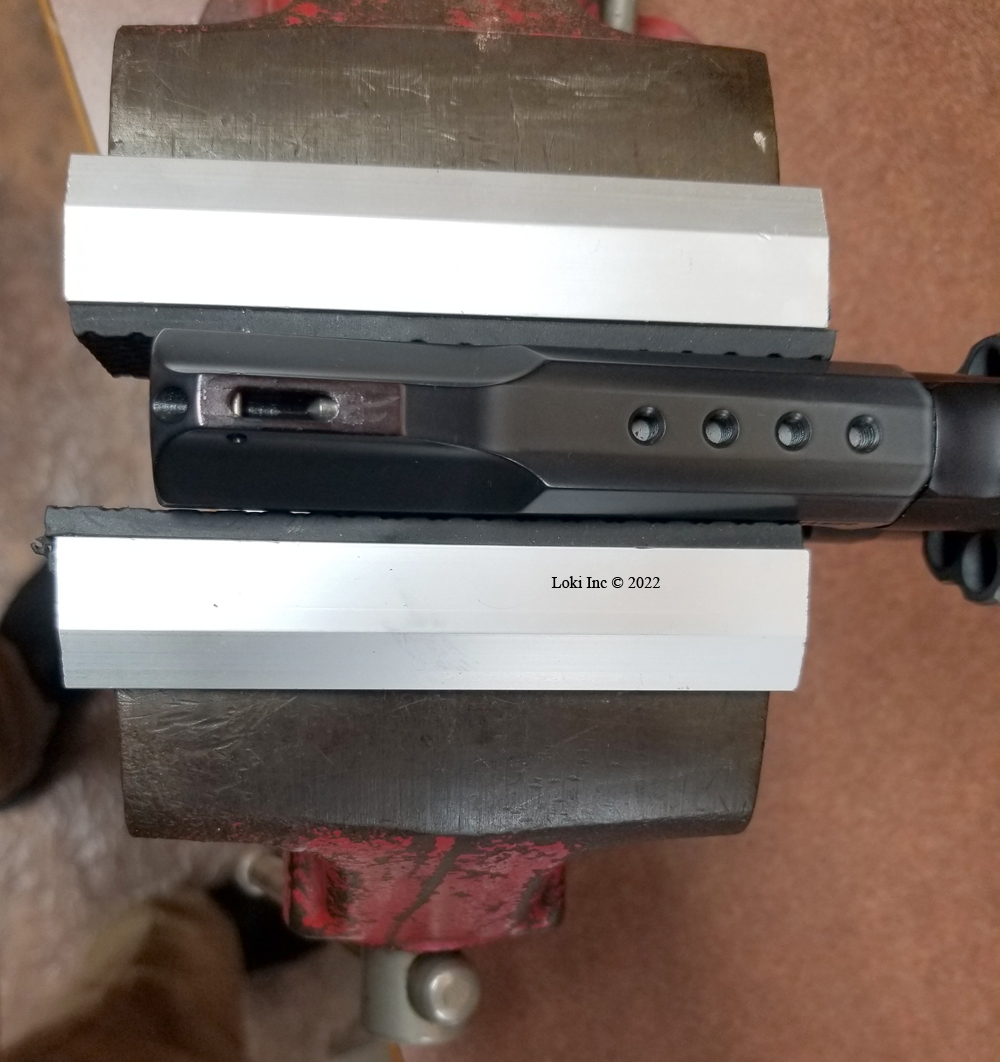
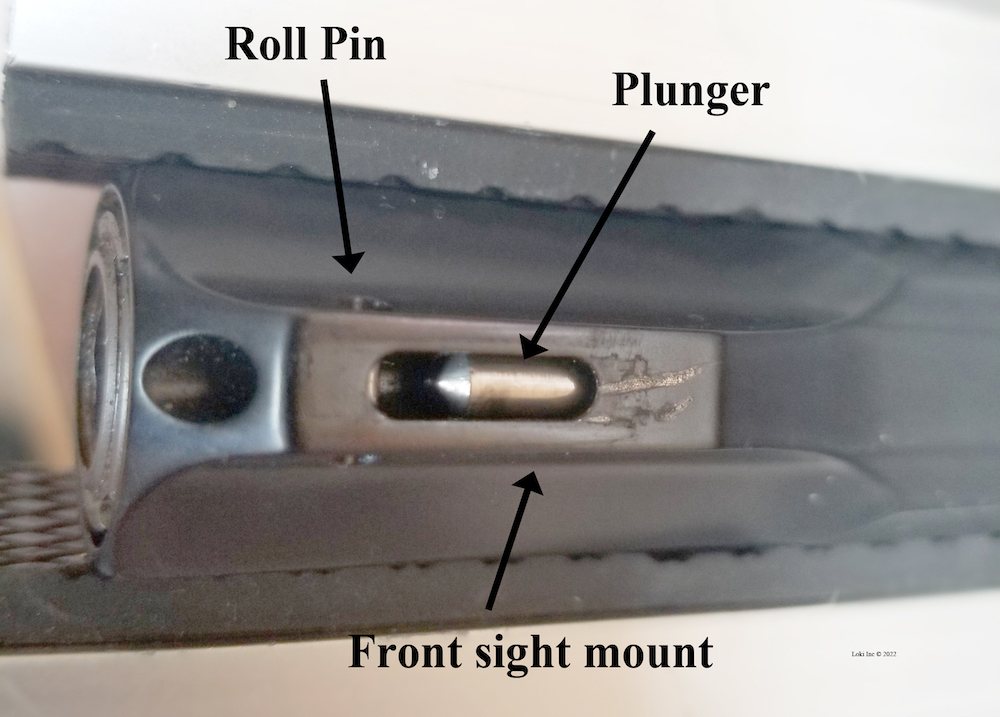
Empty front sight mount in barrel shroud
Front sight mount
The front sight mount in the revolver’s barrel shroud has a small roll pin in the front and a spring-loaded plunger in the rear, and the blade has corresponding notches to engage the pin and the plunger.
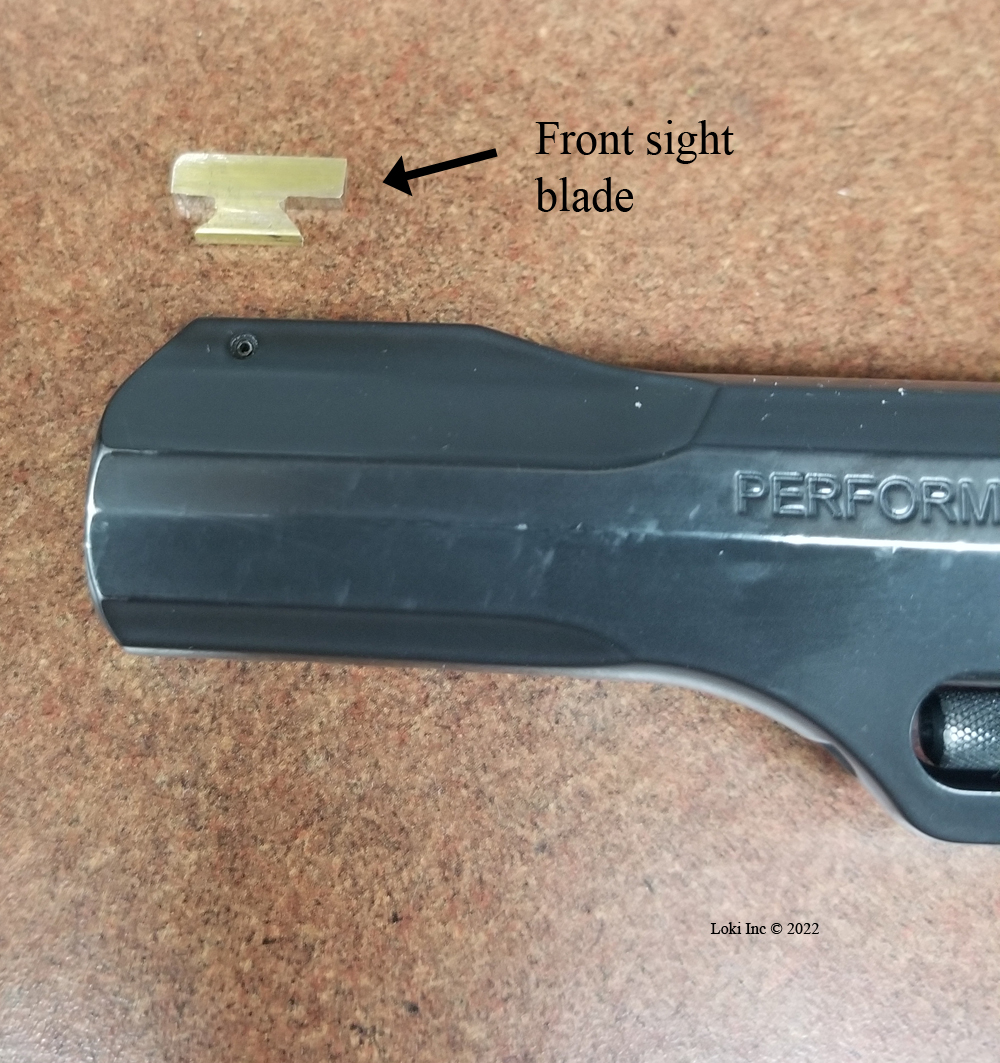
Measuring the dimensions for the base portion of the sight (the part that would fit into the front sight mount in the barrel shroud) was easy using a caliper; I paid close attention to the dimensions so I could get the front and rear lower angles right. If these front and rear angles aren’t correct where the sight hooks under the front roll pin and where it hooks under the plunger, the sight won’t stay engaged in the sight mount.
I used my metal cutting band saw to cut a rough representation of the sight shape from the brass strip, and then I used a small end mill in the mini-mill to finish shaping the sight blade.

Scrap brass after sight blade cut out
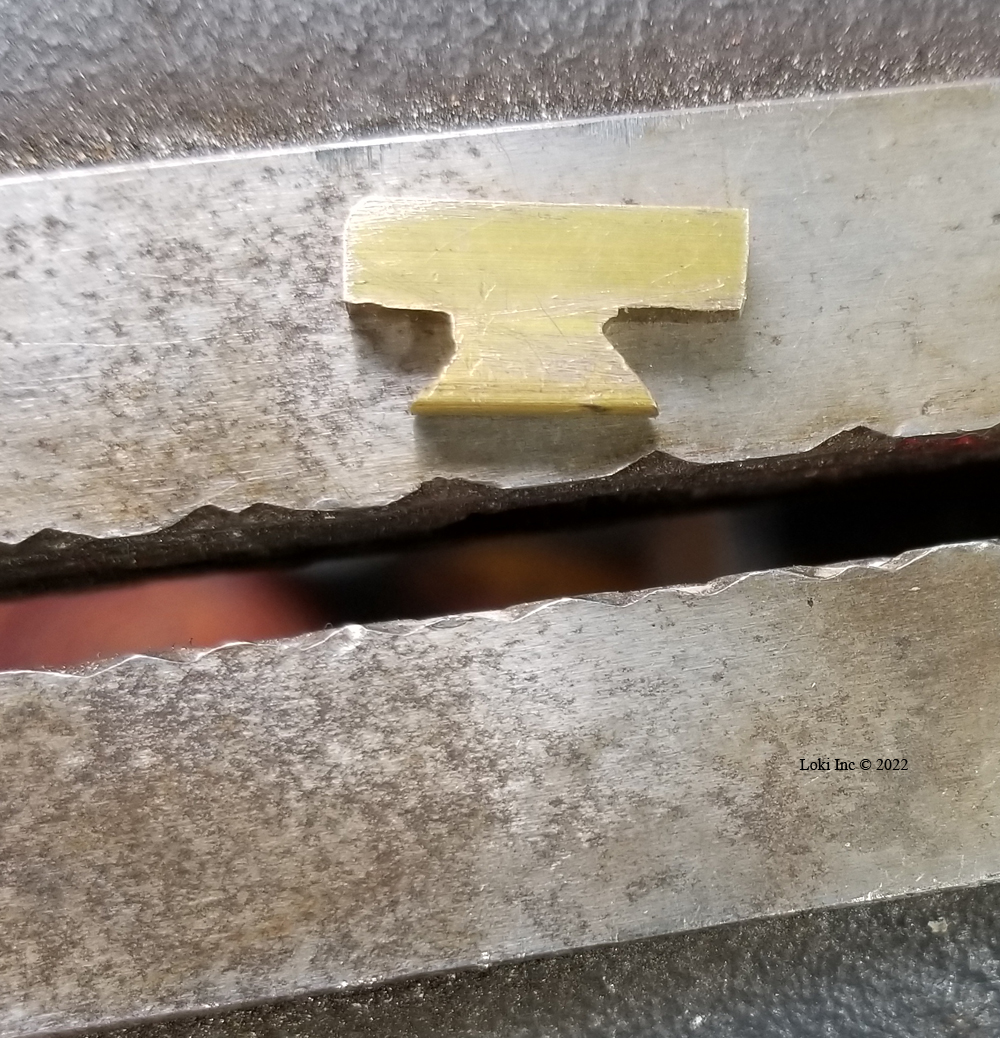
New front sight blade rough cut
Front sight blade shape
I wanted the new sight blade to have an interference fit within the revolver’s front sight mount in the barrel shroud, but the blade was a bit thinner than I liked and rocked back-and-forth when I inserted it into the mount. So, I used a center punch to peen both sides of the blade that would be buried in the mount, until the blade had a press-fit and wouldn’t wobble back and forth.
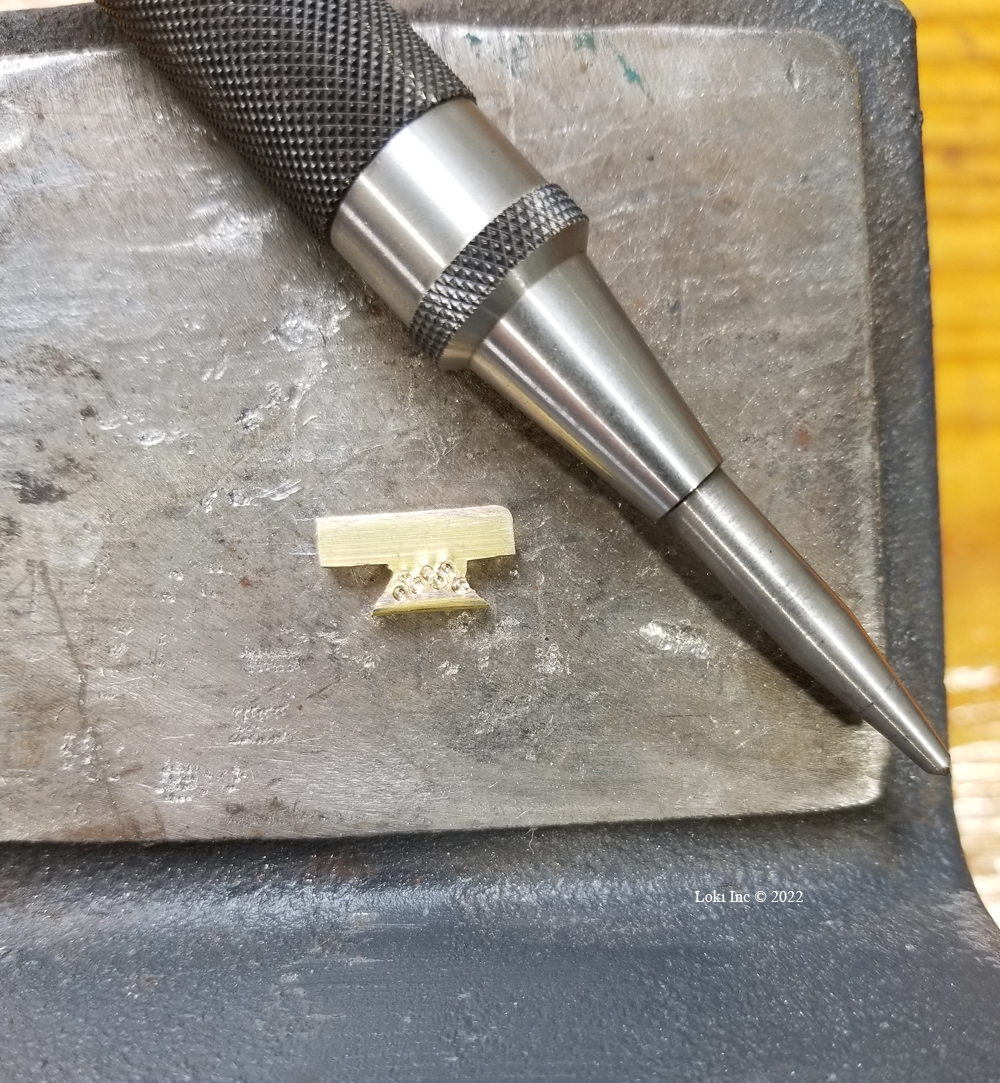
New front sight blade after peening
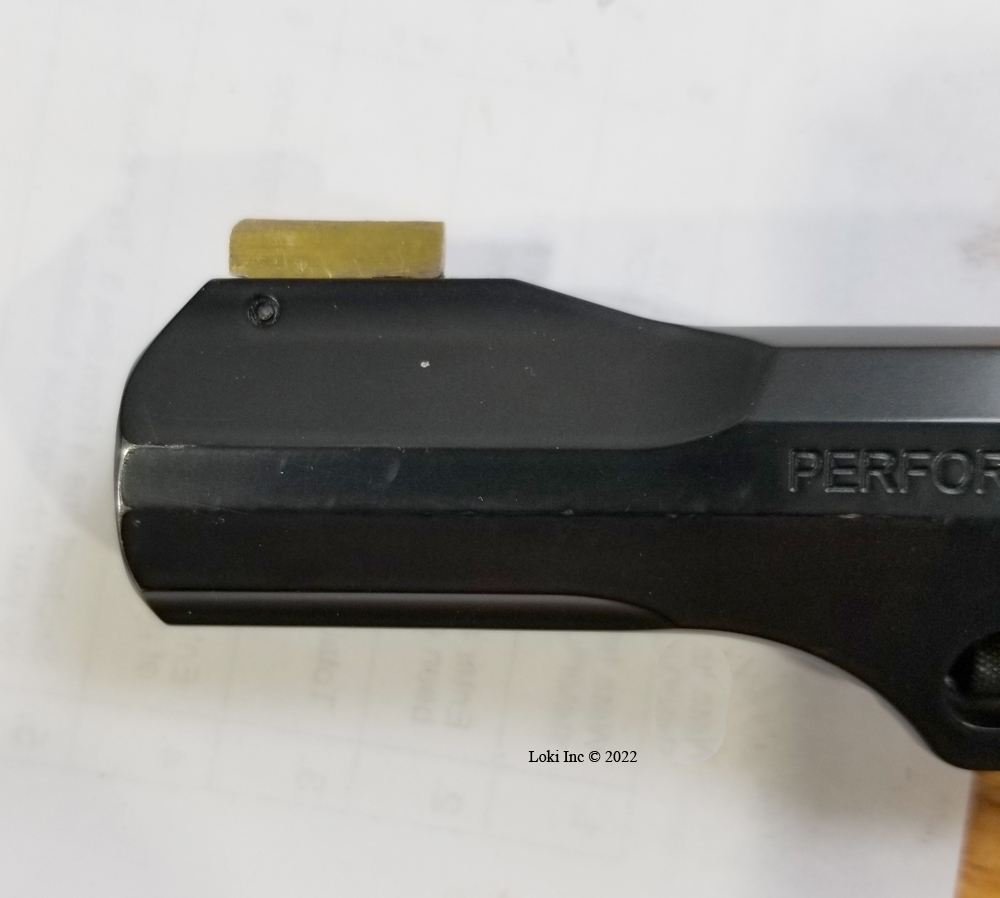
Front sight blade fitted to barrel shroud
At that point, I decided to put a small roll pin in the rear portion of the sight, inserted through the sight mount. After choosing a roll pin that would be about the same size as the factory pin in the front portion of the sight mount, with my new front sight in the mount, I used a center drill in my mini-mill and started the pin hole.
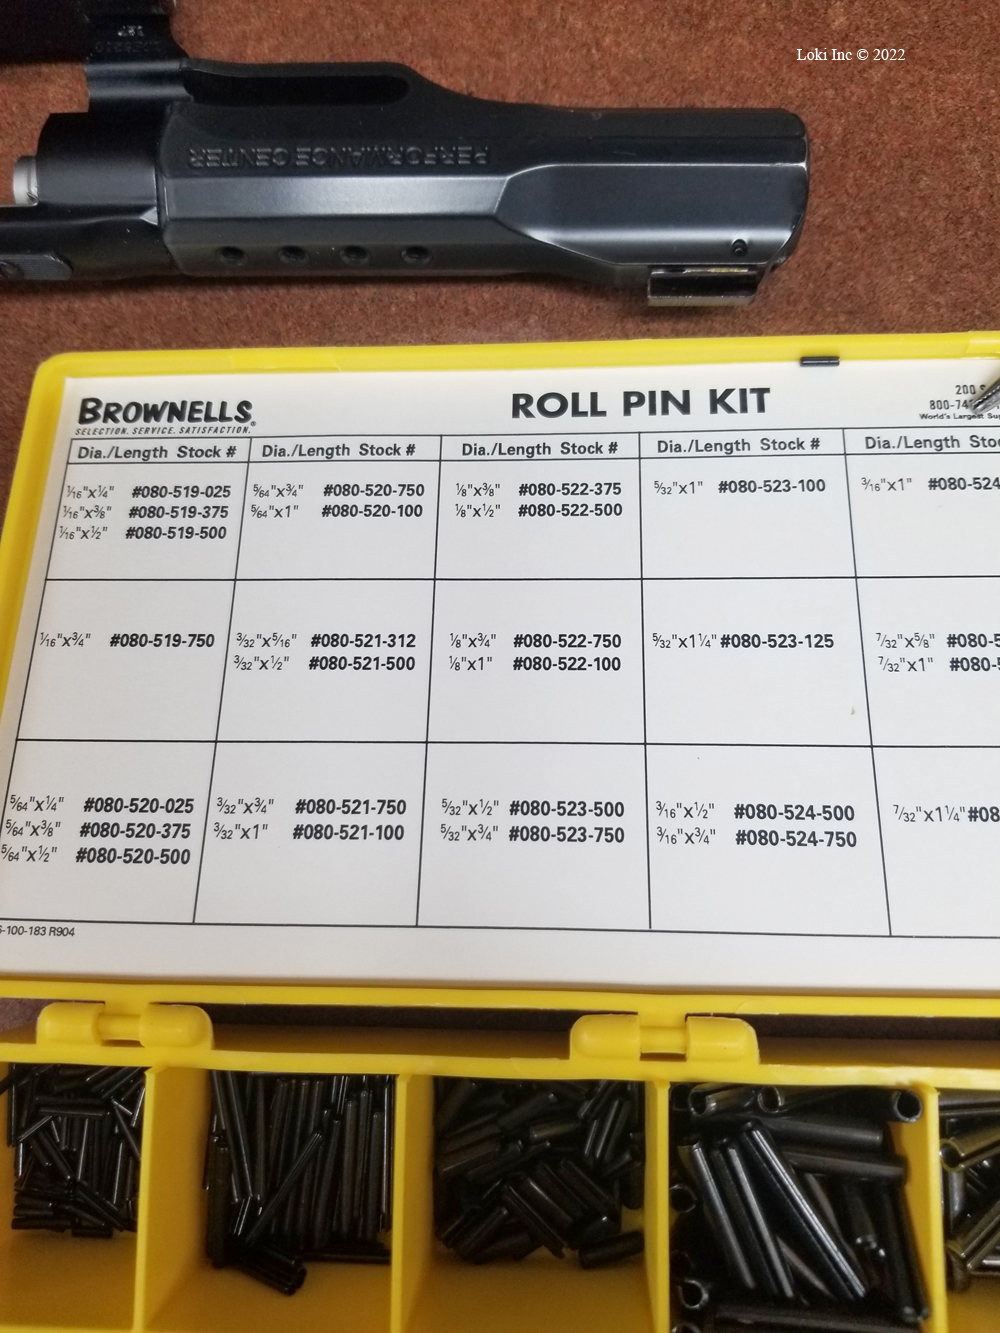
Roll pin kit
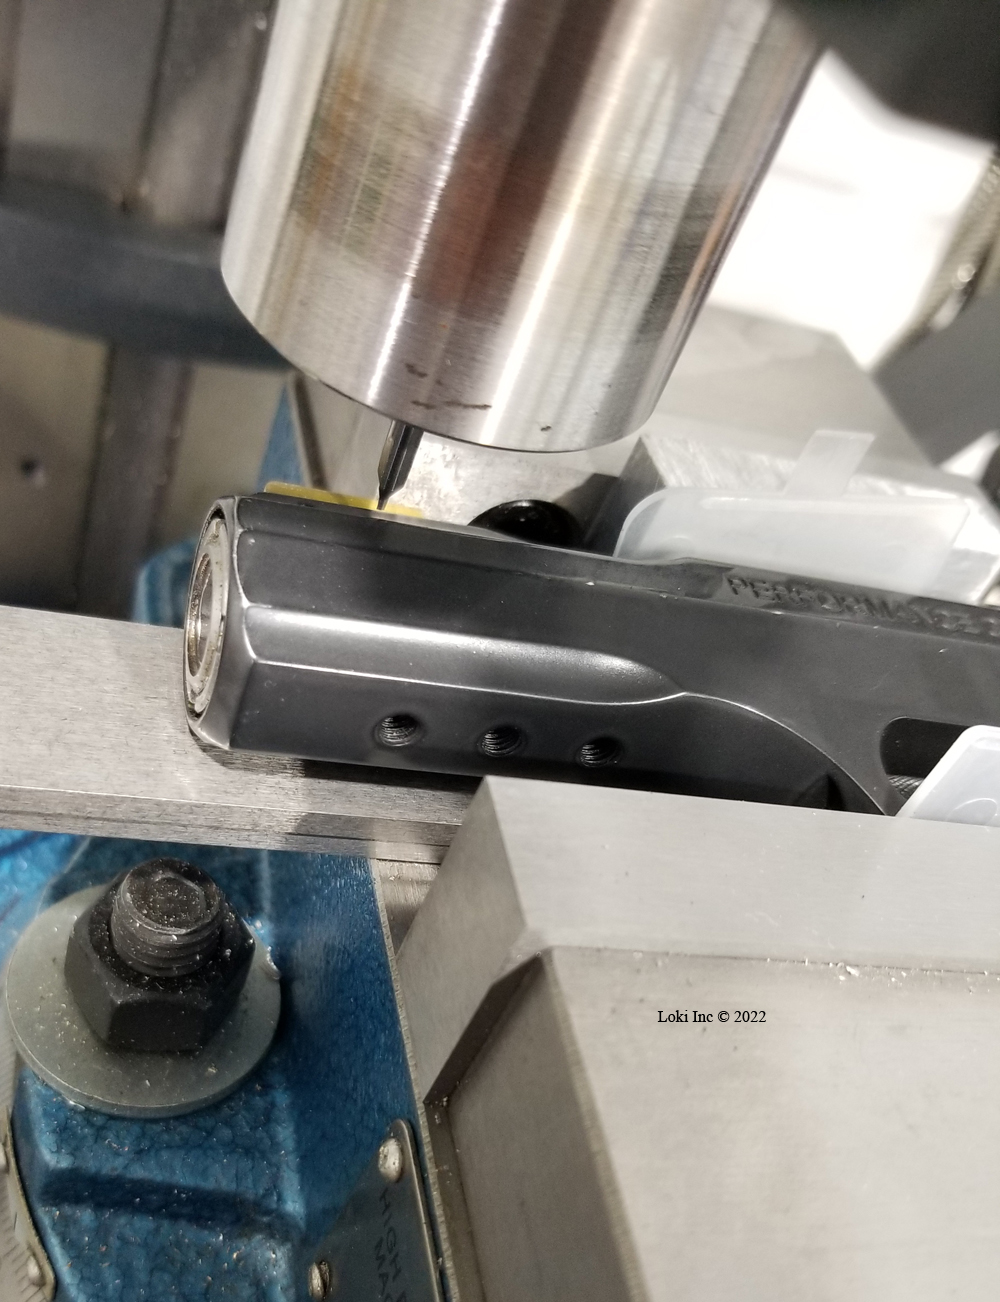
Preparing to center drill hole in front sight mount for retaining pin
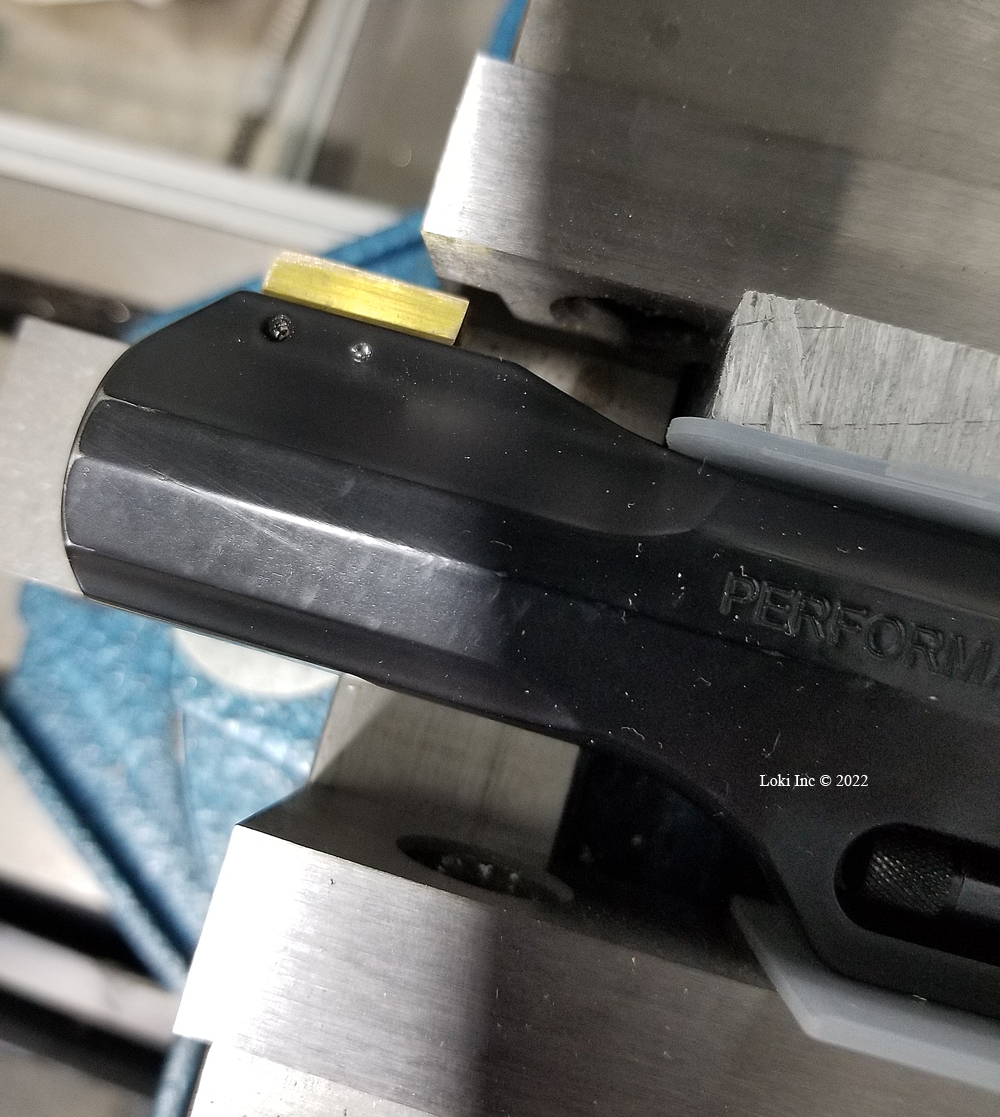
Front sight mount center drilled for retaining pin
Then, using the correct sized twist drill for the roll pin, I drilled the hole all the way through the sight mount and sight, and deburred the hole edges. I used the calipers to measure the correct length for the roll pin, from one side of the mount to the other at the hole openings, and then used a small cutoff wheel in a Dremel rotary cutting tool to cut the pin to that length.
After that, it was simple to insert the roll pin into the hole and tap it into place with a small roll pin punch.
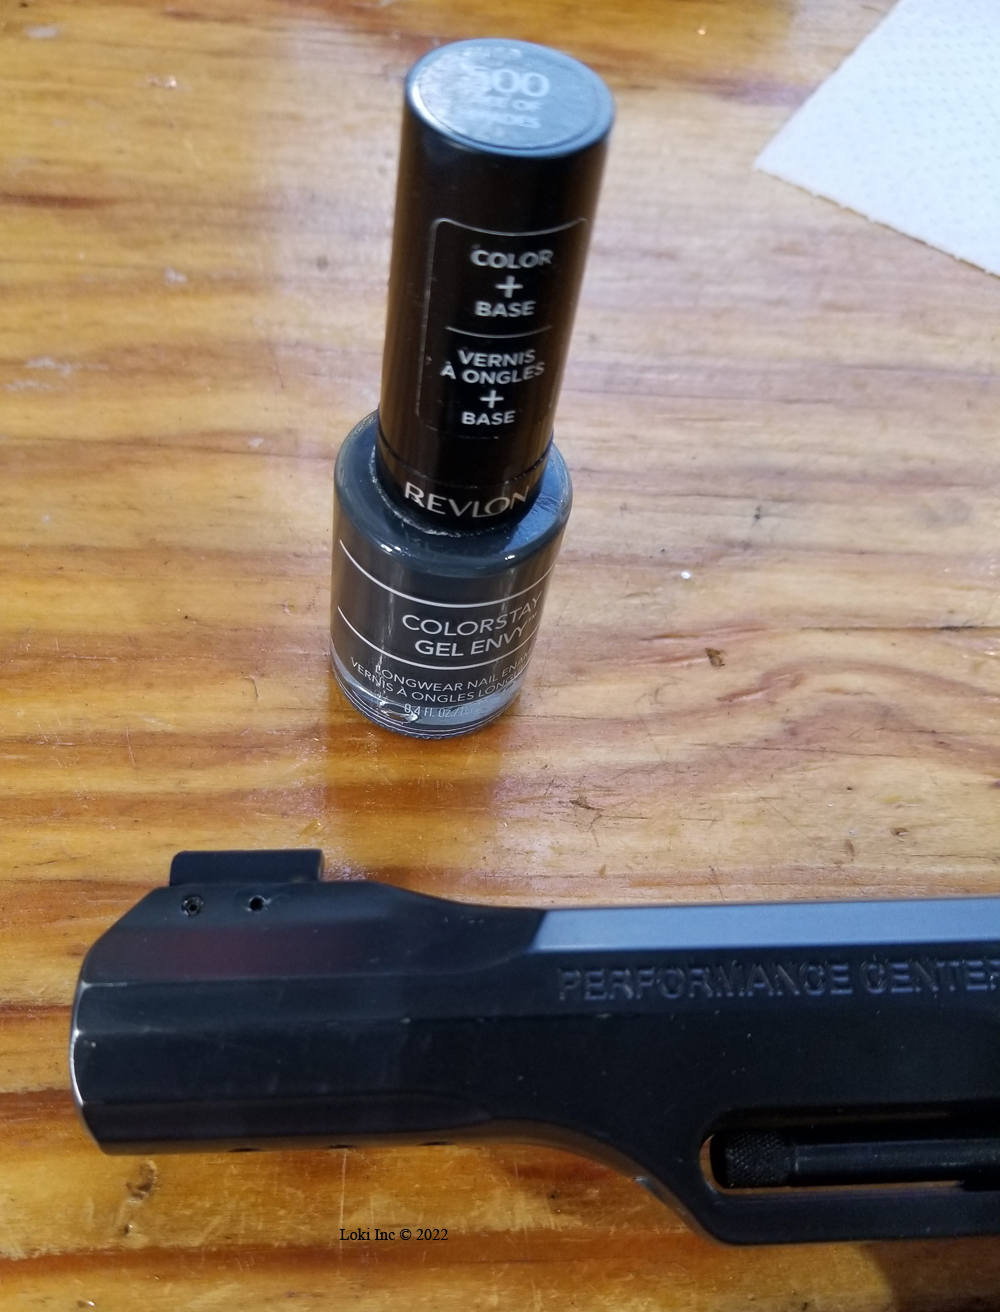
New front sight blade after black nail polish application
A little bit of my wife’s surplus black nail polish worked to cover the edges of the roll pin hole where the bare aluminum of the mount showed, as well as to paint the new front sight. I keep the nail polish bottle handy in case I need to touch-up the sight when it wears from drawing and holstering the gun.
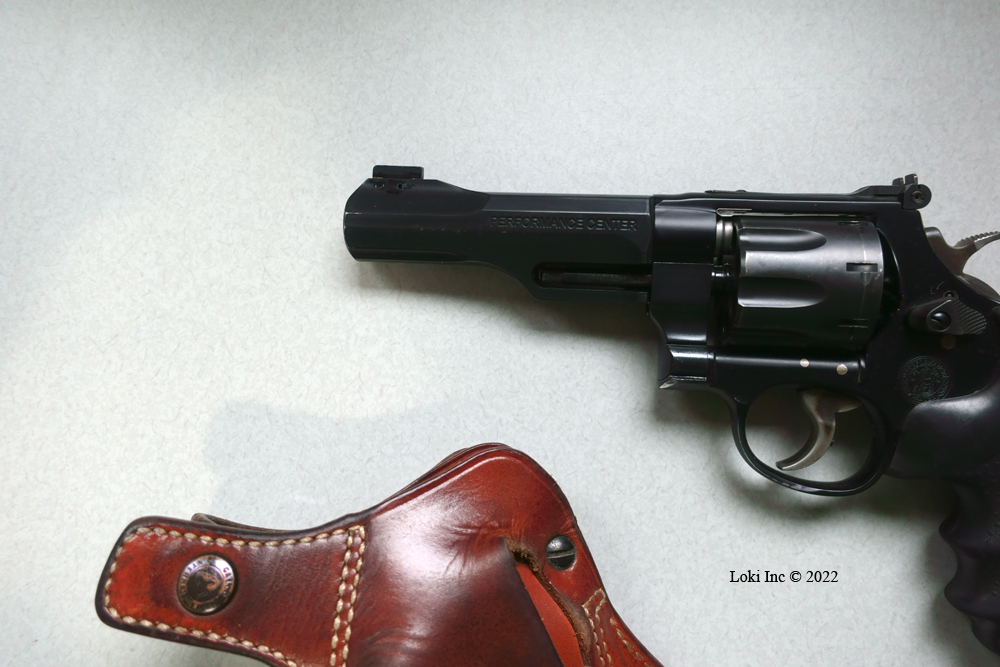
Finished product new TRR8 front sight
Since I completed the project, I’ve used the gun quite a bit and am very happy with it and the sight has never loosened or come off the gun, to the chagrin of many armadillos.
Recent Posts
July 27, 2026 September 23, 2025.22 Caliber Suppressor Cleaning
August 20, 2025Trophy Hunting – Is it Ethical?
August 6, 2025 July 25, 2025On-Target Performance of Subsonic Ammo in Suppressed Rifles – Hype Versus Reality