
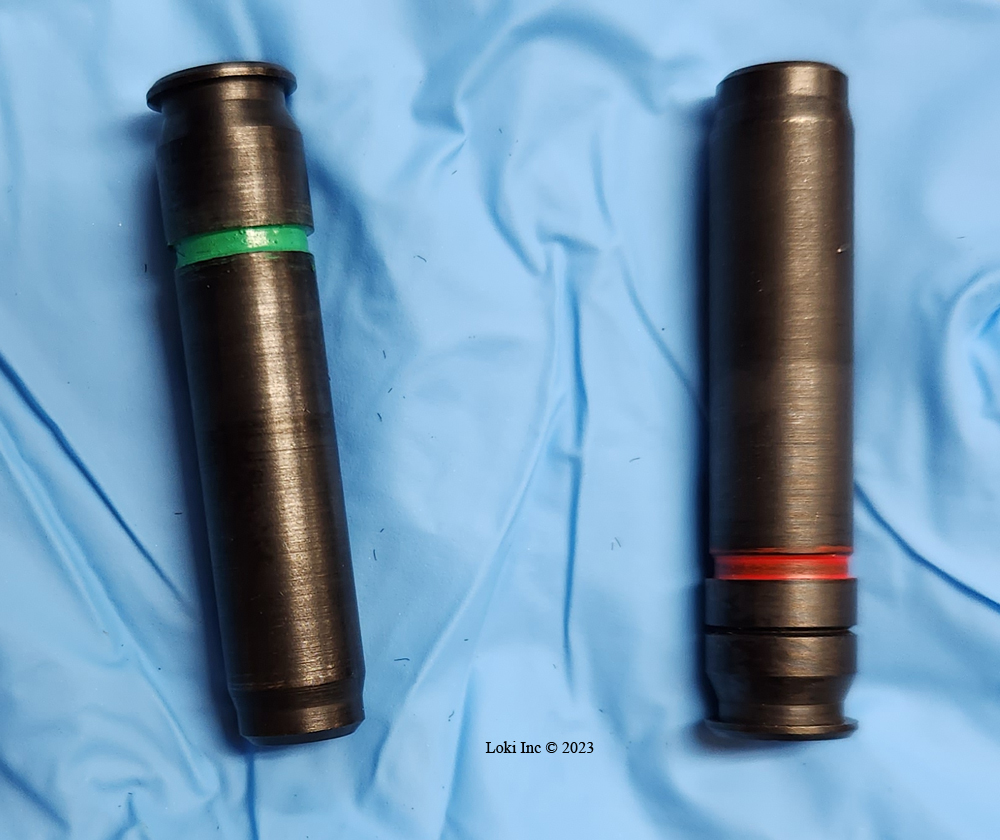
.22 Caliber Suppressor Cleaning
Introduction to .22 caliber suppressor cleaning
On assignments for SilencerCo, I wrote blogs about cleaning suppressors for .22 caliber firearms, but I decided to modify and repost them for my weblog because I have no control over how long the company keeps blog posts up at their website, and I think this information is too important to lose. As sequential blog posts, they documented my learning trip from manually cleaning the little buggers, through experiments with surface treatments and mechanical cleaning method, to using a soda blaster for cleaning. For a discussion of suppressor use, and the application of subsonic ammunition in a suppressed firearm, see my blog post at https://lokiconsult.com/on-target-performance-of-subsonic-ammo-in-suppressed-rifles-hype-versus-reality/.
Do you have a rimfire suppressor? If you do, you have probably experienced the “joy” of taking it apart and cleaning it. In this blog, I detail my experience in discovering the best way I know, so far, of cleaning the little buggers. Since I really enjoy shooting suppressed .22 rifles and pistols with my wife, I did some research to see if there is anything I could do to make the cleaning of .22 suppressors easier. I’m presenting the results of my efforts in two parts – for those who don’t want to invest in a soda blaster, the first part covers the effectiveness of pre-shooting treatments, and the second covers soda blasting. Up to the point where I learned on a SilencerCo plant tour about soda blasting a suppressor I had not even considered it, but it has become my go-to cleaning method.
Part 1 – Pre-treatments for .22 caliber suppressor cleaning
I don’t know about you, but I do not like to clean things unless the cleaning process is pretty simple and doesn’t take long. I imagine this is news to my wife and other people who know me pretty well, but I am not OCD about cleaning (anything). Keeping my stuff clean was drilled into me forcefully, however, as an Air Force Academy first year cadet way back when. As I aged, experience reinforced that dictate, particularly in the areas of tools and equipment. I learned that some things needed cleaning more thoroughly, such as the items I depended on for safety or life, but others would still function with a “lick and a prayer.”
In my world, since I don’t depend on a suppressor for safety or life one might assume that I could get away with a quick suppressor wipe down after using it. It turns-out that is true when it comes to center-fire suppressors, as the experts tell me those cans are pretty much self-cleaning with use. Unfortunately, rimfire suppressors are not so easy.
Rimfire suppressor manufacturers purposely design them so the user can disassemble the cans for cleaning, because without cleaning, carbon and bullet metals (lead and copper alloys) build-up within a rimfire suppressor. The build-up causes lowered noise suppression performance, and if allowed to continue it degrades the weapon’s accuracy. Taken to its fullest, the build-up could be hazardous if it caused bullet strikes on suppressor components. Unfortunately, .22 caliber suppressor cleaning can be a real chore!
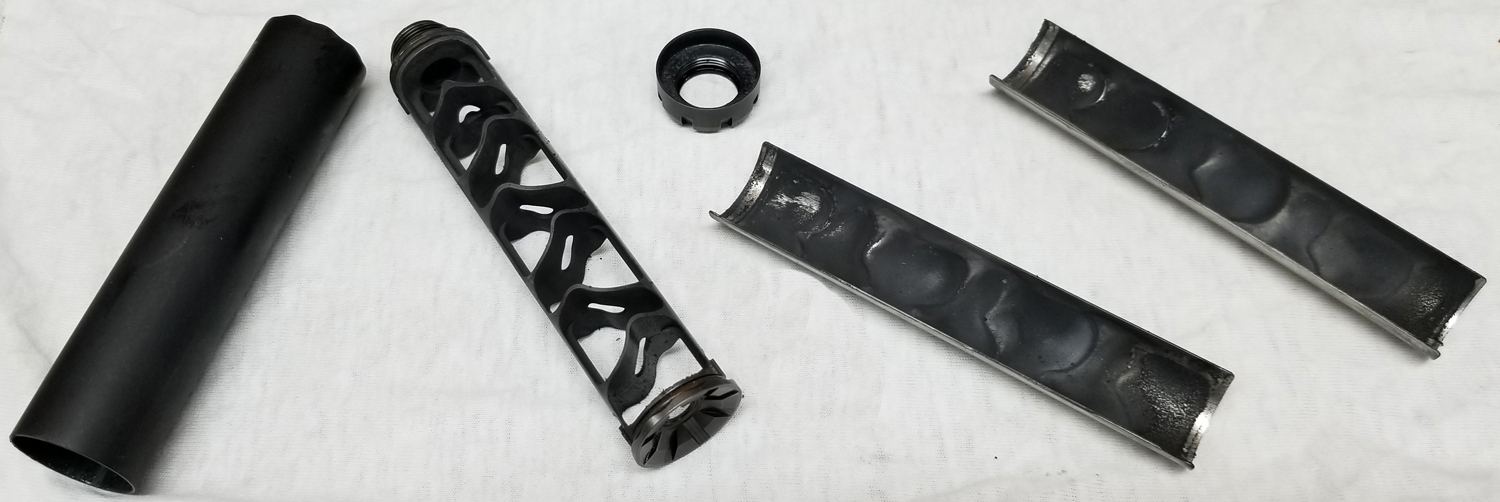
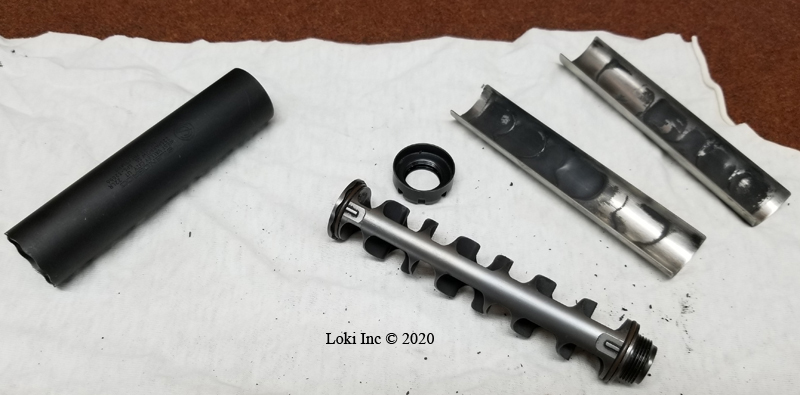
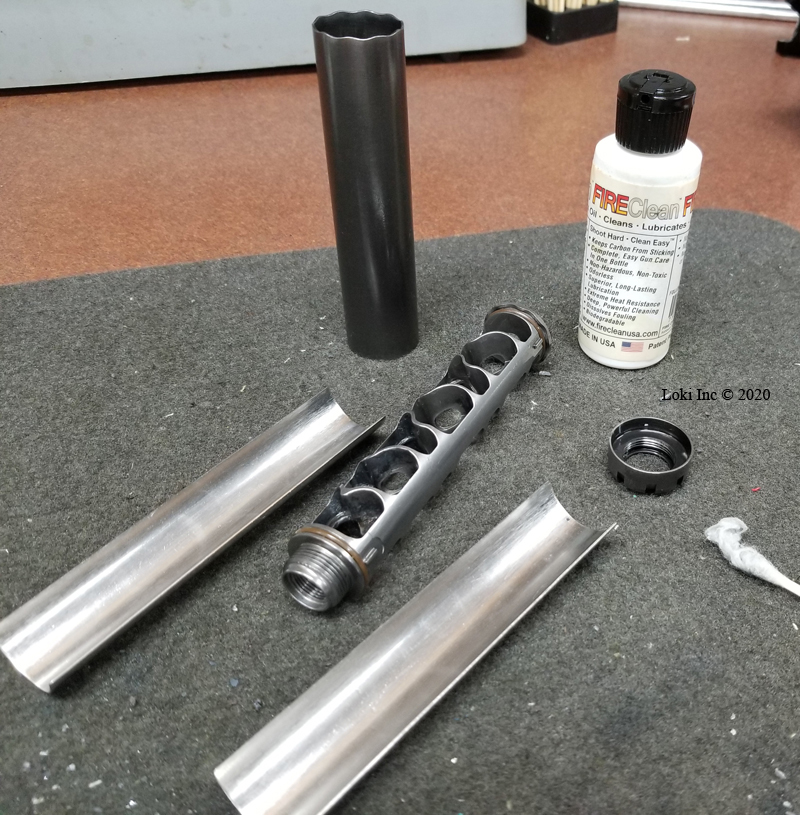
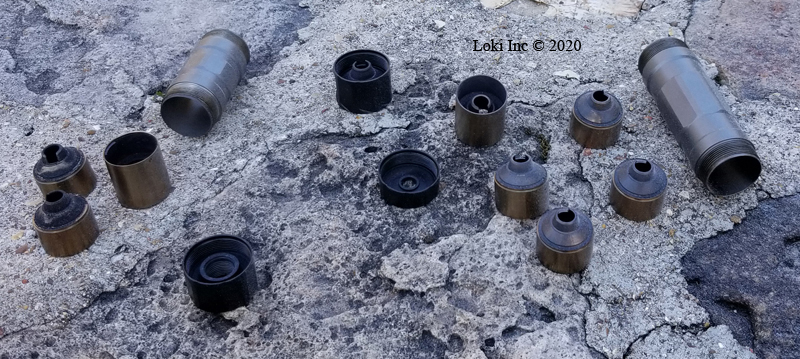
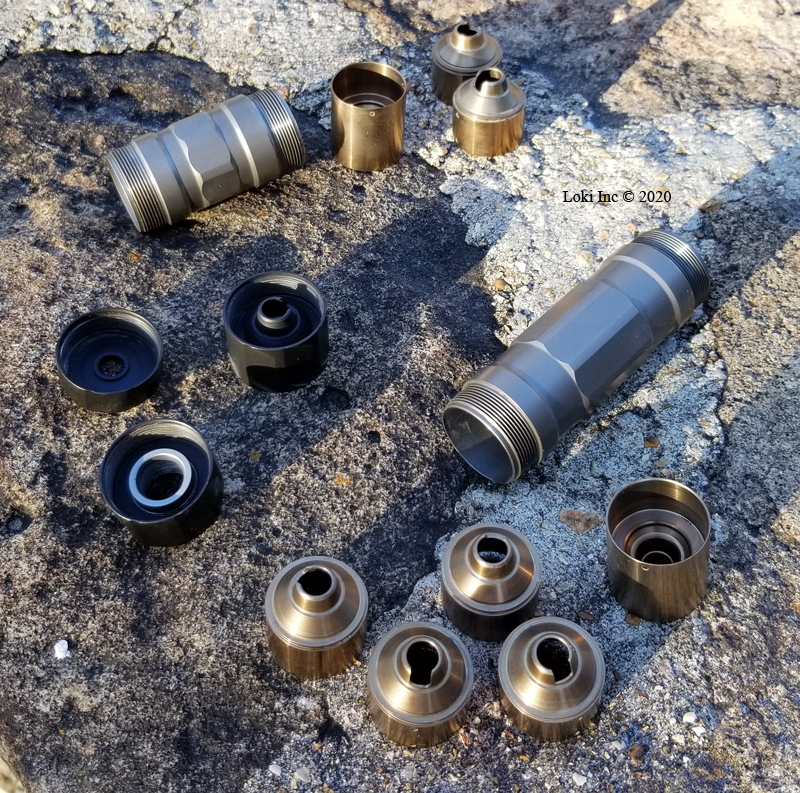
The first time I took apart one of our .22 suppressors, a SilencerCo Sparrow 22 (https://silencerco.com/silencers/sparrow-22/) after firing several hundred rounds through it, I had difficulty getting it broken down into its basic components because of all the carbon and metal plated on the internal parts and into the joints between them. Then, not having any other tools at my disposal, I started cleaning those parts using the techniques I use to clean the carbon off a bolt carrier group (BCG) of an AR-type rifle. The chemicals and brushes worked, sort of, and after a lot of elbow grease I had the carbon off but the bullet metals remained (not a problem with BCGs, since bullets don’t pass through them). I had to resort to scraping and soaking the suppressor parts in chemicals I use to clean jacket fouling out of rifle barrels. Note – if you use this method, be sure to remove any suppressor elastomeric O-rings beforehand because many of the chemicals are not kind to O-ring materials. Well, my efforts made me resolve to find a better way to clean the can.
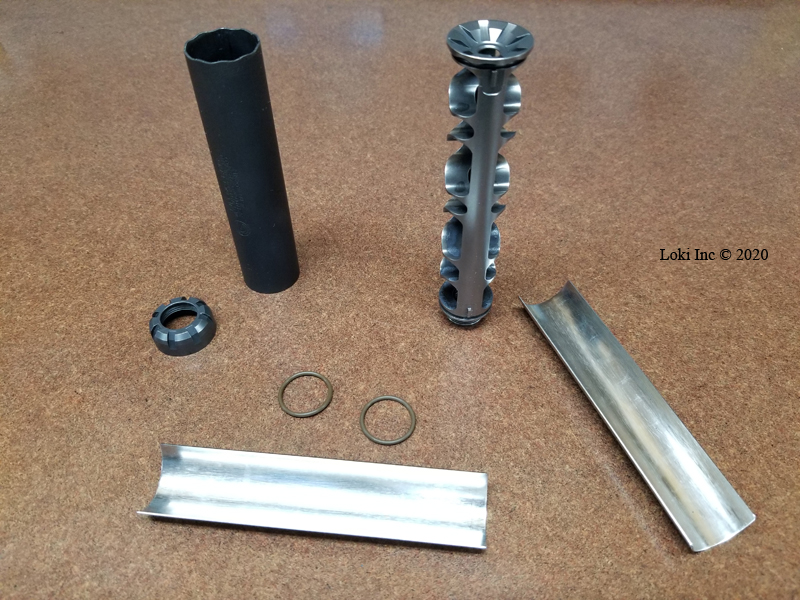
Starting point for cleaning test – clean Sparrow suppressor disassembled
Doing some Internet research on .22 caliber suppressor cleaning led me to three different techniques/products advocated by “experts” to make suppressor cleaning easier, and each of these required pre-treatment of a clean suppressor with chemicals used in other processes. Those chemicals were an anti-spatter spray used in MIG (Metal Inert Gas) welding to prevent the sticking of weld spatter to welded parts, a copper-based anti-seize paste used to lubricate threaded parts and to prevent them from sticking together under severe loads, and FIREClean™ anti-fouling oil designed for use on firearm components to lubricate them and prevent fouling buildup. I used each in turn, and I describe my results, below. Note that none of the companies selling the chemicals I used represented them as effective in preventing fouling of suppressors, and the prices I found for each chemical were not MSRP, but are for comparison purposes and were valid at the link shown at the time of writing. Bidenomics increased the prices of everything, and his inflation made everything cost more, faster, so I offer no guarantees as to the accuracy of the pricing if you check it.
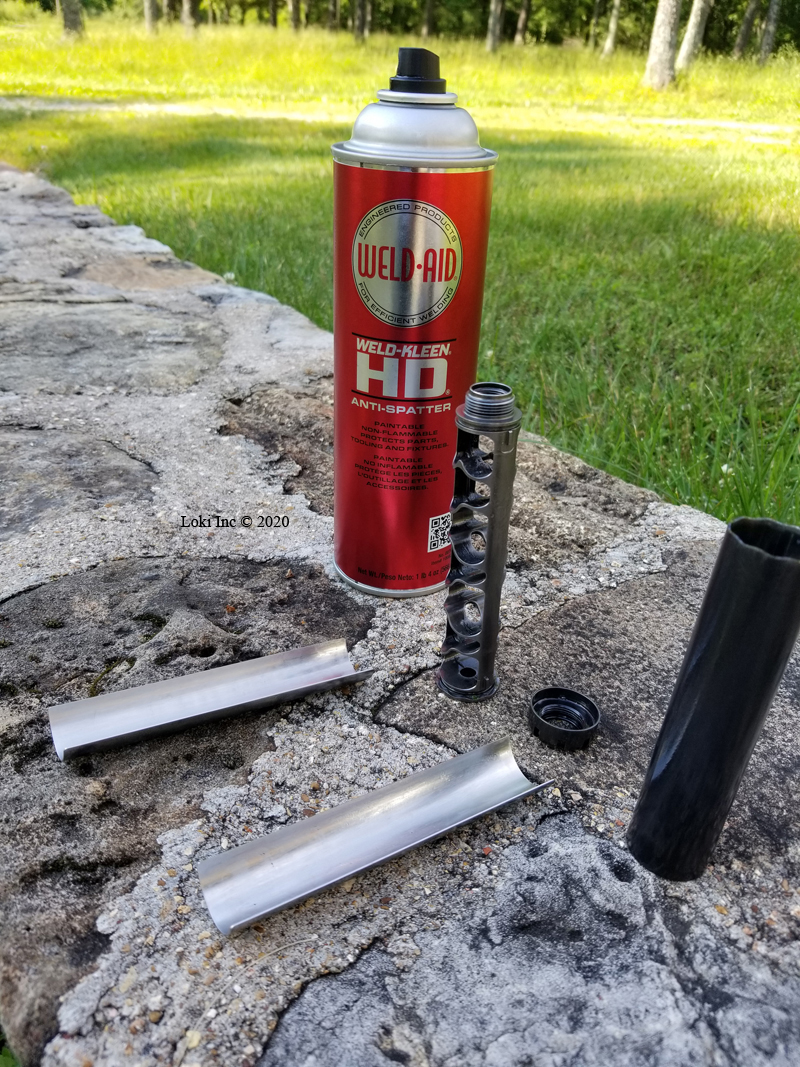
Anti-spatter MIG welding spray
After I had thoroughly cleaned the Sparrow 22, I used Weld-Aid Weld-Kleen Heavy Duty Anti-Spatter Liquid (I got it from https://www.amazon.com/Weld-Aid-Weld-Kleen-Heavy-Anti-Spatter-Liquid/dp/B008RA5JEW, $10.05 for a 20-ounce spray can, but a quick check on Amazon says it is currently unavailable. Amazon does offer alternatives that I have not tried) to coat its internal parts.
Sparrow parts after spraying with Weld-Kleen anti-spatter treatment
Several days later, I installed the suppressor on my KelTec CP33™ pistol (https://www.keltecweapons.com/firearms/pistols/cp33/) and my wife and I did some slow- and rapid-fire training on paper and steel targets, putting quite a few 33-round magazines through the gun in the process. One of the great things, aside from ear-safe shooting, about using the suppressor on the CP33 is that it allows me to run all and sundry ammo through the pistol. Unsuppressed, my gun is ammo-sensitive, and has difficulty digesting subsonic rounds.
After the range time, I took the suppressor apart, noticing that it was easier to disassemble than when it was dirty and not pre-treated with Weld-Kleen.
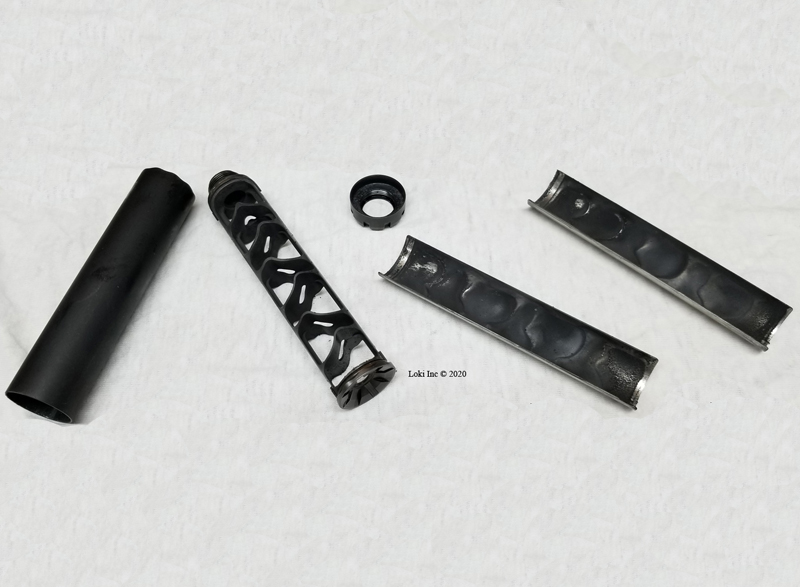
Sparrow disassembled after more than 100 rounds – Weld-Kleen
About 90% of the carbon wiped-off, but removing the remainder required that I use powder solvent and a gun cleaning brush (with plastic bristles) to remove it.
Fired Sparrow parts treated with Weld-Kleen after wipe down
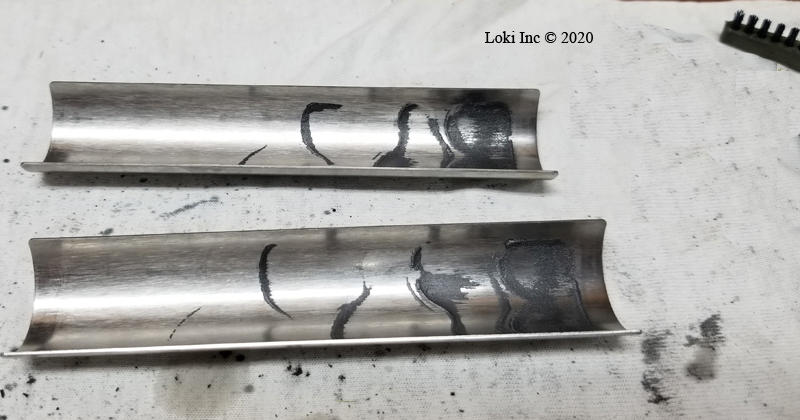
Fired Sparrow parts treated with Weld-Kleen after solvent and brushing 1
Fired Sparrow parts treated with Weld-Kleen after solvent and brushing 2
After spending a few minutes attacking the remaining metal deposits with a scraper and ammonia-based chemicals, I punted and put the parts into my brass-cleaning tumbler with the usual Dawn®/Lemi Shine®/Water/5 lb stainless steel pins combination. After 3 hours of tumbling, all of the metal deposits were gone, and the suppressor was ready for the next test.
Fired Sparrow parts treated with Weld-Kleen after tumbling with stainless steel pins
Copper-based anti-seize paste
For this test, I applied a coat of Loctite 51007 Copper LB 8008 C5A Anti-Seize Lubricant (https://www.amazon.com/Loctite-Copper-Anti-Seize-Lubricant-Temperature/dp/B001HWDEGW, formerly $29.99, not $35.77 for a 1-pound brush-top can) to all the Sparrow 22’s internal parts.
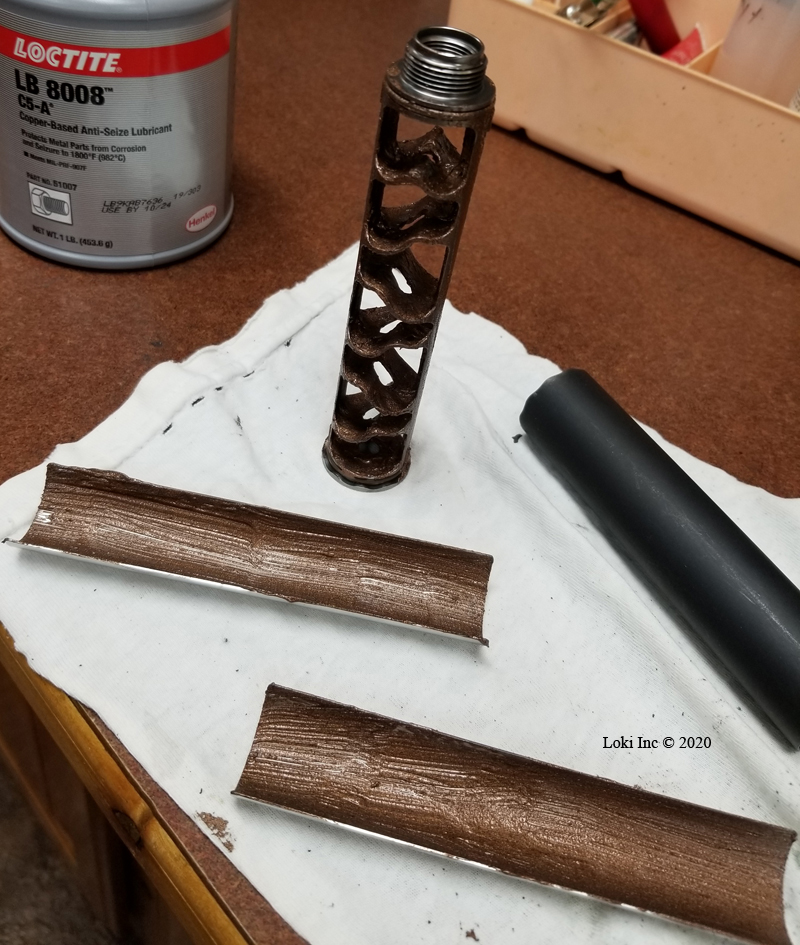
Sparrow parts after Loctite Copper anti-seize application
A few days later, we took the suppressor to the range and shot it on the CP33 as well as on a Ruger American® Rimfire bolt-action .22 rifle (https://www.ruger.com/products/americanRimfire/specSheets/8305.html).
After we put about 150 rounds through the suppressor, I disassembled it for cleaning. The results were the same as I achieved with the Weld-Kleen spray – I wiped most of the carbon off with a rag, and got the rest of it using powder solvent and a gun cleaning brush.
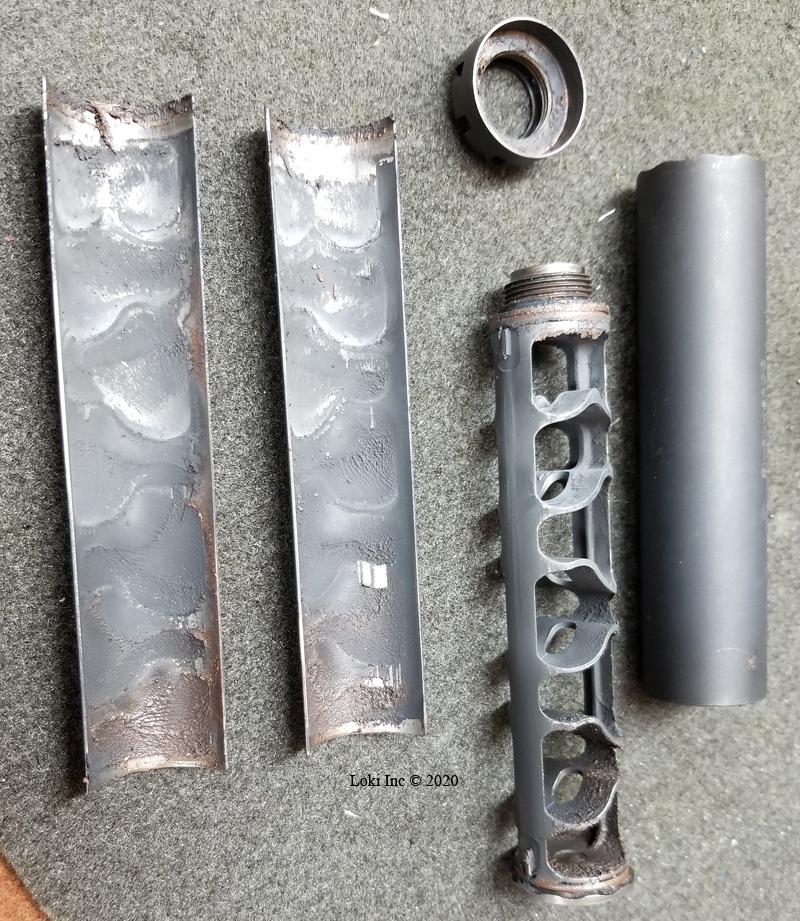
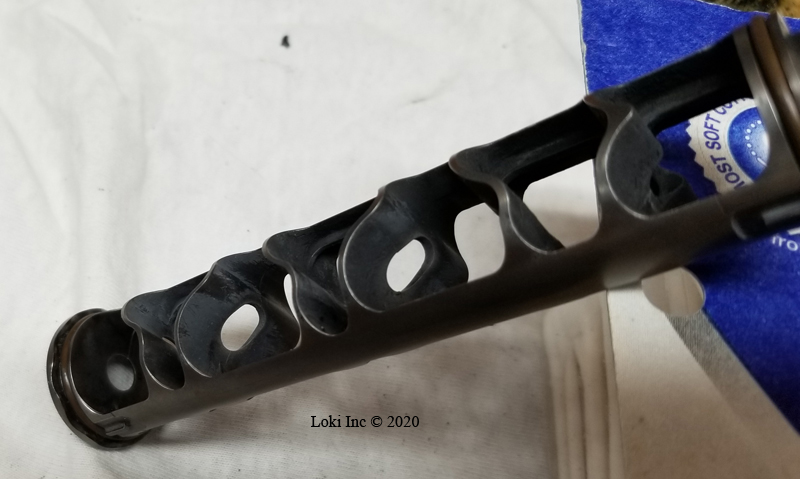
Sparrow with anti-seize after firing
Sparrow with anti-seize after wiping, solvent soak and brushing
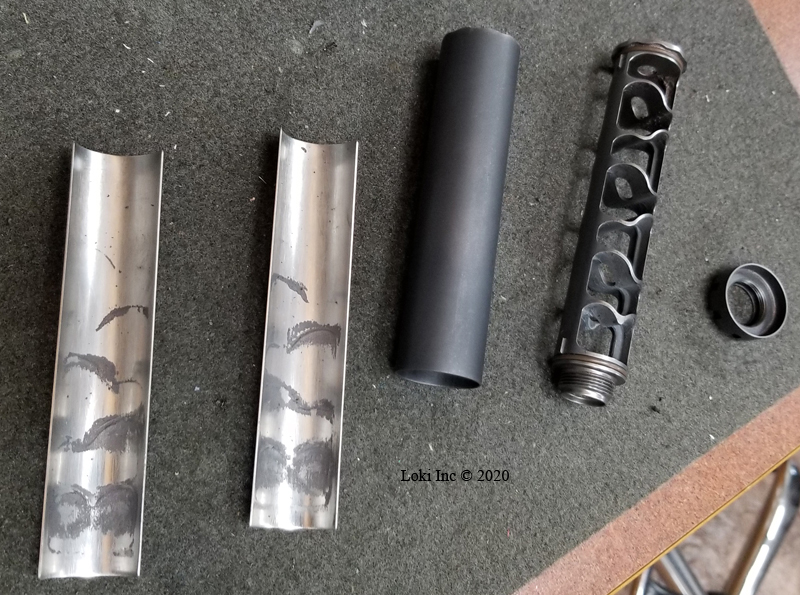
Once again, rather than spending much time with a scraper I used my brass tumbler to clean the remaining metal deposits off the suppressor parts.
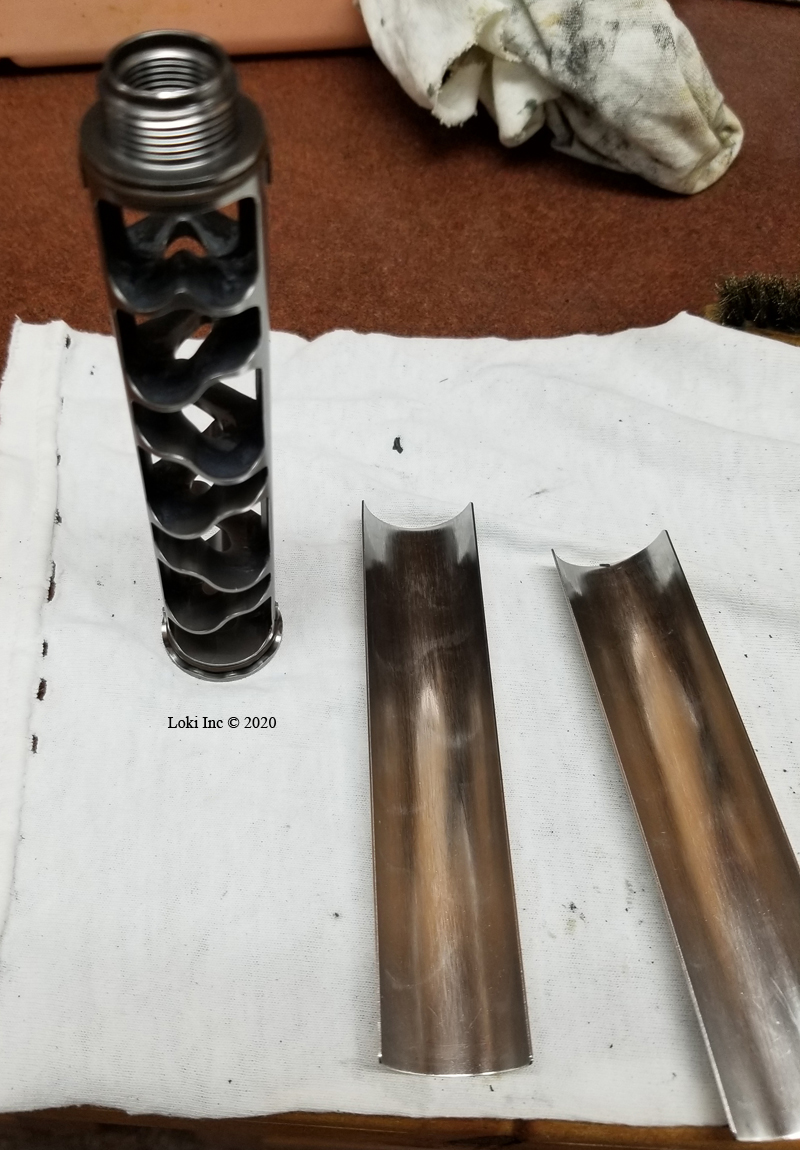
Sparrow with anti-seize after tumbling with stainless steel pins
I had high hopes for the final test using the FIREClean oil, based on what I’d seen online and my experience using it on AR BCGs.
FIREClean Anti-fouling oil
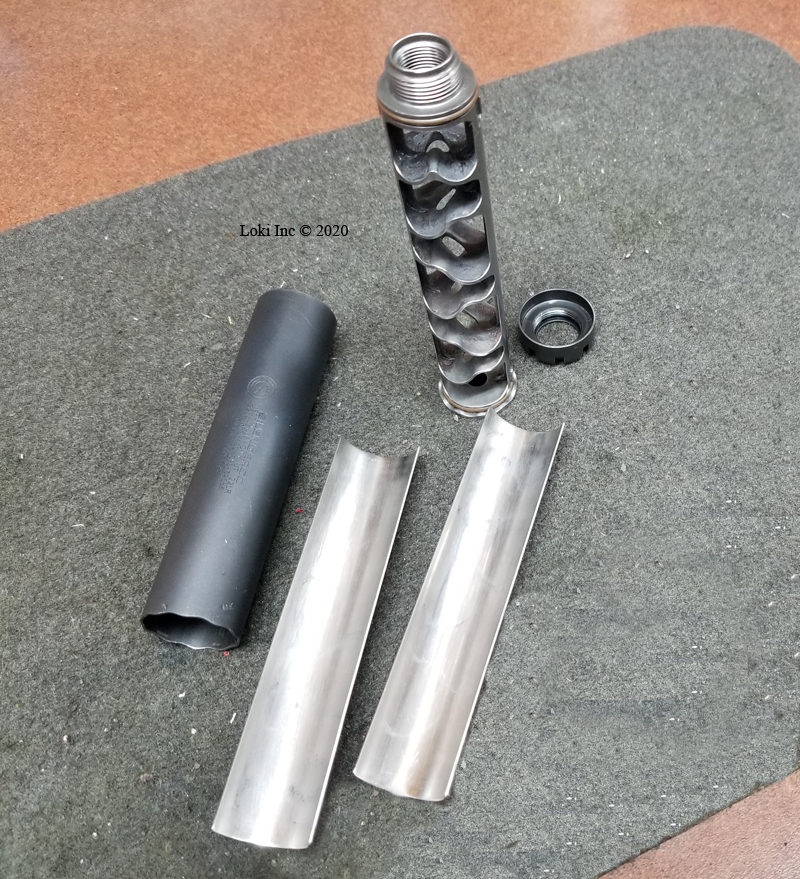
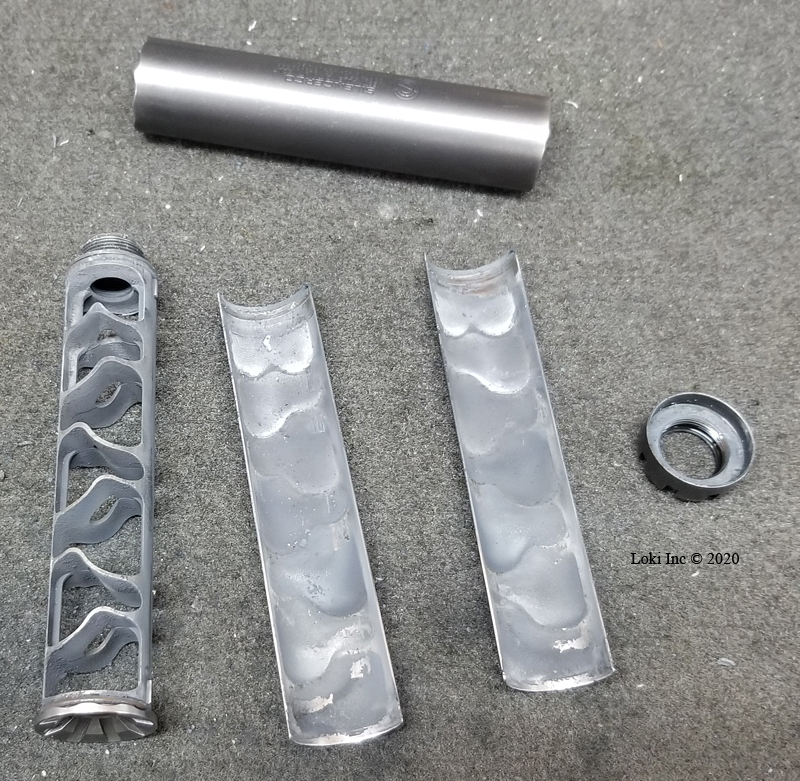
I followed the FIREClean (https://www.lawtactical.com/product_p/2014fc2.htm) instructions as I applied it to the internal parts of the disassembled Sparrow 22, using a swab to be sure to get an even coat on the nooks and crannies of the baffles. Disclaimer – as I noted, above, the manufacturer of FIREClean, as with the manufacturers of other chemicals I used, does not make any claims about the use of FIREClean in suppressors.
Sparrow after treatment with FIREClean oil
After a couple of weeks, I had the opportunity to test the FIREClean-treated suppressor. My wife and I shot over 100 rounds through her Volquartsen Scorpion® (https://volquartsen.com/products/1120-scorpion) and suppressor combination, as well as 50 + rounds through the Ruger American rifle with the suppressor attached.
After our range session, I disassembled the suppressor for cleaning.
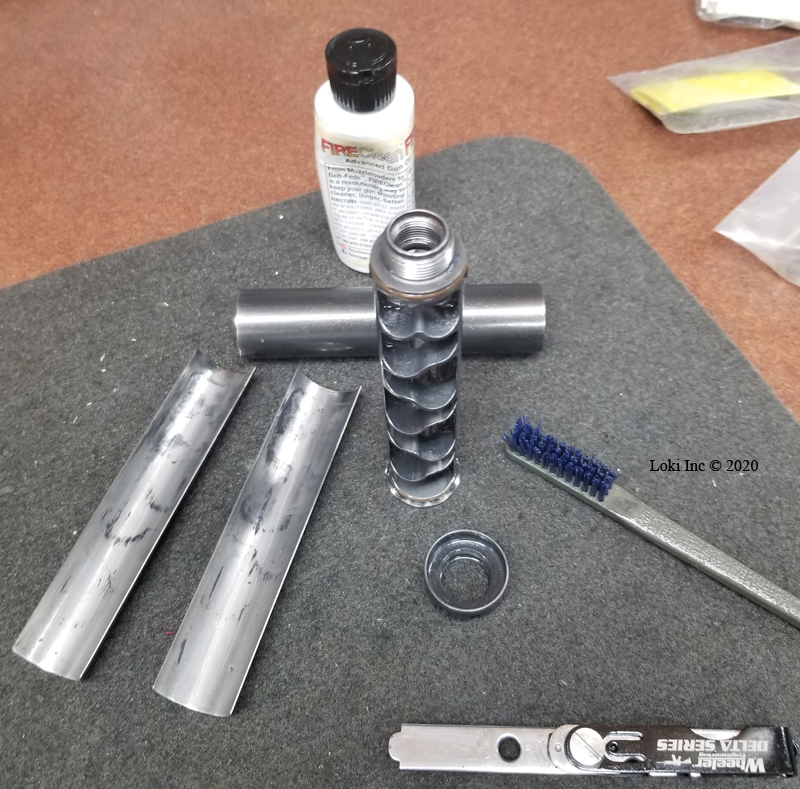
Sparrow with FIREClean disassembled, dirty
As with the tests of the Weld-Kleen spray and the anti-seize paste, I had a much easier time getting the suppressor apart than I did when it was untreated. I wiped about half of the carbon off the parts with a rag, less than the results with the previous two chemical tests, and then re-coated the surfaces with FIREClean as I would if cleaning a BCG (the chemical is its own cleaner, according to the directions). After about an hour, I scrubbed the parts with my gun cleaning brush, removing most of the carbon deposits. Sadly, as far as I could tell none of the bullet metal deposits came off. Out of curiosity and hoping the FIREClean had worked better than the other chemicals, instead of throwing the lot into my brass tumbler as I had previously I attacked the parts with a brass brush, AR BCG steel scraper, and a dental pick to see if the FIREClean had made that process any easier than cleaning the suppressor without any pre-treatment. In my opinion, it wasn’t any easier to get the bullet metals off the parts.
Sparrow after FIREClean soak, brushing and light scraping
So, was pre-treating the Sparrow 22 parts, whether with anti-spatter spray, anti-seize paste, or special gun cleaning oil worth the effort? Until I started using soda blasting to clean our rimfire suppressors, I’d say pre-treating was worthwhile when compared to just using standard gun cleaning chemicals and tools. But, I’d be hard-pressed to say which was better with regard to the effort involved. If I had to make a choice among the three, it would be based on the cost of the chemicals and how many applications I could get out of a container of whichever one I chose.
It so happens that right after I finished this set of tests was when I heard about using a soda blaster for .22 caliber suppressor cleaning. Looked like a good idea, if I could get into soda blasting without too much of a cash investment. I decided to give that a try – the next part of this posting is a report on my experience using soda blasting to clean the Sparrow 22 and another rimfire suppressor of a different design, the SilencerCo Switchback 22 (https://silencerco.com/silencers/switchback-22/).
Part 2 – Soda Blasting for .22 caliber suppressor cleaning
For those who don’t know anything about it, I’ll briefly address abrasive grit blasting, of which soda blasting is a subset (for additional information search for “grit blasting” on the web). Industries use grit blasting to clean surfaces for inspection or coating. As one might assume from the name, grit blasting uses high-pressure air to entrain an abrasive medium (the grit) and propel it at the working surface. Grit types range from soft (sodium bicarbonate, or soda) to very hard and tough (carbides). Soda is good for paint removal, and it so happens that soda blasting cleans the carbon and some stuck-on metals from suppressor surfaces. It doesn’t damage the surface as easily as harder grits. The blasting soda process typically uses small particle sizes, 150 to 3400 microns in diameter; for comparison, the particles in type we have in our kitchens for cooking, etc. are quite a bit smaller, at 65 to 70 microns. Generally, the smaller the particle size, the gentler the stripping effect and the greater the dust cloud created by the blasting process. The larger particle sizes create less dust and remove material from the surface faster, but are more expensive to buy (see https://www.pfonline.com/articles/soda-blast-question-revisited).
I have a sandblasting cabinet and a portable sandblaster in one of my shops, but I didn’t want to go to the trouble of switching back and forth between sand and soda as blasting media in the cabinet. Repurposing a soda blast system to sand might be okay, but the reverse just asks to get a little sand grit mixed-in with the soda – bad juju! Without special dust collection equipment installed, a blast cabinet purposely recycles the grit since the grit falls back into the hopper after it hits the working surface. Soda particles break down into dust when they hit the working surface, so recycling them through a blast cabinet system would rapidly result in a massive FAIL, with no work done on the surface by the blasting medium.
In the following explanation, I give links to items online at the time I wrote this, but the sellers may no longer have the items, so this information is for comparison purposes only.
To grit blast, you need a hopper for the grit, a source of high-pressure air, and a nozzle system that draws the grit into the air stream and then accelerates the air/grit mix toward the working surface. The simplest blasting system consists of the hopper and nozzle system, combined.
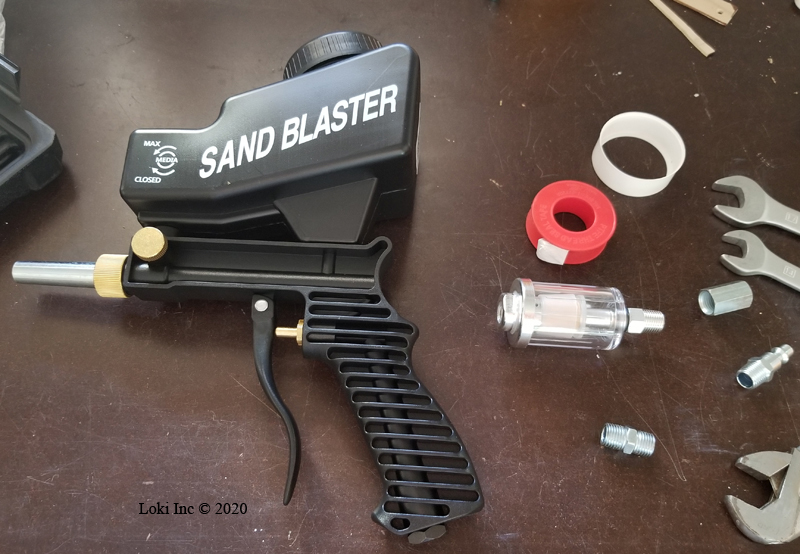
Soda blast gun, inline dryer, parts and tools
I ordered a simple one online, along with an air dryer since I planned to use the blaster with a large air compressor that usually pushes some water into the air hoses.
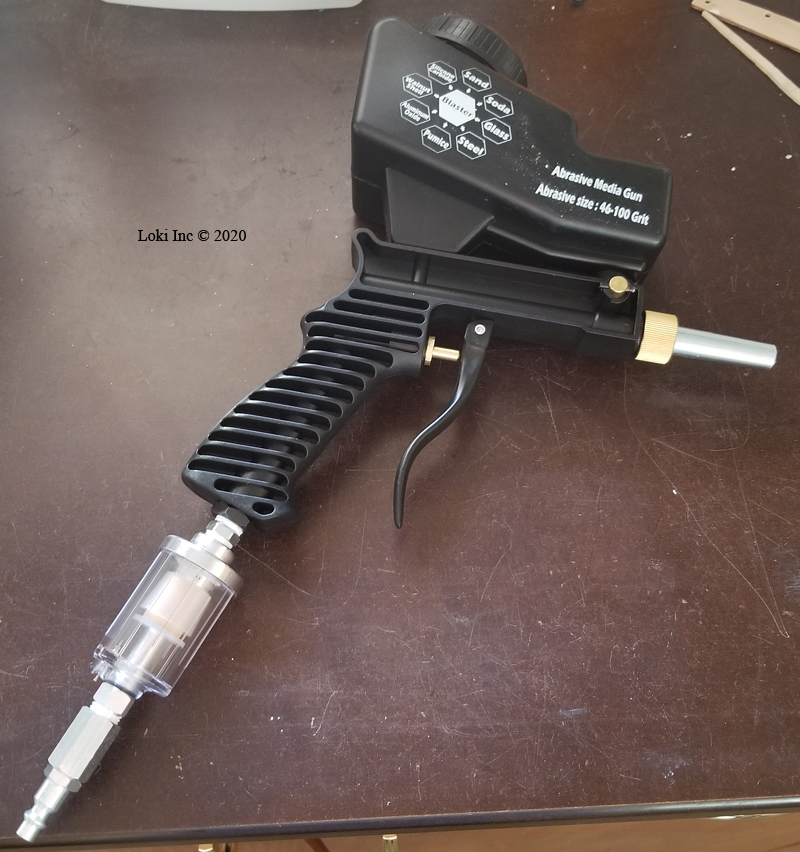
Blast gun and inline dryer, assembled
Note that the company selling the blaster recommends an air source that can maintain 90 to 150 psi pressure at a minimum 4 cubic feet per minute volume. With this blaster, the hopper sits above the nozzle and trigger assembly so the grit gravity feeds into the mix. Other blasters might use a hopper or reservoir that draws the grit up through a tube into the nozzle assembly.
At the time I purchased the grit blaster, the soda blasting media was out of stock everywhere I looked so I bought three 1-lb boxes of baking soda at the local grocery store to use as media for my evaluation of the method.
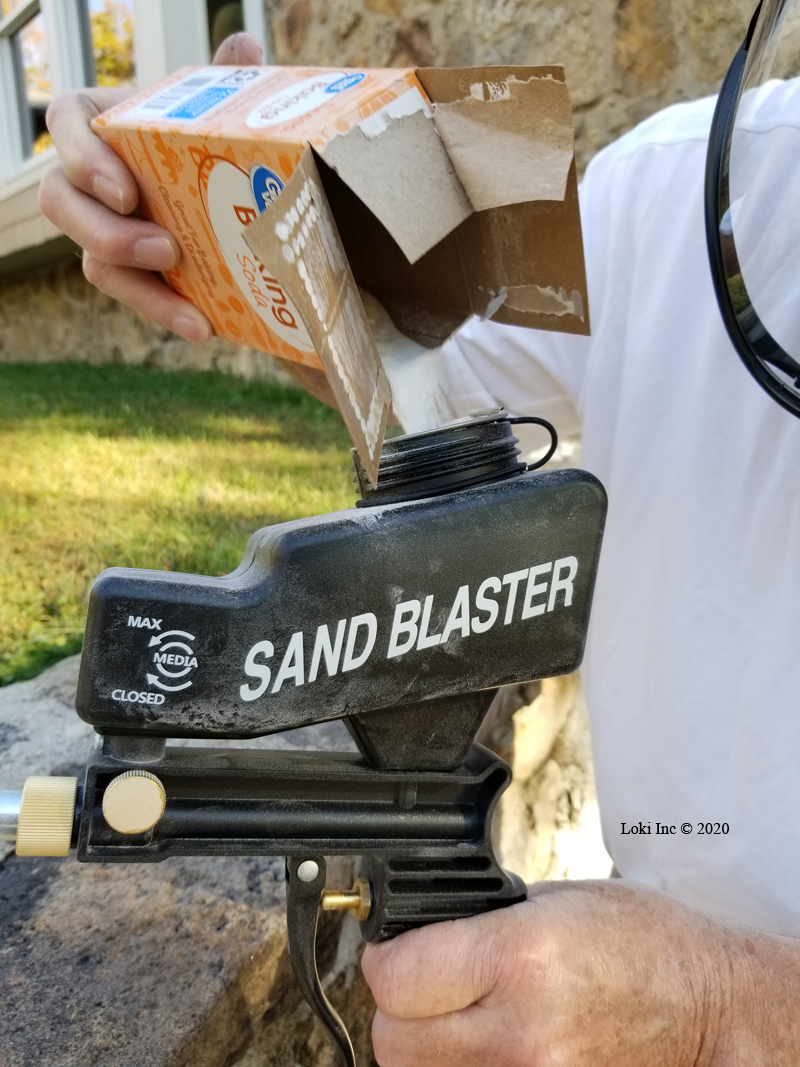
Loading soda into the blast gun – even plain baking soda worked!
Even though most online references say not to use baking soda because of its small particle size, it worked well for me in my soda blaster (see the results, below). Later, I was able to get a deal on soda blast media online – I’ll give you the source, but shop around as the prices and deals change constantly. In fact, if you have one of the big chain home improvement or farm and home stores nearby (I don’t) you may find the soda blasting media at one of those places for less than online prices.
Okay, but does soda-blasting work? Yes, it does, and quickly! First caveat – you must have access to compressed air that meets the requirements to operate whatever soda blaster you use. Second caveat – soda blasting removes paint and surface finishes, so do not use it on suppressor parts that have some sort of coating or finish that is not part of the metal. Exercise some common sense. Do not use abrasive grit more aggressive (harder) than soda! If you are cleaning a .22 cal suppressor, you should be able to disassemble it by design. Use soda blasting to clean internal parts, but do not attempt to clean exterior parts that have a coating or finish. Third caveat – Use the proper PPE for your process! Soda blasting creates a nuisance dust cloud of sodium bicarbonate, the impact of the abrasive particles on your skin stings, and the escaping air from the blasting process can be loud. So, wear safety glasses or a face shield, hearing protection if required, a filter mask that stops nuisance dust if you are indoors or in a situation outdoors (no wind) that keeps the dust cloud around you, and protective gloves because you’ll have to hold the small parts as you blast them. After you are done, unless you use an enclosed cabinet you will likely have soda dust on parts of your body, so brush or rinse it off. In our litigious world, realize that no matter what you use to clean the bullet metals off your suppressor you will have some small amount of lead to dispose of as a residual. Also, realize that soda has a pH of 8, so if you soda blast around acid-loving plants the dust that settles on them may damage them.
If you don’t remember what a dirty Sparrow 22 looks like, take a gander at Part 1 of this blog and you’ll see several photos. Here’s what ours looks like after about 5 minute’s work with my soda blaster.

Sparrow after soda blasting – just a little lead to scrape off
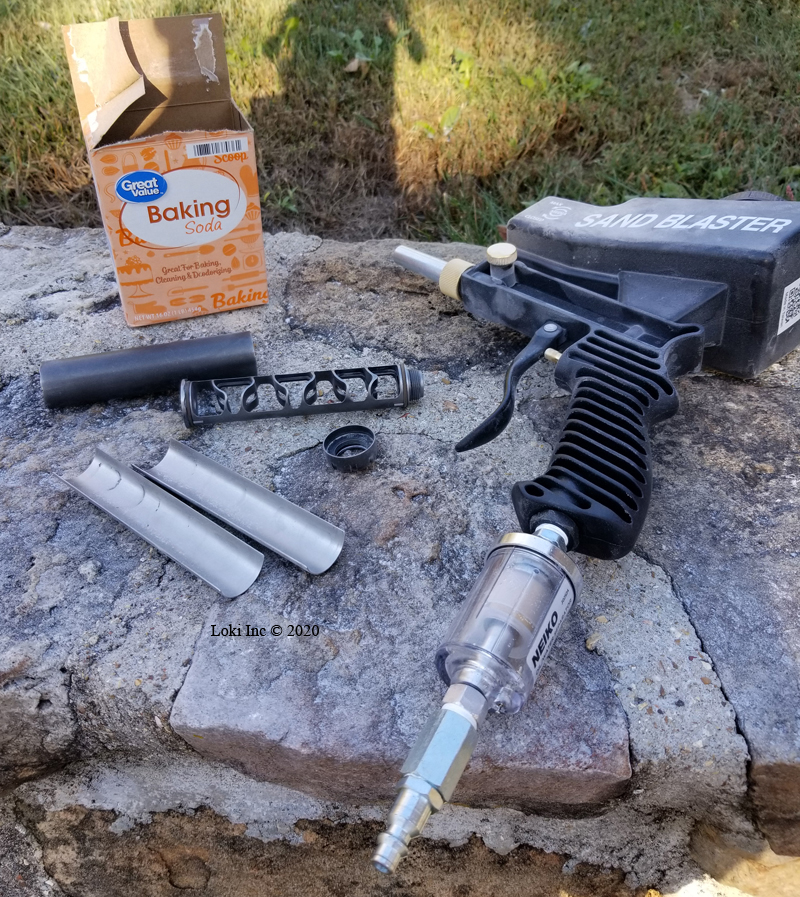
Sparrow, soda blaster, and baking soda
I used it outside with a breeze at my back, in a place where the soda dust wouldn’t damage my grass (it needs to be limed, anyway). What about the assertion that the kitchen baking soda I used is too fine to work very well? It was “dusty,” but I couldn’t tell that it was any dustier than when I used the soda blast media. The baking soda worked fast and cleaned the surfaces well, as you can see from the photos. I also disassembled our Switchback and used the soda blaster on it, too, with great results.
Switchback prior to soda blasting
Switchback after soda blasting
I’m sold on .22 caliber suppressor cleaning using a soda blaster!
Trophy Hunting – Is it Ethical?

The Boone & Crockett Club
My better half asked me to accompany her, as her photographer, to the Media Summit for the Boone & Crockett Club (B & C Club) 32nd Big Game Awards held at the Bass Pro Shops home base in Springfield, Missouri, this past April. As a deer hunter, I was interested in seeing the trophy mounts, horns, and antlers, but I didn’t expect to be as interested in the scoring process as well. In addition, a round-table discussion during the Summit intrigued me – enough, as it turns-out, that I thought about it periodically over the ensuing days. The discussion involved the invited media folks and B&C Club employees, and addressed current concepts of fair chase in hunting, trophy hunting, and hunting ethics in general. Our primary concern was the direction those concepts have taken in the media, and in the public’s opinions, throughout the last few decades. Does the public consider trophy hunting ethical?

A trophy mount at the Boone & Crockett Club 32nd Big Game Awards
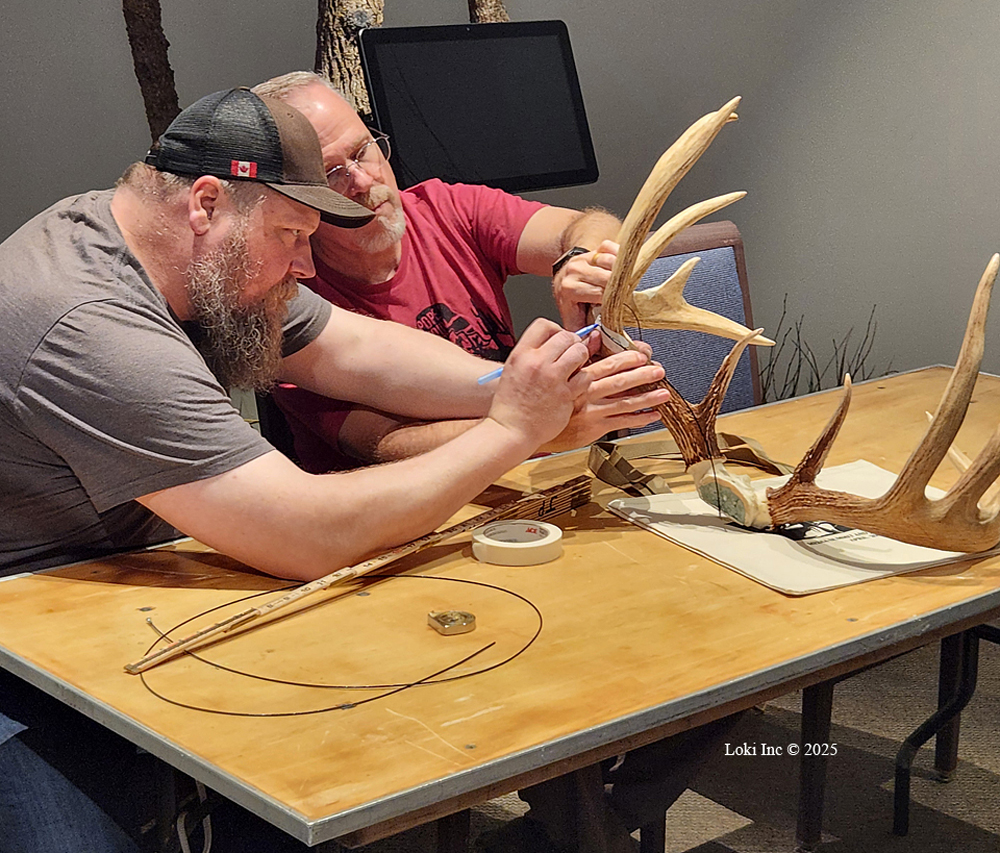
B&C Officials scoring a set of antlers.
Before this event, I knew very little about the B & C Club, or Pope & Young, a similar trophy scoring organization that collaborates with B & C Club and apparently only deals with animals taken by archery methods. The scoring this year was of horns, skulls, and antlers from the top five entries for each big game type submitted for scoring from the last three years. Before this experience, I, like (I imagine) many people in the public and media unfamiliar with the details, considered trophy hunting as something invented to satisfy the competitive nature of hunters.
Trophy Hunting
I don’t consider myself superior to “trophy hunters,” but refusing a good meat kill in favor of waiting for a chance at harvesting a (somehow) superior animal never appealed to me, even though I have a son I assist during hunting season who will do so. In other words, I don’t consider trophy hunting a bad or distasteful pursuit, even though I don’t partake. Is it unethical? Is it fair chase? I hadn’t considered these questions before attending this Media Summit, but the round-table discussion intrigued me and got me thinking about it.
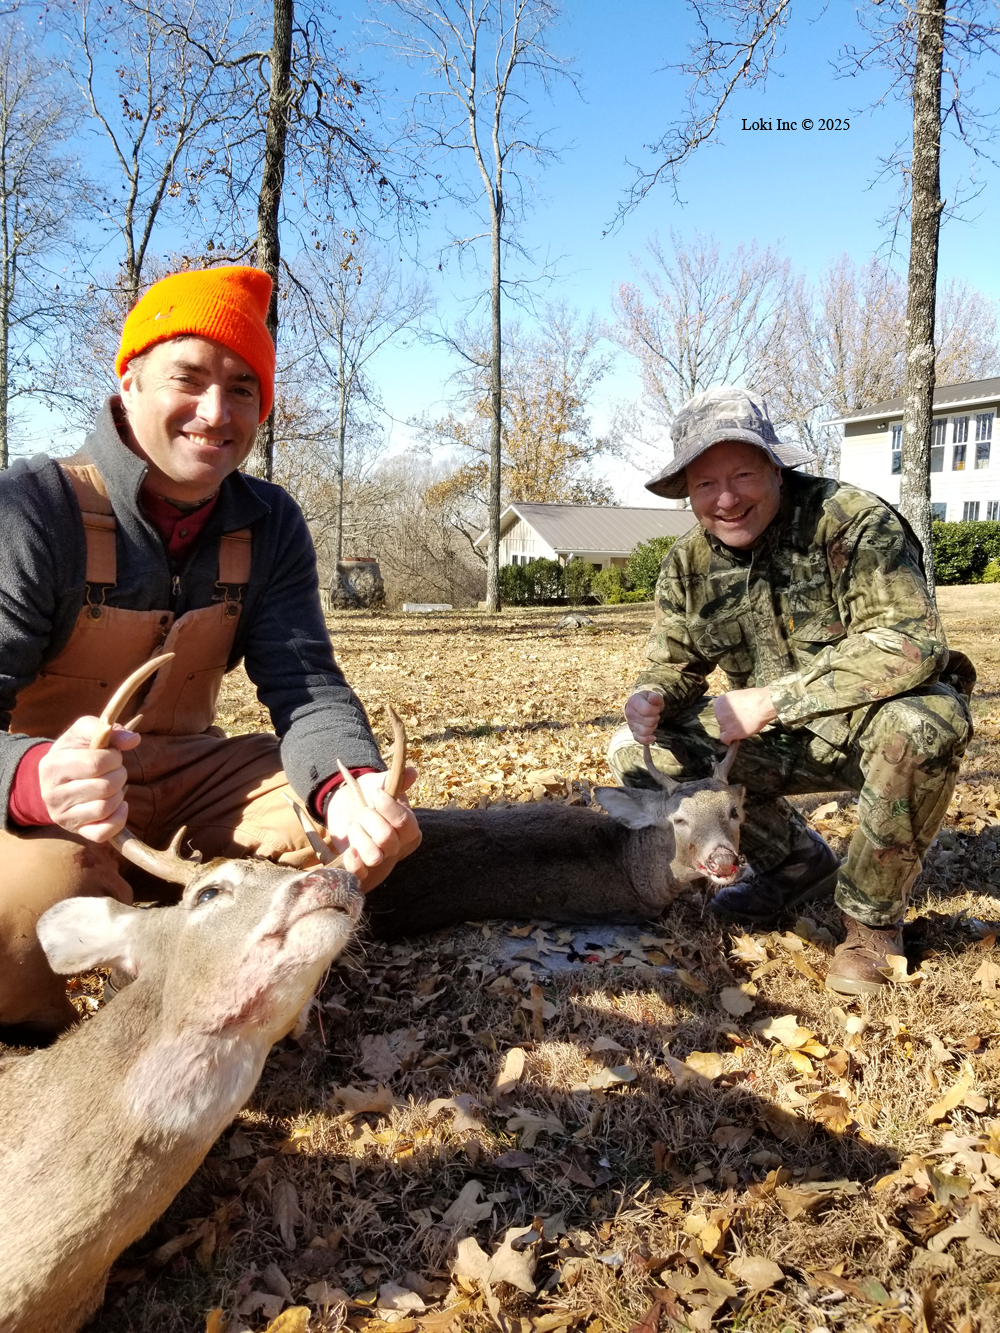
The author (r) and one of his sons after a successful morning of deer hunting

A fine buck harvested during deer season
Well, for starters, what are ethics? Fifty years ago, I was the representative to the Cadet Ethics Committee for my squadron at the U.S. Air Force Academy during a time when we decided the Honor Code (I will not lie, cheat, steal or tolerate anyone who does) needed a supplement to address the “gray” areas outside this simple Honor Code statement. The supplement covered standards of behavior acceptable to our society, a warrior class of officers charged with securing our nation against all enemies, foreign and domestic. One cannot simply express Ethics as a single sentence, even within a relatively small group of people with a nearly singular focus such as we had, so we Ethics reps had a difficult job that required much thought, soul-searching, and discussion regarding each (possible) ethical violation.
Hunting Code of Conduct
So, how do we decide what “ethical” means regarding hunting? In trying to answer that, one must think about what hunting behaviors are acceptable to society. Because societal concepts change with time, we need to look at society as it was when our hunting ethics were in their infancy in North America, in addition to incorporating current societal concepts. According to B&C Club’s essay on Fair Chase, when members founded the B&C Club (the first meeting was in 1888) they believed, in addition to laws and regulations, a code of conduct for sportsmen would leave “no doubt that hunting would be conducted ethically and in a manner that would aid wildlife recovery and not threaten wildlife populations.”
These outdoorsmen realized the ancient aristocratic European hunting ethics surrounding hunting challenges and game management on their land holdings did not transfer to North America. Our immigrants were primarily commoners who considered hunting as a means of providing food, with no concept of game management for the future. From the Fair Chase essay: “The members of the Club reasoned that if the recovery and conservation of big game populations was to stand a chance of succeeding, a different approach to hunting was needed. Laws and government game management agencies alone would not necessarily satisfy a society concerned with wildlife extinction… Members agreed that such a code (of conduct) would also be helpful in further distancing ethical hunting from commercial market hunting, an industry that was eventually eliminated.”

One of the joys of hunting – being in the woods, early in the morning watching the moon setting
Praying in a deer stand
According to the Club, “The code needed to convey the idea that achievement in the field is best measured by the effort involved, that the hunting experience was far more important than the kill, and that hunting serves the goals of conservation.” So, within the Club, these three concepts became their model of fair chase. Personally, I believe this last quoted statement also encapsulates ethical hunting.
Ethics and Fair Chase in Hunting
OK, but why is harvesting animals based on their trophy status appropriate to ethics and fair chase? One measure of conservation success is the change in numbers of game animals, but a mere increase in numbers doesn’t tell anything about the vigor of the animal population. Wildlife agencies across North America manage conditions for wildlife and track animal population changes thorough field counts and hunting season harvest numbers, and they control the relative numbers of male versus female animals harvested during seasons. Private organizations, like B & C Club and Pope & Young, must take up the slack, however, to keep records of physical traits identified with the more robust male members of different species. These records are tools necessary to help us measure the successes or failures of habitat conservation and species restoration efforts. The B & C Club code of conduct promotes hunting for trophies following fair chase and ethical hunting practices, so the process incentivizes species conservation while enabling an ethical outlet for the competitive nature of many hunters.

A deer skull found while hiking in the woods. Did the deer die due to disease, misadventure or gun shot? We would know the answer if it had been taken during a hunt and submitted for scoring. However, found skulls, antlers and horns may still be measured for the record books — even if you didn’t hunt the species. And, remember, if you find a dead animal, before removing a skull, you need to check with your wildlife agency in that state to see what the regulations are for possession.
Learning this was an eye-opener for me; it certainly expanded my concept of trophy hunting and gave me an appreciation for what B & C and Pope & Young do for wildlife conservation.
Promoting Wildlife and Habitat Conservation
Therefore, so long as hunters following the code of conduct pursue and take the trophy animals, the hunters’ quests for the biggest and best actually promote wildlife and habitat conservation and contribute to the database of information about what is working or what needs consideration by wildlife agencies, hunters, and the voting population in general.
For more information about what the Boone & Crockett Club does, take a look at their website: https://www.boone-crockett.org/.
Explosion Basics

Explosions – So What?
Explosions fascinate most people – they are either drawn to or horrified by the display of power and destruction explosions can produce. Explosion phenomena also draws my attention, but as an experienced explosives engineer and professor, the science behind explosions fascinates me more than the simple spectacles of light, noise and destruction. Explosives engineering combines science and art to change the world around us – shock hydrodynamics and material sciences on one hand, and an innate feel for dynamic balance and situational effects on the other. For example, I spent much of my time and energy as a researcher at the university testing protective schemes created by civil engineers, exploring the design limits of those creations. The art/science combination eventually allowed me, with few exceptions, to tell the civvies how their designs would perform before we tested them.
First frame capture from a video of the detonation of 50 pounds, TNT equivalent, of ANFO at 8 inches away from a steel-reinforced concrete T-barrier during testing

Second frame capture from a video of the detonation of 50 pounds, TNT equivalent, of ANFO at 8 inches away from a steel-reinforced concrete T-barrier during testing

Final frame capture from a video of the detonation of 50 pounds, TNT equivalent, of ANFO at 8 inches away from a steel-reinforced concrete T-barrier during testing
Outside of nuclear reactions, we either grow or mine the materials for everything we make or use, mining requires breaking rock, and explosives are the most efficient and economical way to break rock. That is, of course, as long as lawyers aren’t involved!
If an online source or one of your friends has convinced you that you should be making your own explosives (or exploding targets), don’t do it. Even with proper training and education, pursuing my profession is hazardous, and it is unlikely you have either one of those. As with using firearms, always consider Safety First!
Regarding online sources, I hope everyone knows not to trust reloading information posted to a forum without independent verification from a reliable source. What about explosives concoctions presented in the same way? Even the “Anarchist Cookbook” is not to be trusted. Many people have misconceptions about explosives that I’ll try to correct.
Background
In this post, I’ll restrict my discussion to chemical explosives, which release pressurized gas and give-off light and heat when the explosives initiate. Nuclear explosives are a different kettle of fish, even though the effects on its surroundings of a nuclear detonation can be similar, when scaled down, to the effects of a chemical explosive detonation. This detonation requires a source of oxygen (an oxidizer), a fuel, and some stimulus (energy) to set off the process, just like burning. In a manner similar to burning, the chemical explosive reaction is an oxidation type that liberates energy by breaking chemical bonds; contrary to burning, though, the reaction in an explosion completes itself nearly instantaneously.
The type of chemical exothermic (fancy word for “energy comes out”) reaction varies according to the speed at which the reaction takes place. Rusting of iron-based metals is an example of the slower end of the exothermic reaction range; burning or combustion is a faster reaction than rusting, and deflagration is combustion that propagates through the fuel very rapidly but at subsonic speed. An explosive detonation, however, is a reaction that takes place in and propagates through the fuel at greater than supersonic speed. Detonation, since it occurs faster than the speed of sound, produces a shock wave in the material just like a supersonic aircraft produces a sonic boom in the air through which it travels. Its ability to detonate is the property that sets a chemical high explosive apart from other materials that “explode.”
Let’s Detonate
Unfortunately, the mass media misuses the term “detonate” and its derivatives when they should use “explode,” and this adds to the general confusion about what exactly is an explosive. Different from the rapid gas release and high-pressure generation by a propellant such as smokeless powder, or the explosion of a vaporized combustible fuel such as propane or gasoline, the detonation shock-wave shattering effect of a high explosive such as TNT or C-4 tears apart any surrounding materials.
C-4 demolition high explosive in bulk form, rather than the green plastic-wrapped 1-1/4 pound blocks typically shown in the media
Notice that I slipped the term “high explosives” in on you; in the explosives business we had to add “high” in order to separate detonatable explosives from “low explosives,” an old and unfortunate term for materials such as black powder designed to deflagrate but not detonate, much in the same way as propellants. Chemists designed low explosives to produce large volumes of high-pressure gas, and their reaction speeds go nearly to supersonic velocity but don’t quite get there. This is fortunate – otherwise, we wouldn’t have propellants for firearms and rockets, since the detonation shock wave from the reaction would destroy the gun’s chamber and the rocket’s engine. Therefore, an event is not a detonation unless there is a shock wave, and it isn’t a high explosive unless it detonates.
So what – why all this detail about detonations? At times, after news reports of an accidental natural gas or other fuel explosion I am asked by members of the press to compare the explosion to TNT or dynamite.

“Sticks” of gelatin dynamite mining and excavation high explosive
In each case, the reporters found it hard to believe me when I told them there was no way to make that comparison. They really weren’t interested in the details of my answer (and they never attempted to print the correct information), because they only knew the Hollywood visuals leading them to believe that all explosions are created equal. This is similar to the movie lie that someone can shoot another person with a handgun or long gun (from the shoulder) and knock him off his feet.
In fact, a typical wood fire releases over three times more BTUs of energy than the detonation of the same mass of TNT or dynamite. This seems to be counter-intuitive, and Hollywood and the press don’t like comparisons that have to be complex, but if you’ve read this far you are well on your way to understanding what they won’t tell you.
What Good are Explosives?
If a fuel-air deflagration releases more energy than the detonation of a high explosive, why do we use explosives? Well, the detonation shock wave, not the high-pressure gas or the intense heat from the chemical reaction, shatters the target of a military high explosive shell or bomb. A detonation shock wave also fractures rock when we use explosives in mining; the high pressure gas then pulverizes the fractured rock and heaves it so we can dig it with machinery (this isn’t a small matter – we use over 6 billion pounds of explosives every year for mining and construction in the US). This shattering plus pressurization effect is an enormously more destructive (and efficient) process than any other chemical or manual way of breaking rock. We used blasting powder (“low explosives”) for mining in the beginning, but gave it up when more effective (i.e., detonable) blasting explosives were invented. We now have an entire suite of rock-blasting explosives, tailored to the requirements, from low shock and high gas volume to more shock and less gas volume.
Bad from the Good
Nevertheless, a bad guy can use a low explosive (black powder, for example) or a propellant to make bombs. After the Boston Marathon terrorist attack in April 2013, you may have read or heard about the pressure cooker bombs those terrorists used. This sort of bomb is similar to a pipe bomb, in that a high explosive is not necessary to make it work. The bomb maker takes a strong vessel and fills it with an energetic material that can create enough pressure to burst the vessel. The result is similar to a boiler explosion. It’s an explosion, but it doesn’t involve high explosives. If the terrorists use high explosive charges instead of pressure bombs for an attack, the high explosive charges add a destructive, high-energy blast shock immediately around each bomb, and hurl bomb fragments and pieces of surrounding materials (sidewalks, roadways, parking meters, etc.) at several times the velocity of fragments generated by a pressure burst.
Our government attempted to make it difficult for terrorists to obtain explosives in the US via the Safe Explosives Act of 2002, which introduced restrictions on all purchases of explosive materials. Prior to the Act, one could purchase and use explosives in his State of residence without any Federal restrictions. Some of you may remember those days; I remember being able to purchase dynamite, detonators, and safety fuse at the local hardware store to use shooting post holes in the rocky Ozarks ground where I live. It’s questionable whether the Act made us any safer; similar to gun control laws, when a law restricts our activities only law-abiding people obey the laws. For example, had it been in place at the time, the Act would not have prevented Timothy McVeigh’s attack against the Murrah building in Oklahoma City in 1995 since he stole the items from a rock quarry needed to initiate the blast and purchased the fertilizer and racing fuel required for the main charge without any requirement for a license.
Exploding Targets
How about exploding targets?

Commercial exploding target product components. After the materials are properly mixed, they will explode after being shot with the specified firearm.
If we have a Safe Explosive Act that restricts most people from buying explosives, why can we buy Tannerite™ from a store or online? I’m sure many of you use the targets – seeing and hearing an explosion thrills almost everyone, and the targets are safe if used according to the directions that come with the packaging. Some people, when they find-out that I’m an explosives engineer, ask me why the government does not regulate those targets. “They explode, so aren’t they explosives?” In many cases, the questioner believes those targets should be regulated by the ATF, and cannot understand how any reasonable person could think otherwise. State regulations may be coming, because a couple of State Fire Marshalls have asked me to help them answer legislators’ questions about regulating exploding targets. Nevertheless, the Feds do not regulate these targets because the sellers separate the reacting materials, the oxidizer and fuel components, into different containers. Common materials used for many industrial and commercial purposes other than exploding targets, the Feds don’t have explosives regulatory power over the separated materials. For some formulations with particular oxidizers, the exploding target components are not explosives until the fuel and oxidizer are mixed. For others, after mixing the fuel and oxidizer one must also combine the mixture with a small amount of a so-called catalyst (a small portion of the fuel that reacts with the oxidizer under shock loading from a projectile impact more easily than the remaining fuel). Once you mix one, you must use the now-detonable target; you cannot store the mixture unless you possess a Federal Explosives License, the requisite State permits/licenses, and a magazine approved for explosives storage. Another area the Feds have restricted with regard to use of exploding targets is by banning them from US Forest Service and Bureau of Land Management lands in some states, claiming that explosions may start wildfires. If this is the case, why not just ban exploding targets, as they ban campfires, in specific locations when wildfire conditions are present? I’ll leave the answer to you.
Resources
If you are curious about some of the myriad of Federal rules regarding explosives, try looking at atf.gov/explosives and the submenus found at that website. Strangely, Federal regulation of explosives use and storage depends on how the government categorized them for shipping. Therefore, the US Department of Transportation governs transportation (and therefore categorization) of hazardous materials such as explosives (see websites such as phmsa.dot.gov and fmcsa.dot.gov). The Institute of Makers of Explosives (ime.org), and the International Society of Explosives Engineers (isee.org) are non-government organizations that are good sources for information about explosives, the application of explosives, and explosives-related training and education.
The Bottom Line
One of my former bosses was an explosives chemist, and used to say that he was one of the few of his colleagues who still had all his fingers. It’s one of those self-deprecating jokes that is funny because there is a foundation of truth to it. If the folks trained to work with energetic materials still face on-the-job injuries or death, what are the chances that you, the untrained and internet-educated sort, is going to mess with hazardous materials without being injured? Don’t even try it.
Also, don’t be a dead hero – if you spot something that looks like an explosive material or device that is obviously not where it should be, don’t fool with it! I’ve include photos of some of the devices and materials you may see if you run across blasting materials.
A non-electric detonator (blasting cap) with its shock tube lead-in line, still in its wrappers, placed atop a spool of shock tube lead-in line

A detailed view of a non-electric detonator, or blasting cap, showing the detonator cup (silver) containing sensitive high explosives and the lead-in shock tube (yellow) that carries the initiation pulse to the detonator
Pentolite boosters, used in mining with blasting caps (detonators) to initiate the detonation of blasting agents such as ANFO (Ammonium Nitrate + Fuel Oil).
Don’t be like the sheriff’s deputy attending one of my courses, who told a story one morning before class about responding to a domestic dispute. After he and his partner handcuffed the wife abuser who was the subject of the call, the wife said the old man had some bad stuff in the garage. So, the deputy checked it out. When he peeked into a cooler, he spotted a grenade sitting there. I asked the deputy what he did – what do you think he said? “I stuck the cooler into the back of the squad car and took it to the jail.” Bad idea! Particularly, since he couldn’t tell a live grenade from one rendered inert.
Sadly, a similar incident recently killed three Los Angeles Sheriff’s Deputies who belonged to the agency’s bomb squad. According to reports, law enforcement personnel recovered two “military-style” grenades from a garage in Santa Monica and Sheriff’s personnel took them to the squad’s training facility in East Los Angeles, where they stored the grenades overnight. Deputies x-rayed the devices and apparently believed the grenades were inert, but one or both detonated during disassembly by the three men killed in the explosion. The event is still under investigation as I write this, but you can bet officials will take a hard look at training and procedures for bomb squads in the future.
As I said up front, working with explosives is hazardous, and although the hazards cannot be eliminated they can be reduced by proper education, training and a Safety First attitude.
On-Target Performance of Subsonic Ammo in Suppressed Rifles – Hype Versus Reality

As a follow-on to another article about the causes of gunshot noise that I posted in my blog, I’m posting this article about the hype versus reality of terminal performance of subsonic ammunition fired from suppressed rifles. Many people, including those who are experienced in the field of physical security, believe in some sort of magic surrounding suppressed weapons and their effect on targets when the targets are hit by projectiles (bullets) fired from those weapons. In this article, I show why suppressing a rifle and shooting subsonic ammunition from it usually produces worse performance (kinetic energy delivered on the target) than a rifle with standard rifle ammunition.
Protecting against rifle fire
In a past consulting job, my customer asked me to test many different ballistic protection schemes against penetration by projectiles fired from three different rifle systems he considered the primary threats. Possible attacks on his business’s protected spaces by homegrown terrorists or disgruntled customers (!) concerned him. After I performed the tests, I provided him with the following table of information regarding the ammunition I used:

A listing of the test results from testing I performed to determine bullet kinetic energy
I handloaded the cartridges, weighed each projectile and selected only those within one-tenth grain of the specified weight. I chronographed each shot, and the values in the table are the average velocities from the cartridges in the test. The kinetic energies I calculated from the formula Ek = ½ mV2.
Does a suppressed rifle shooting subsonic ammunition perform better against a target?
After looking at the penetration results and the tabular information about the cartridges, my customer asked me, “Do you think ammo fired through silenced weapons would perform better?” My immediate reply was “No way” and I briefly explained why I thought so. He was an intelligent person, and because of his position in his company and his life experience in law enforcement he had a better than average knowledge of firearms. So, while I was explaining to him that from a kinetic energy standpoint I didn’t think cartridges fired through suppressed weapons would outperform “standard” rifle fire, I was thinking that I needed to thoroughly investigate the possibilities through some research and calculations (and, possibly, additional testing).
My explanation did not satisfy him, and he said that suppressed fire concerned him, since part of his company’s defense in depth concept used a shot location system to inform his first responders in case of an incident. At that time, his location system wouldn’t reliably spot the origin of suppressed gunshots.
Hollywood hype
In addition (and here’s the rub), TV shows and movies have “Ninjas” dressed in black running around shooting suppressed weapons that are highly effective against everything (and everyone) they shoot. So, what were the facts regarding the performance of subsonic ammunition fired through suppressed rifles?
I agreed to do some research and get the information back to him so that he could decide on further testing. So, I began with my customer’s question, “Can ‘silenced’ rifles be nearly silent and perform ballistically on a par with (or better than) rifles without suppressors?”
First, I ruled-out supersonic ammo because the sonic “snap” would activate the shot location system. Admittedly, the sound might confuse the system as to the shooter’s location, but my customer agreed, nevertheless, that the sound would cause an alert.
Next, I looked at a range of commercially available subsonic ammunition and ammo where handloading produced projectiles at subsonic muzzle velocities. For each of these ammunition types, I chose a cartridge/projectile combination likely to produce and maintain higher Ek better than the others. Another consideration was whether the combination was easily available for purchase, realizing the two categories might overlap. As a result, I considered the following ammo, loaded to be subsonic: .38 Special (carbine), .308 Win/7.62 x 51, .45 ACP (carbine), .458 SOCOM, .300 AAC Blackout, 7.62 x 39, 5.56 x 45.
Analysis
I used the following considerations/assumptions as I began my analysis:
- .38 Special is a handgun round, and even through a carbine, only the lighter bullets made for the cartridge loading would produce supersonic performance. Therefore, there are several possible selections for test cartridges.
- .45 ACP is a handgun round, and as with the .38 Special, only the lighter bullets will produce supersonic performance.
- .458 SOCOM is a rifle round designed to fit into magazines conforming to the AR-15 magazine form factor. Rifles and AR-15 upper receivers designed for the round are available from a couple of companies, as is the ammo. The projectile weights vary from 300 to 600 grains, with only the 600 grain ammo advertised as subsonic.
- .300 AAC Blackout. Similar in effectiveness when using supersonic ammo as the 7.62 x 39, the same twist rate works well for supersonic as well as subsonic ammo with bullet weights of 220 grains and below. Heavier bullets require faster twist barrels.
- 7.62 suppressed (7.62 x 39 mm, the rifle round created for the AK-47, but normally supersonic). The key to making this cartridge work is to have the right combination of fast-burning propellant, bullet type, bullet weight and rifling twist rate in the rifle to achieve subsonic velocity with stable projectile flight and safe powder burn in the cartridge. With some experimentation, one can create a subsonic 7.62 x 39 round for a rifle that has the needed barrel twist rate.
- 5.56 suppressed (5.56 x 45 mm rifle round, normally supersonic). Same considerations as for the 7.62 suppressed, above.
- .308 suppressed (.308 Winchester or 7.62 x 51 mm rifle round, normally supersonic). Likely will require bullet weights greater than 190 grains; same considerations as for the 7.62 suppressed, above.
Reality
As a first cut to weed-out some of the alternatives, I assumed that hard-surface penetration would require full metal jacket projectiles. Next, in order to make some logical comparisons to the rifle rounds I already tested, I then calculated the muzzle energies of several bullet and cartridge combinations using information gathered from ballistics software and loading information from reputable sources.
Kinetic energy ranking of bullets from subsonic cartridges
Note that many of these ammunition combinations are not commercially available and must be handloaded. The .458, .308, and 170-grain .38 ammo combinations may be particularly difficult, even for a handloader who has a weapon with the right barrel twist rate and who is willing to take the experimentation time to achieve subsonic velocities.
Based on this information, I recommended to my customer that if he wanted a test series using subsonic ammunition, it would be best to use a rifle firing the .300 AAC Blackout cartridge. Of the subsonic ammo combinations I examined, It would be the most easily obtainable for an attacker.
Comparison with the test data from our previous tests using supersonic cartridges, however, led me to believe that this additional test was not required from an engineering evaluation standpoint. Using kinetic energy and bullet shape as the deciding factors, the 7.62 x 51 NATO M80 Ball test cartridges produced muzzle kinetic energies more than twice the largest energies produced by the subsonic cartridges in the table, above. The 7.62 x 39 Russian and the 5.56 x 45 NATO M855 cartridges previously tested produced muzzle kinetic energies larger than the subsonic .458 SOCOM cited, above. Moreover, contrary to the .458 bullet, the two NATO cartridges are recognized for having at least some penetration capability against steel targets.
The bottom line
My customer agreed that no further testing was required. Once again, Hollywood mischaracterized firearms. The only advantage subsonic rifle ammunition offers when compared to standard, supersonic ammo is noise reduction when fired through a suppressor. Even the muzzle kinetic energy of the biggest subsonic “thumper” (the .458 SOCOM) I examined falls short of the tiny 5.56 x 45 mm military ball. When fired at hard targets, the .458’s much larger diameter is of no help, either, as it merely spreads-out the penetration load on the target’s surface.
Why Are Guns Noisy?
I wrote “Is Pffffft-Pffffft the Sound of Silence” back in 2021 for another site because of a request that I clarify what a “silencer” really does to the noise of a firearm. Because of the continued public confusion regarding suppressor performance in the real (not Hollywood) world, and because it is still topical, I decided to give it a redux at my website. Of course, a silencer does not silence gunshot noise, so I’m using the more accurate term “suppressor.” I also added a note at the end where I address a present day issue.
Why Are Guns Noisy?
I imagine many of you grimace while watching TV shows and movies with “Ninjas” dressed in black running around shooting suppressed weapons that are highly effective against everything (and everyone) they shoot. Of course, according to video and film productions, non-military or police use of “silencers” is only for bad guys who silently kill people and then get away because no one, not even the victim, hears the single gunshot that kills. Seems like the only change up from this we see is a “double tap” in movies trying to appeal to watchers who have some video game knowledge of shooting, but the noise is still only a “pffffft – pffffft.” We know better.
Nevertheless, the main reason most of us invest the time and money to purchase and obtain a suppressor to use with pistols and/or long guns is to reduce the firing and downrange noise of gunshots. We realize we’ll likely never achieve the Hollywood “pffffft,” but what should we expect, noise-wise?
Silence Is Golden
Bear with me as I take you through a simplified explanation of gunshot noise sources. It may help you make informed decisions about gun, suppressor, and ammo purchases. In the process, I’ll focus on the biggest factor in noise, ammunition, but briefly mention the other factors regarding caliber and suppressors along the way. A shooter must consider other factors in addition to suppressor brand, type and performance. Ammunition choices, especially subsonic versus supersonic ammunition, play a huge part in the amount of noise suppression possible. I’ll use the military-sounding term weapon system because you must wrap your brain around the fact that this is what we are assembling when we make choices regarding a firearm + caliber + suppressor + ammunition.
As you may guess, I’ll lay out some of the basic facts regarding the performance of subsonic ammunition fired through a suppressed weapon system. Choosing the ammunition to use, based on its projectile velocity when fired in your weapon, is an important step, because a suppressor by itself does not affect all noise from the shot, and noise reduction is a big reason to purchase a suppressor.
Think about it – what noises result from firing a weapon system (besides the “oohs” and “ahs” from folks watching your Instagram-post-able shooting technique and cool gun accessories)? Starting from the butt-end of the system, we have the sound made by the action as it chambers, fires, extracts, and re-chambers a cartridge. This happens unless you use a bolt-action or other single-shot firearm. So, one way to reduce firing noise is to use a single-shot firearm.
Hey Buddy, Fix Ya Muffla!
Next, there is the sound of the explosion in the gun chamber as the cartridge fires. If you fire a large weapon system you might hear a distinct “ping,” but in small arms very little of that noise comes through the steel chamber walls. You usually hear the portion of that noise that comes out of the muzzle, and that noise combines with the noise created by the heat and turbulence of combustion gases expanding into the air. This is the noise we reduce by installing a suppressor on the muzzle.

Bullet, followed by pieces of bullet metal, leaving the muzzle. The turbulent, energetic gas is evident as the white cloud, with still-burning particles of gunpowder spraying from the barrel. Credit: Herra KuulaPaa, Caters News.
Glowing gas would be visible if a suppressor was not used. The energy dissipating from the gas cloud is a major source of noise from a gun shot.
Another noise is the sound of the bullet hitting the target, and we cannot do anything to modify that aside from shooting a different target.
Thwack!
The last noise is the sound a bullet makes after it leaves the firearm, if it speeds along at or above the speed of sound in the air (where most bullets travel). A supersonic bullet creates shock waves that spread out along the bullet’s path in a very similar manner to the shock waves created by supersonic aircraft and missiles; nearly everyone has heard the resulting “sonic booms.” The shadowgraph photo shows these shocks from projectiles. Most shooters never hear the shocks because gunshot noise overwhelms the “snap” of a sonic boom from a bullet, but if you are downrange and hear the shock wave, it is a sound reminiscent of someone firing a cap gun (small caliber gun, say .22 LR or .223 Rem) or slapping a wet flip-flop against a hard surface (large caliber gun).
Shadowgraph of projectiles traveling through air at about 1.5 times sonic velocity. Credit: A Davidhazy, Rochester Institute of Technology.
It happens that we can affect the noise of these sonic booms by firing subsonic ammunition, which eliminates the shock waves. The medium (usually air) through which the projectile is fired and the medium’s density (depends on temperature, humidity, and altitude) determine the local sonic velocity. You might correctly guess that it takes an involved computation using the results of several measurements to arrive at a precise sonic velocity, but a good rule of thumb is that the local sonic velocity is about 1100 to 1150 feet per second (fps) under the conditions most of us shoot (all the way up to 9,000 feet elevation under normal conditions).
Given this information, a shooter can consult the muzzle velocity information given by most ammunition manufacturers to decide whether particular ammunition is likely to produce a sonic “snap” when fired through a suppressed weapon.
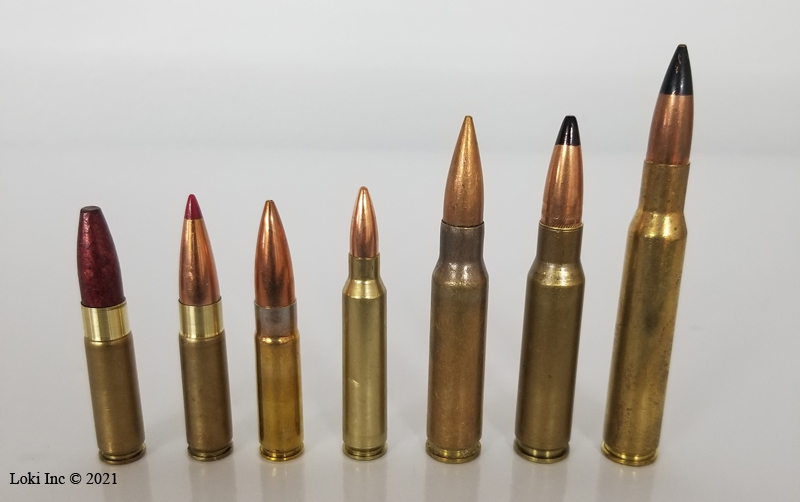
Typical rifle cartridges, l. to r.: 3 x .300 AAC Blackout: 203 grain coated practice round, subsonic, handload; 212 grain plastic tipped hunting round, subsonic, handload; 155 grain match round, supersonic, commercial. 5.56 x 45 mm NATO Ball 62 grain, supersonic, commercial. 2 x 7.62 x 51 mm NATO: M80 Ball 147 grain, supersonic, commercial; M61 AP 150 grain, supersonic, handload. .30 – ’06 M2 AP 165 grain, supersonic, handload
Can We All Just Be Quiet For a Little While?
In some cases, the internal ballistics of the cartridge may make this impossible. Unless you are a handloader, finding subsonic ammunition in popular centerfire calibers is difficult. Even handloading subsonic ammo in many calibers is problematic, if not outright dangerous, so if extreme quiet is of supreme importance, this should influence your choice of firearm caliber. For more information about this particular problem, do some background research on the genesis of the .300 AAC Blackout caliber. If you do an online search, you’ll find several hours’ worth of reading on the topic.

Ruger American Ranch Rifle .300 AAC Blackout caliber, with Harvester 300 suppressor, and Leupold Mark AR 3-9 x 40 scope
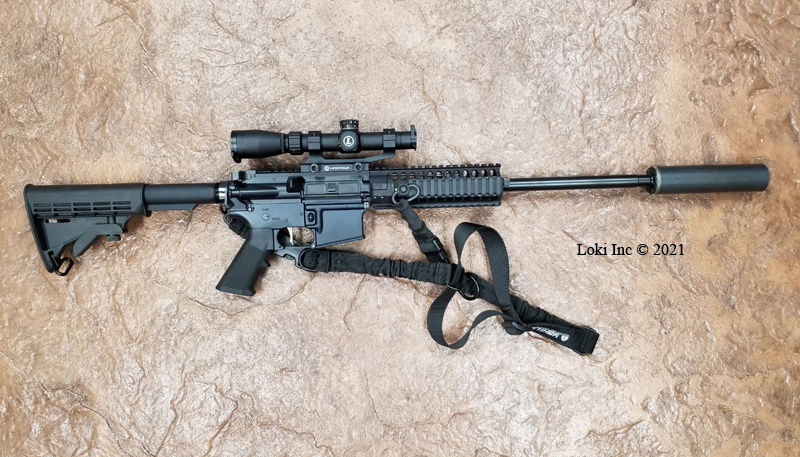
Palmetto State Armory PA-15 multicaliber lower, with .300 AAC Blackout carbine upper, Omega 300 suppressor, Leupold Firedot-G optic and mount, and ATC Gold trigger
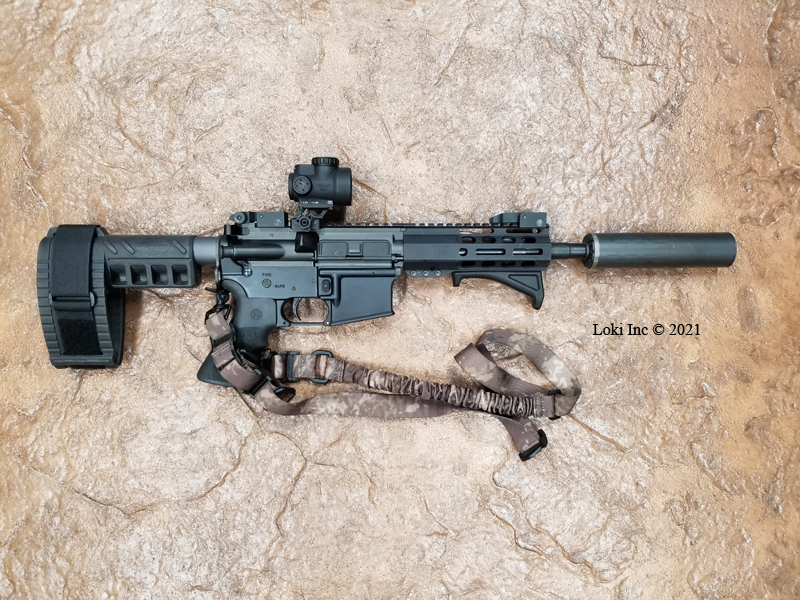
Palmetto State Armory PA-15 multicaliber lower, with .300 AAC Blackout pistol upper, Omega 300 suppressor, Trijicon MRO-C optic, SIG brace
Another Benefit of Using a Suppressor
Ammunition affects suppressed weapons systems’ performance in a different way other than noise, and in this case being suppressed may improve the performance with subsonic ammo. When firing subsonic ammo using a suppressor on semi-auto .22 LR caliber handguns and rifles or pistol-caliber carbines, the systems are often less sensitive to ammunition quality than when you fire them without a suppressor. Many of these semi-autos are blowback-operated weapons, in many cases making them finicky consumers of ammo. Suppressing these weapons increases the operating pressure, allowing them to use lower pressure (i.e., subsonic) ammo that normally is hit-or-miss in the unsuppressed gun when it comes to misfeeds and stovepipes. You may also find that suppressing your larger caliber gas-operated pistol- or carbine-length AR causes operating problems because of the higher operating pressure, unless you use subsonic ammo.
Hoplophobia
This year, several pro-2A organizations lobbied the U.S. Congress to remove suppressors (and other gun-related items) from coverage under the National Firearms Act of 1934 (“the NFA”), a U.S. law that regulates the manufacture, transfer, and possession of certain firearms and firearm accessories. The law imposes a tax on these firearms and requires their registration with the federal government, ostensibly to help control crime associated with their use. The Act got around being a direct violation of the Second Amendment to the U.S. Constitution by attempting regulation and control of arms via taxation, and by making a permittee wait months for possible permission to own these items. I suppose Congress originally included suppressors because of some fearful concept that only people using them for nefarious reasons would want to quiet the noise from firearms. Ever since then, the hoplophobes in the Government and media have fought removing suppressors from the NFA, even though their use in crime is non-existent. One supposes their reason for opposing removal is their fear that if you give us gun nuts an inch, we’ll become emboldened and want a mile. They are merely assuming we would act as they do in a similar situation, a classic case of psychological projection. In the meantime, those of us participating in the shooting sports wanting to protect our hearing must use uncomfortable and sometimes ineffective protection, or wait six months for some government bureaucrat to give us permission to exercise a constitutional right.
The Steiner TOR-X: Laser Aiming with the Mantis Dry-Fire Training System
Mantis calls its latest hardware release “The Ultimate Mantis-Steiner Fusion.” Even though as far as I know this is the only Mantis-Steiner Fusion, I suppose they can be given some allowance for hyperbole, as its collaboration with Steiner (a respected German optics/laser company now a part of the Beretta Group) resulted in the TOR-X.
The TOR-X is the first handgun-mountable aiming laser system to be integrated with MantisX technology (the same as is in a Mantis X10 Elite unit).
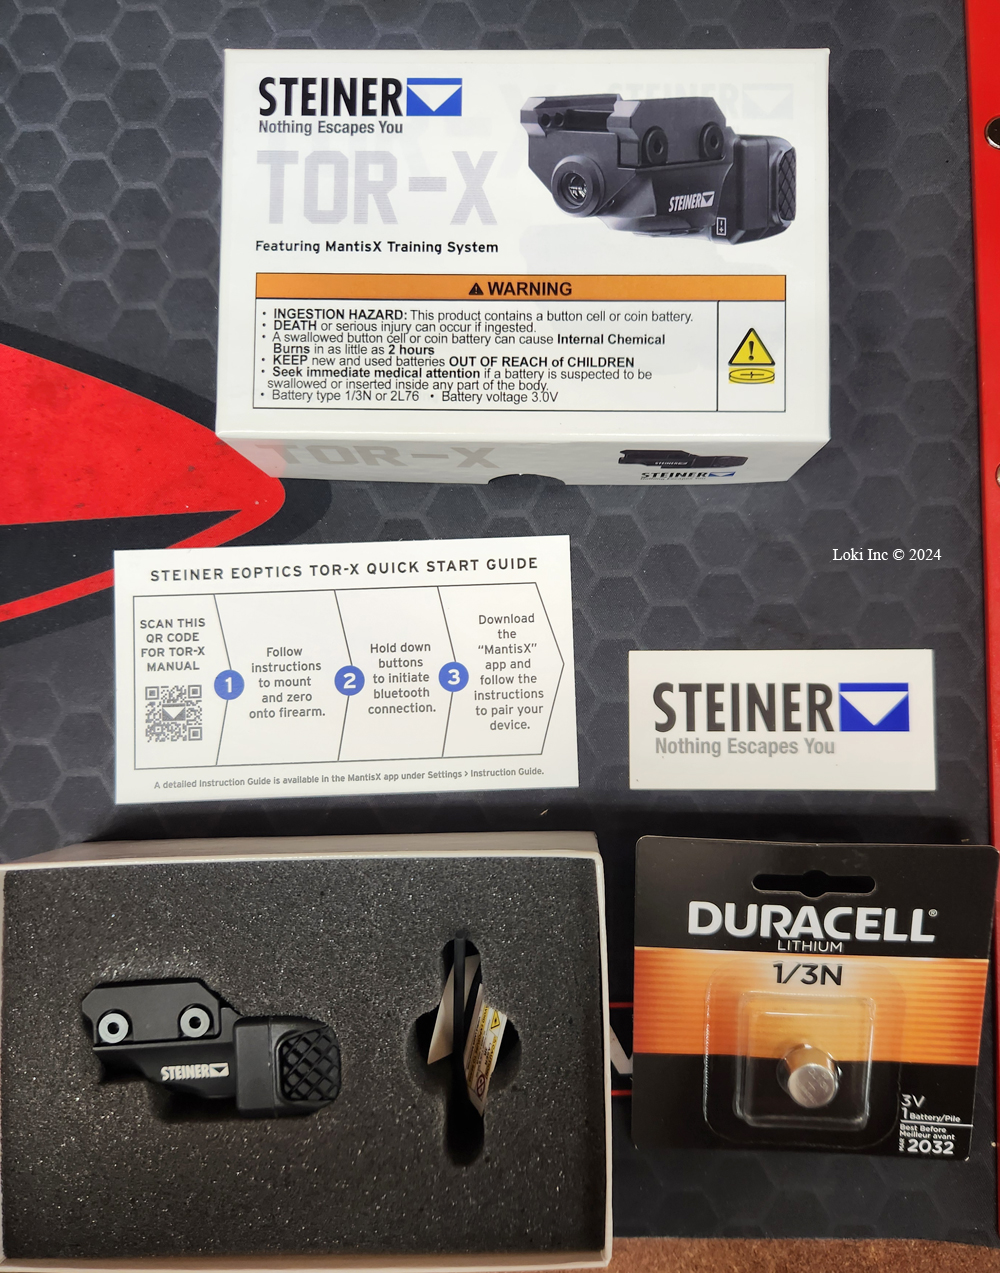
TOR-X box and contents
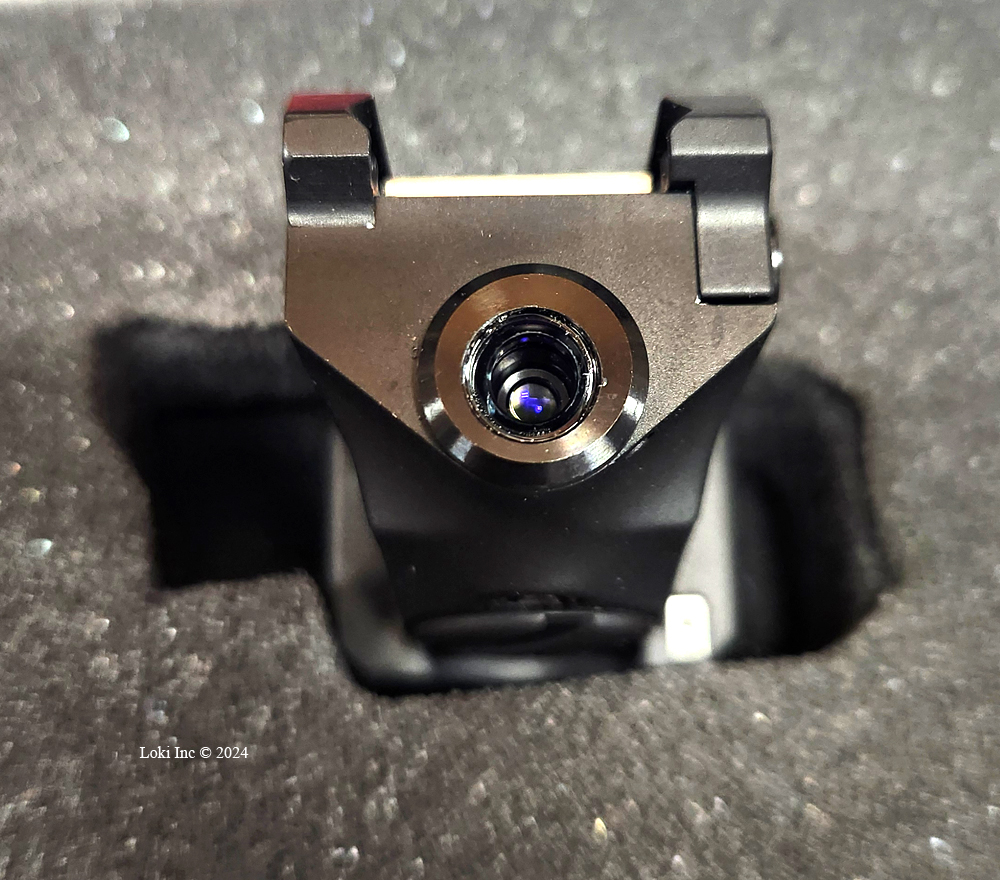
Front end of TOR-X showing laser aperture
Mounting a TOR laser pointing device and a Mantis X10 Elite on the same handgun rail mount is not feasible on most handguns; there simply isn’t enough room on the rail. The TOR-X allows a shooter to have both systems in a package that will fit on most forward undermount rail-equipped handguns.
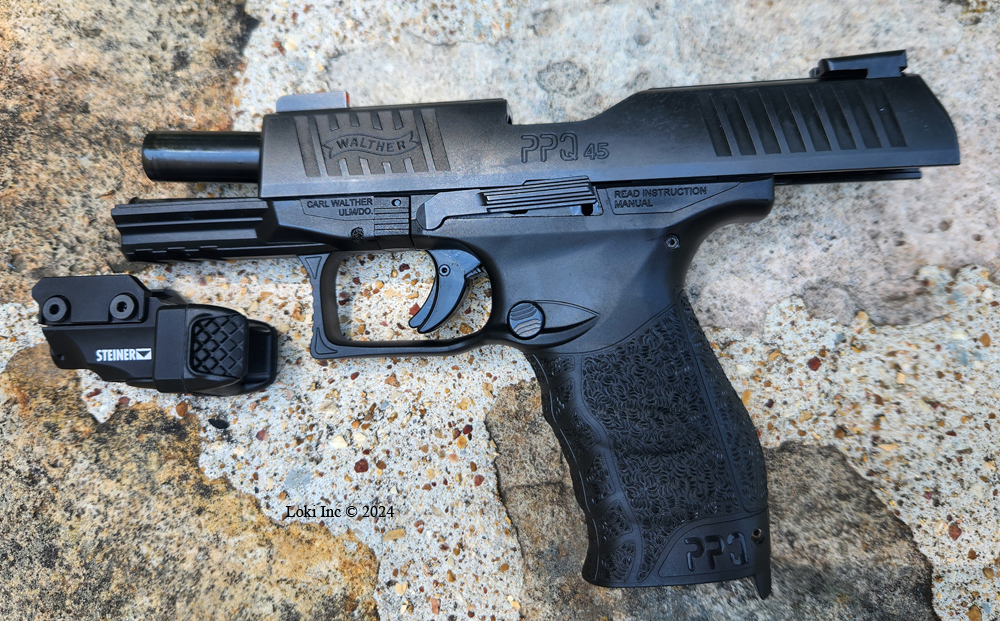
Walther PPQ 45 and unmounted TOR-X
I’ve written about MantisX systems in a previous blog post, and for additional information see my post about the BlackbeardX training system, which integrated the Blackbeard AR-15 training system with MantisX technology. As such, I won’t repeat myself – please refer to the previous blog posts for information about MantisX dry fire training and how to operate the associated systems.
In my earlier blog posting, I explained why the MantisX system is an excellent aid to learning proper handgun grip and trigger management. Adding the technology to a dedicated laser aiming system in the TOR-X package, which is small enough to be deployed effectively from the forward undermount rail location of a handgun, has not changed my opinion of the Mantis concept. Also, fortunately, the system will fit into a holster that accommodates the particular pistol plus a light mounted on the aforementioned forward rail, thereby allowing full use of the different training programs available with the Mantis smartphone application.
Mantis continually upgrades the smartphone application that takes data from MantisX and then provides to the user pointing direction up to trigger break, shot analysis, and a trace of pistol movement from the start of sight hold on target through shot break and recoil (if used in a live fire exercise). All this capability is inherent in the TOR-X system due to its MantisX technology.
Having the capability of laser aiming while using MantisX for shot monitoring and handgun mastery training expands the latter dimension of the Mantis concept. Not only can you use the MantisX for dry fire training without the laser, or the laser for aiming at a target during live fire, but you can use both MantisX and the laser when doing either type of training to help diagnose difficulties you may be having with your grip of the gun, trigger management prior to shot break, and recoil management afterwards.
Steiner TOR-X Fit on Guns
Having a large array of handguns at my disposal, I checked the fit of the TOR-X on a number of them in order to give the reader an idea how well the system would integrate with a particular gun. Some of the designs I checked are no longer in production, but are in use so I didn’t exclude them from my examination. A photograph of each fit check is below.
Walther PPQ 45, .45 ACP caliber. Good fit, but laser pointing cannot be elevated enough to coincide with the point-of-aim (POI) at 7 yards. The laser spot at 7 yards is about 2 inches low.
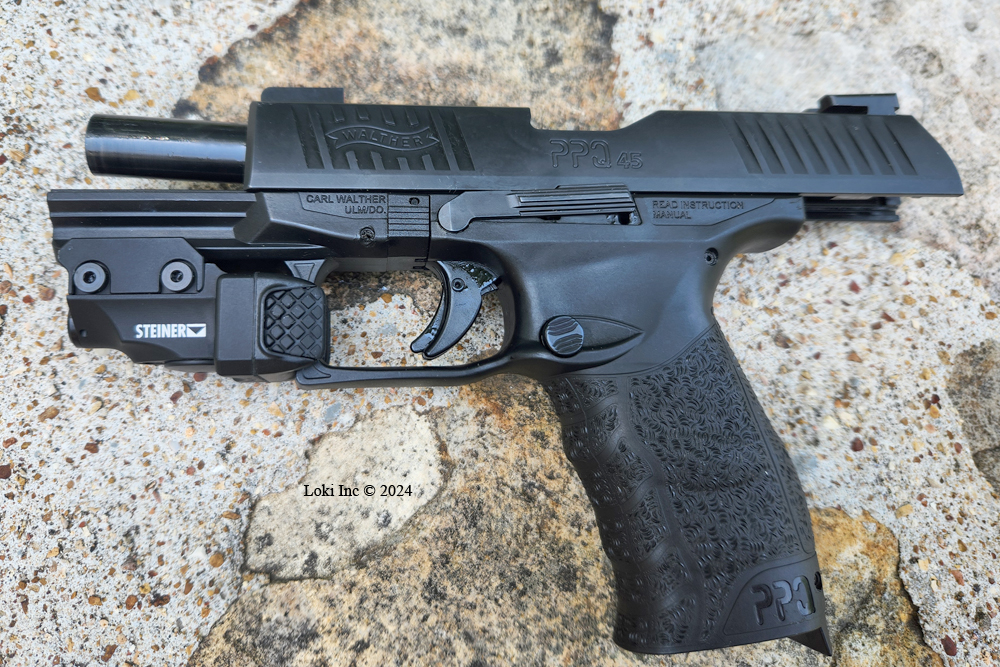
Walther PPQ 45
SIG Sauer P220, .45 ACP caliber. Good fit and pointing capacity.
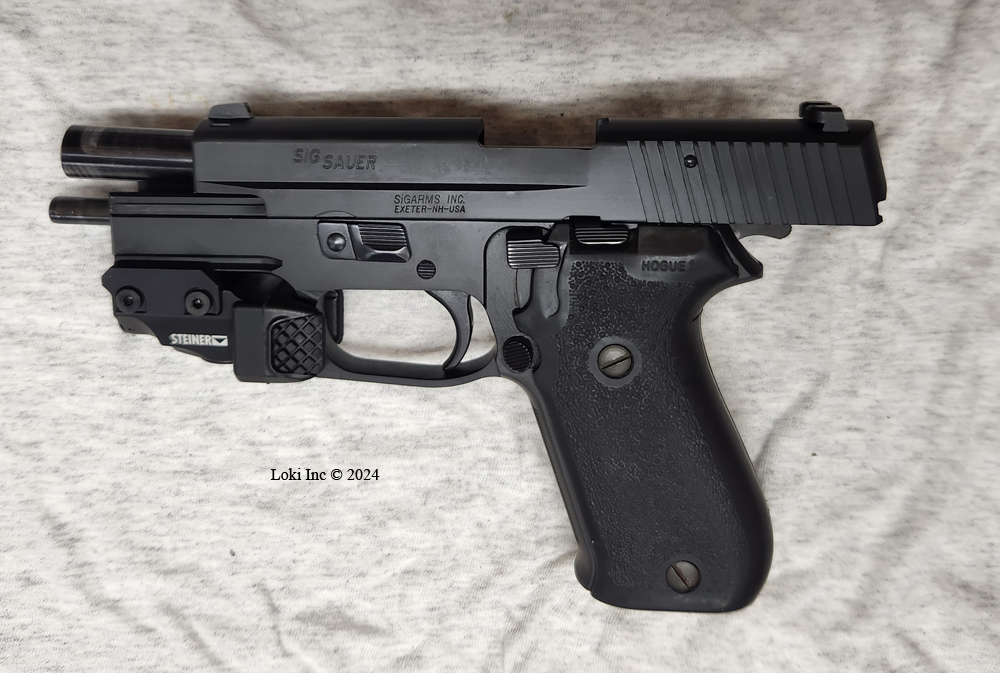
SIG Sauer P220
Glock 22, .40 S&W caliber. Pointing capacity good, TOR-X mount cross-pin had to be force-fitted into the rail groove.

Glock 22
S&W M&P 40 Performance Center, .40 S&W caliber. Good fit and pointing capacity.
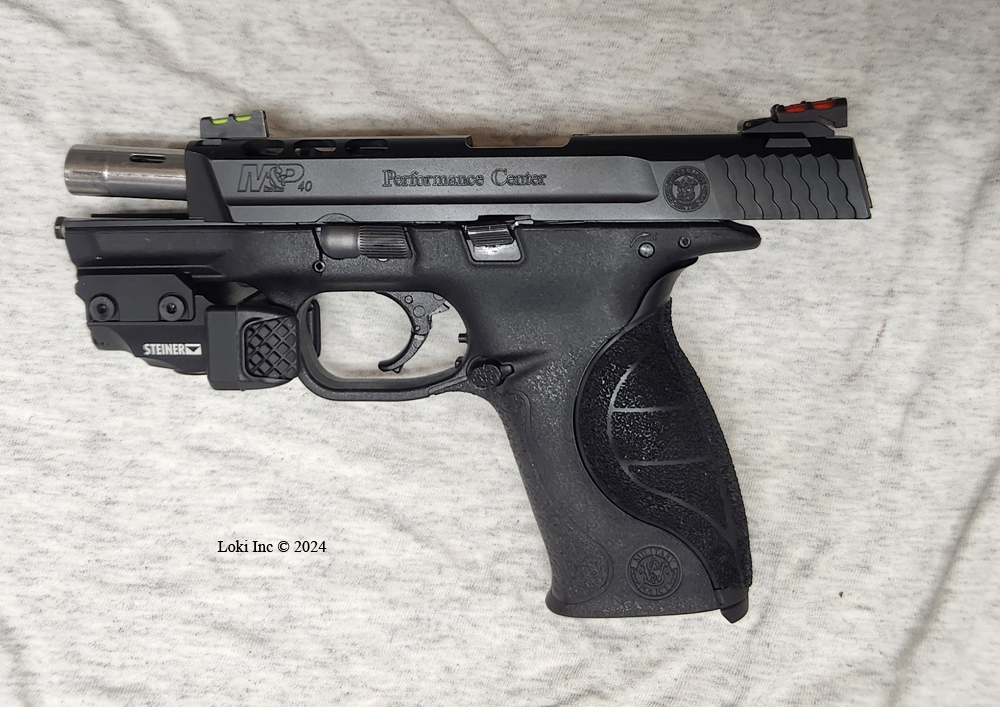
S&W M&P 40
Walther PDP, 9 mm Parabellum caliber. Good fit, but laser pointing cannot be elevated enough to coincide with the POI at 7 yards. The laser spot at 7 yards is about 1 inch low.
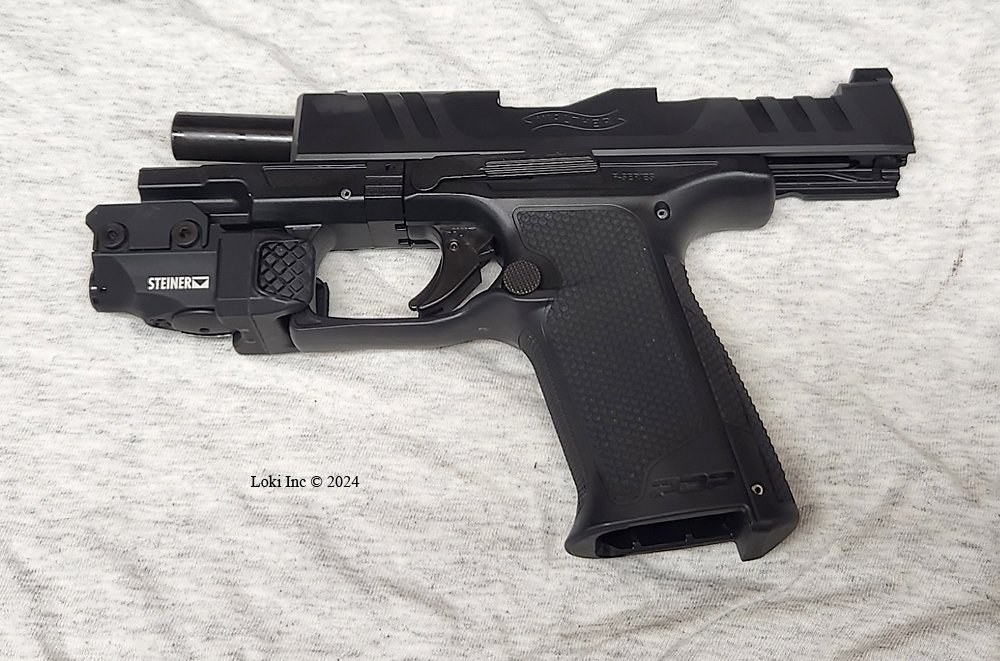
Walther PDP
Remington RP9, 9 mm Parabellum +P caliber. Good fit and pointing capacity.
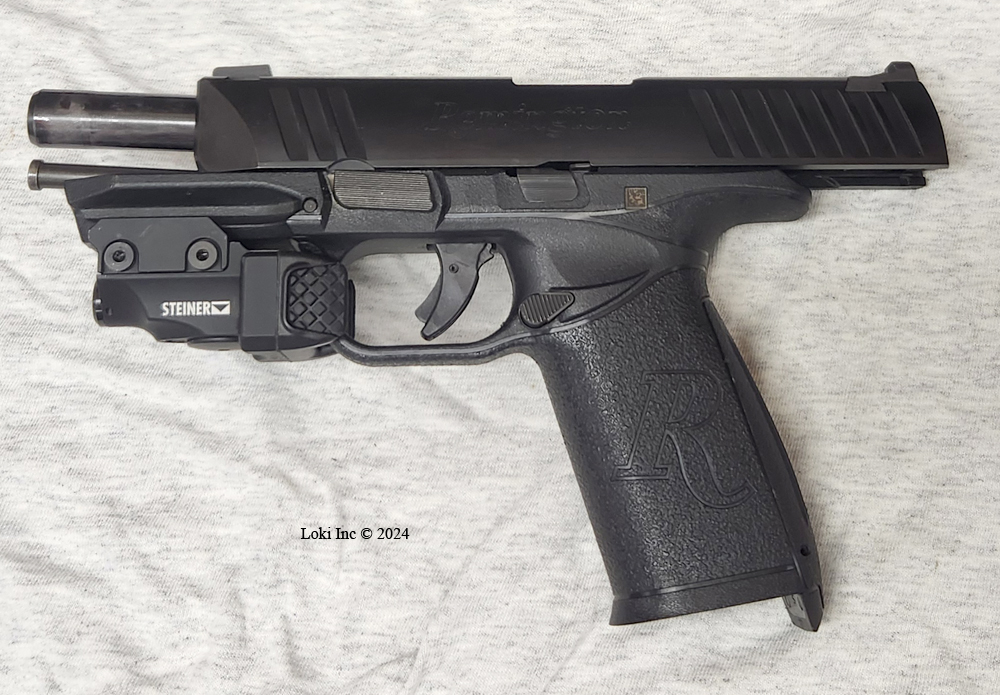
Remington RP9
Ruger 57, 5.7 x 28 mm caliber. Good fit and pointing capacity.
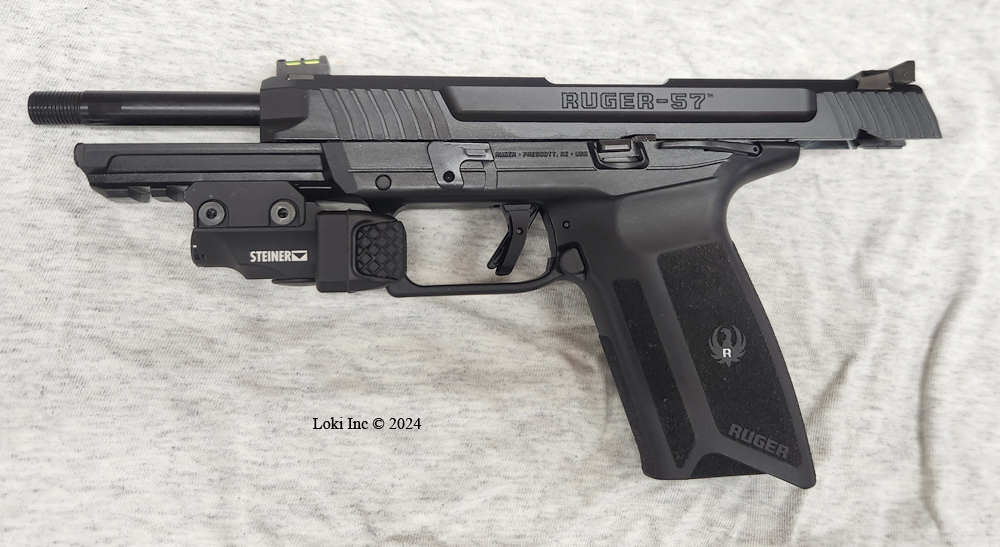
Ruger 57
SIG Sauer Mosquito, .22 Long Rifle caliber. Good fit and pointing capacity.

SIG Sauer Mosquito
Ruger SR22, .22 Long Rifle caliber. Good fit and pointing capacity.
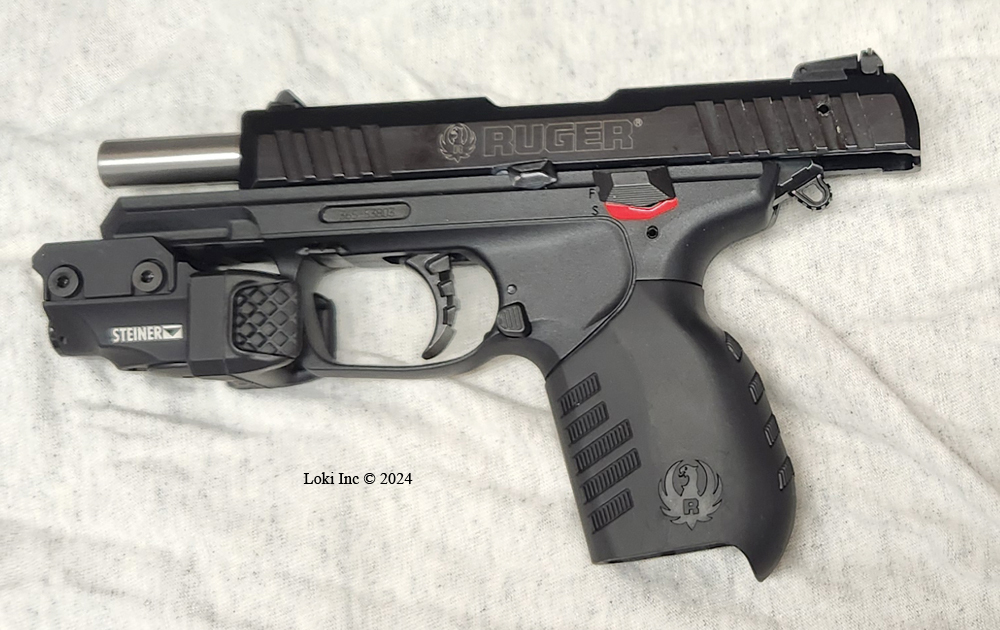
Ruger SR22
Taurus TX22, .22 Long Rifle caliber. Good fit and pointing capacity.
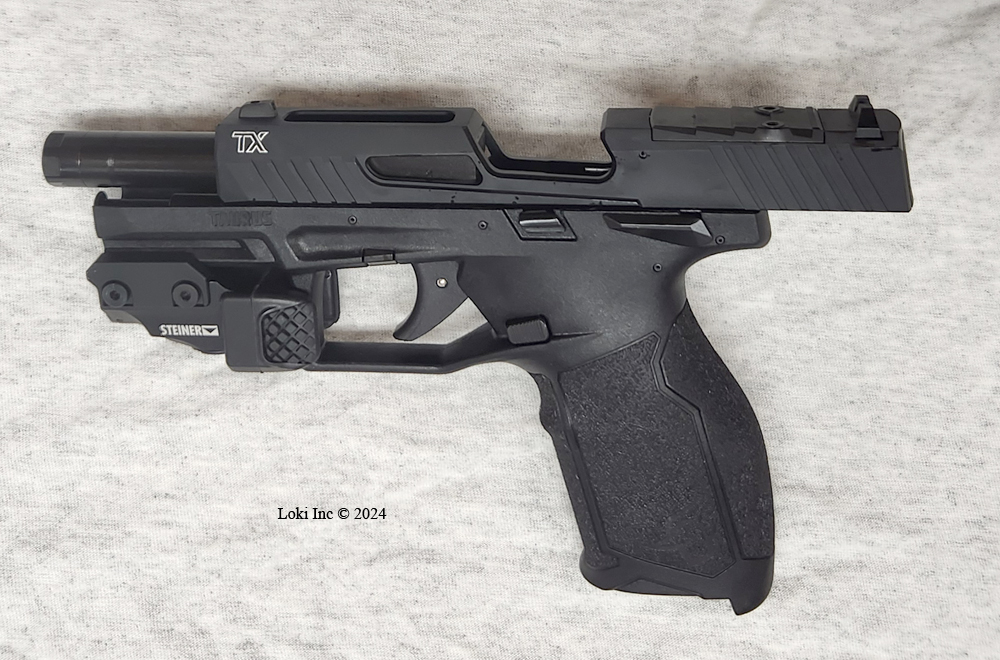
Taurus TX22
Note: For the Ruger SR9, 9 mm Parabellum caliber, the TOR-X mount cross-pin was too big to fit into the rail groove without filing the groove or the cross-pin. I didn’t do either for the purpose of this brief exam, but would file the groove to open it up if I wanted to dedicate the TOR-X to this gun.
When installing the TOR-X, it is critical to pay close attention to, and to follow, the rail mounting instructions in the User Guide. If you are not careful to align the cross-pin with the correct and corresponding holes in the mount and in its clamping bar, you will not be able to tighten the mount to the rail sufficiently enough to keep the mount from moving and possibly departing the gun if live firing. At the very least, the system cannot provide good accelerometer data if its sensors are slopping around on the gun in ways that don’t correspond to your grip and trigger management.
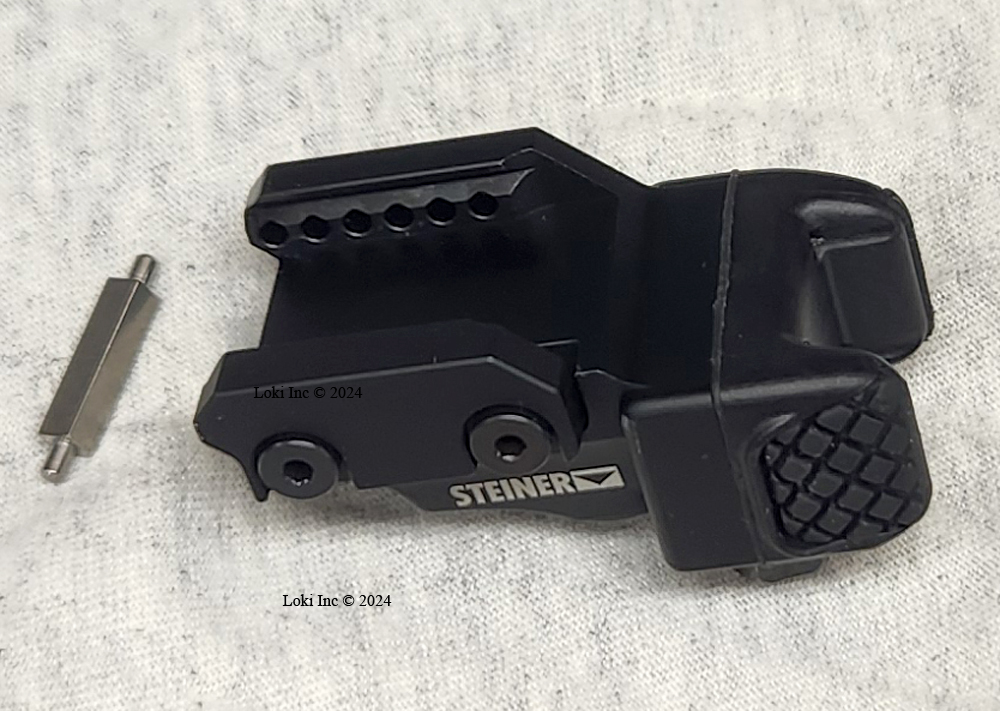
TOR-X showing cross pin and its mounting holes
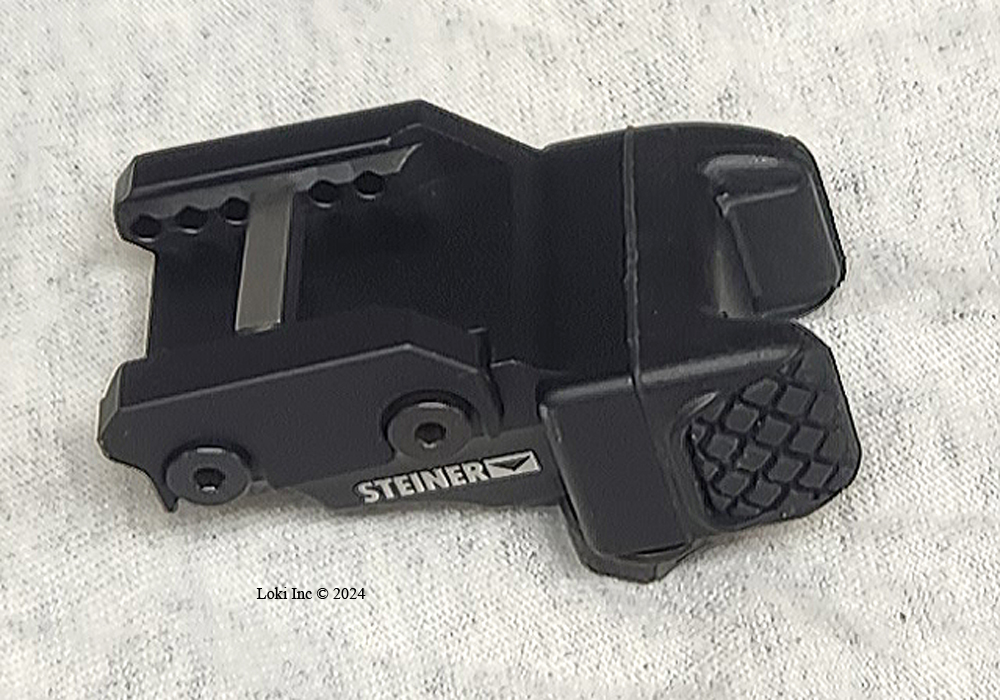
TOR-X showing cross pin in place
For more information about the TOR-X, visit the Steiner website. The TOR-X is distributed by Mantis, so you should visit their website for availability and purchasing information.
MSRP: $359.99
Rebarreling a Savage Axis II .25-’06 XP Hardwood Rifle
I decided to rebarrel my Savage Axis II .25-’06 XP Hardwood Rifle because I didn’t like the group size it produced using a good scope and very good ammunition.
If you haven’t already read my blog posting about reworking a 6.5 Creedmoor Savage Axis rifle, you may want to do so before reading this post because I’m not going to repeat the information about the rebarreling or scope mounting processes. I’ll just address the differences between the work I did on the Axis, which was much more extensive, and what I did on the Axis II.
The Axis and Axis II rifles are nearly identical, except the Axis II comes from the factory with their AccuTrigger and a Bushnell scope, whereas the Axis comes with a standard trigger and a Weaver scope (see the Savage Arms descriptions here). As in the case with the Axis rifle, I won the Axis II at an NWTF benefit banquet. Unfortunately, the similarities between the rifles extended to the conditions of their rifle bores!
I already had an excellent .25-’06 Ruger M77 Mk 1 rifle that I purchased at an auction many years ago. The seller said he sold it because it wouldn’t shoot accurately anymore, so I was able to buy it for a very low price. I took a look down the bore of the gun (this was in my pre-borescope days) before I bought it, and could hardly see the rifling for all the copper bullet material stuck in the grooves, so I figured the gun would be “a shooter” if I could get the bore cleaned of all that metal. After several days and iterations of using an electrochemical bore cleaning system that stripped progressive layers of copper, burned powder, and lead out of the bore I had a clean gun that returned to its previous glory. It is a “tack-driver.” So, I knew the caliber could produce very good and accurate results.
My excitement about winning a new .25-’06 turned to disappointment over a week or so when my new Axis II spewed bullets downrange into really crappy groups, even when combined with a quality SIG scope. It was as inaccurate as my old M77 before I de-metaled its bore! With the Axis II being a new gun, I didn’t think bore metal deposits would be a problem. This time, though, I had a borescope rather than my naked eyeballs to use for a bore examination. After checking all the other things that could be affecting the gun’s accuracy (bad scope, loose scope mountings, barrel in contact with the forend, loose/improperly torqued stock-to-receiver bolts and ammo variations), I borescoped the barrel and discovered similar problems to those I found with my Axis rifle. The craters and cavities in the one-third of the bore closest to the muzzle were worse than in the Axis
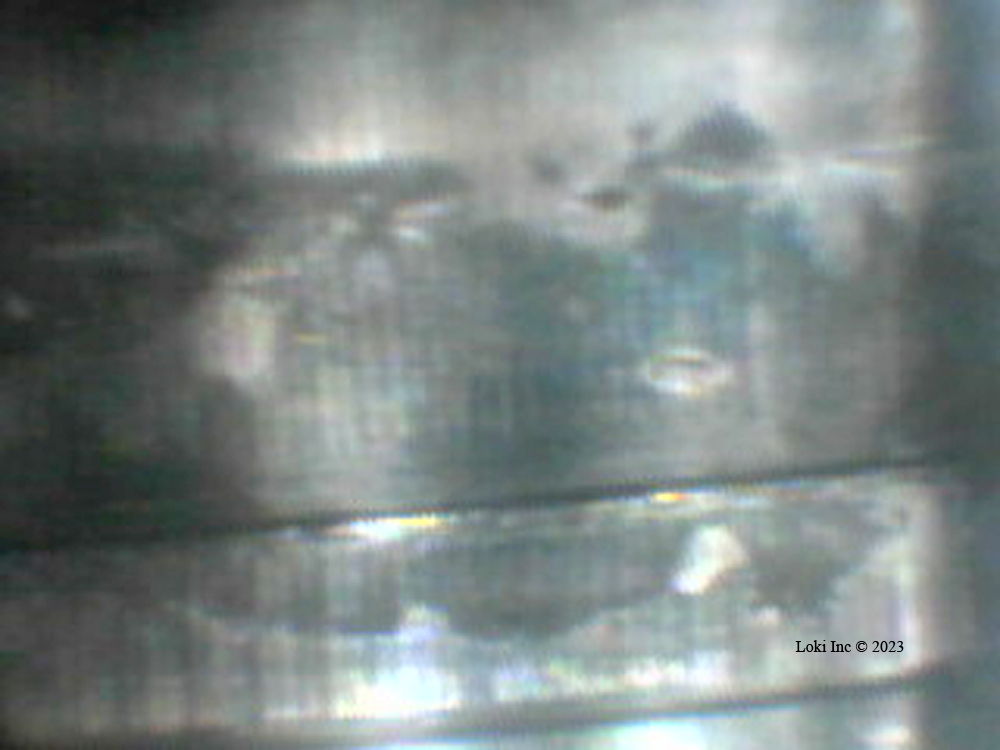
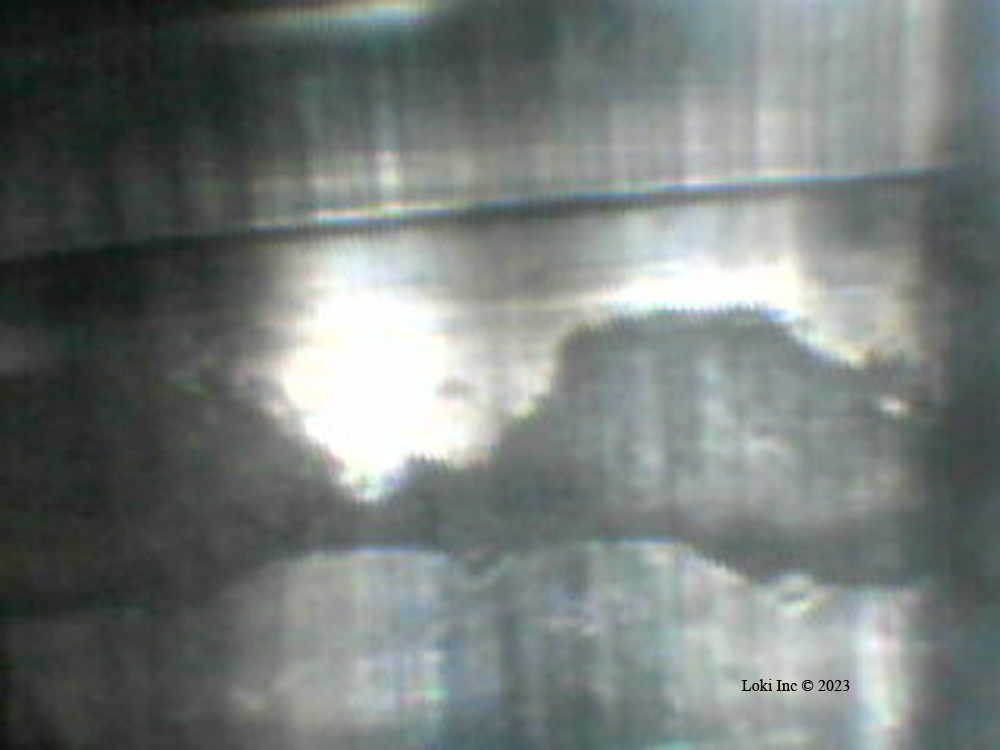
Cavity in bore
This mystifies me, as Savage rifles have a reputation for accuracy, and the two others I own (an older Classic Model 110 in .270 Winchester, and a 110 Precision in .338 Lapua Magnum) were very accurate right out of the box. I don’t know why the two rifles I won at benefit banquets were problem children.
Rebarreling a Savage Axis II .25-’06 XP Hardwood Rifle
The Axis II’s cost to me so far was just the raffle ticket, so I decided to invest some time and money into improvements. The XP stock is pillar bedded, and made of a nice hardwood with two darker cross pins fore and aft of the magazine well, and I like the AccuTrigger. I hoped that all I needed to replace was the rifle’s barrel, so I searched online and found an E R Shaw (now called Shaw Custom Barrels) .25-’06 barrel kit with a factory contour Savage barrel for sale. Shaw barrels are well known for accuracy, and the kit included a GO gauge and a NO-GO gauge as well as a Savage barrel nut wrench.
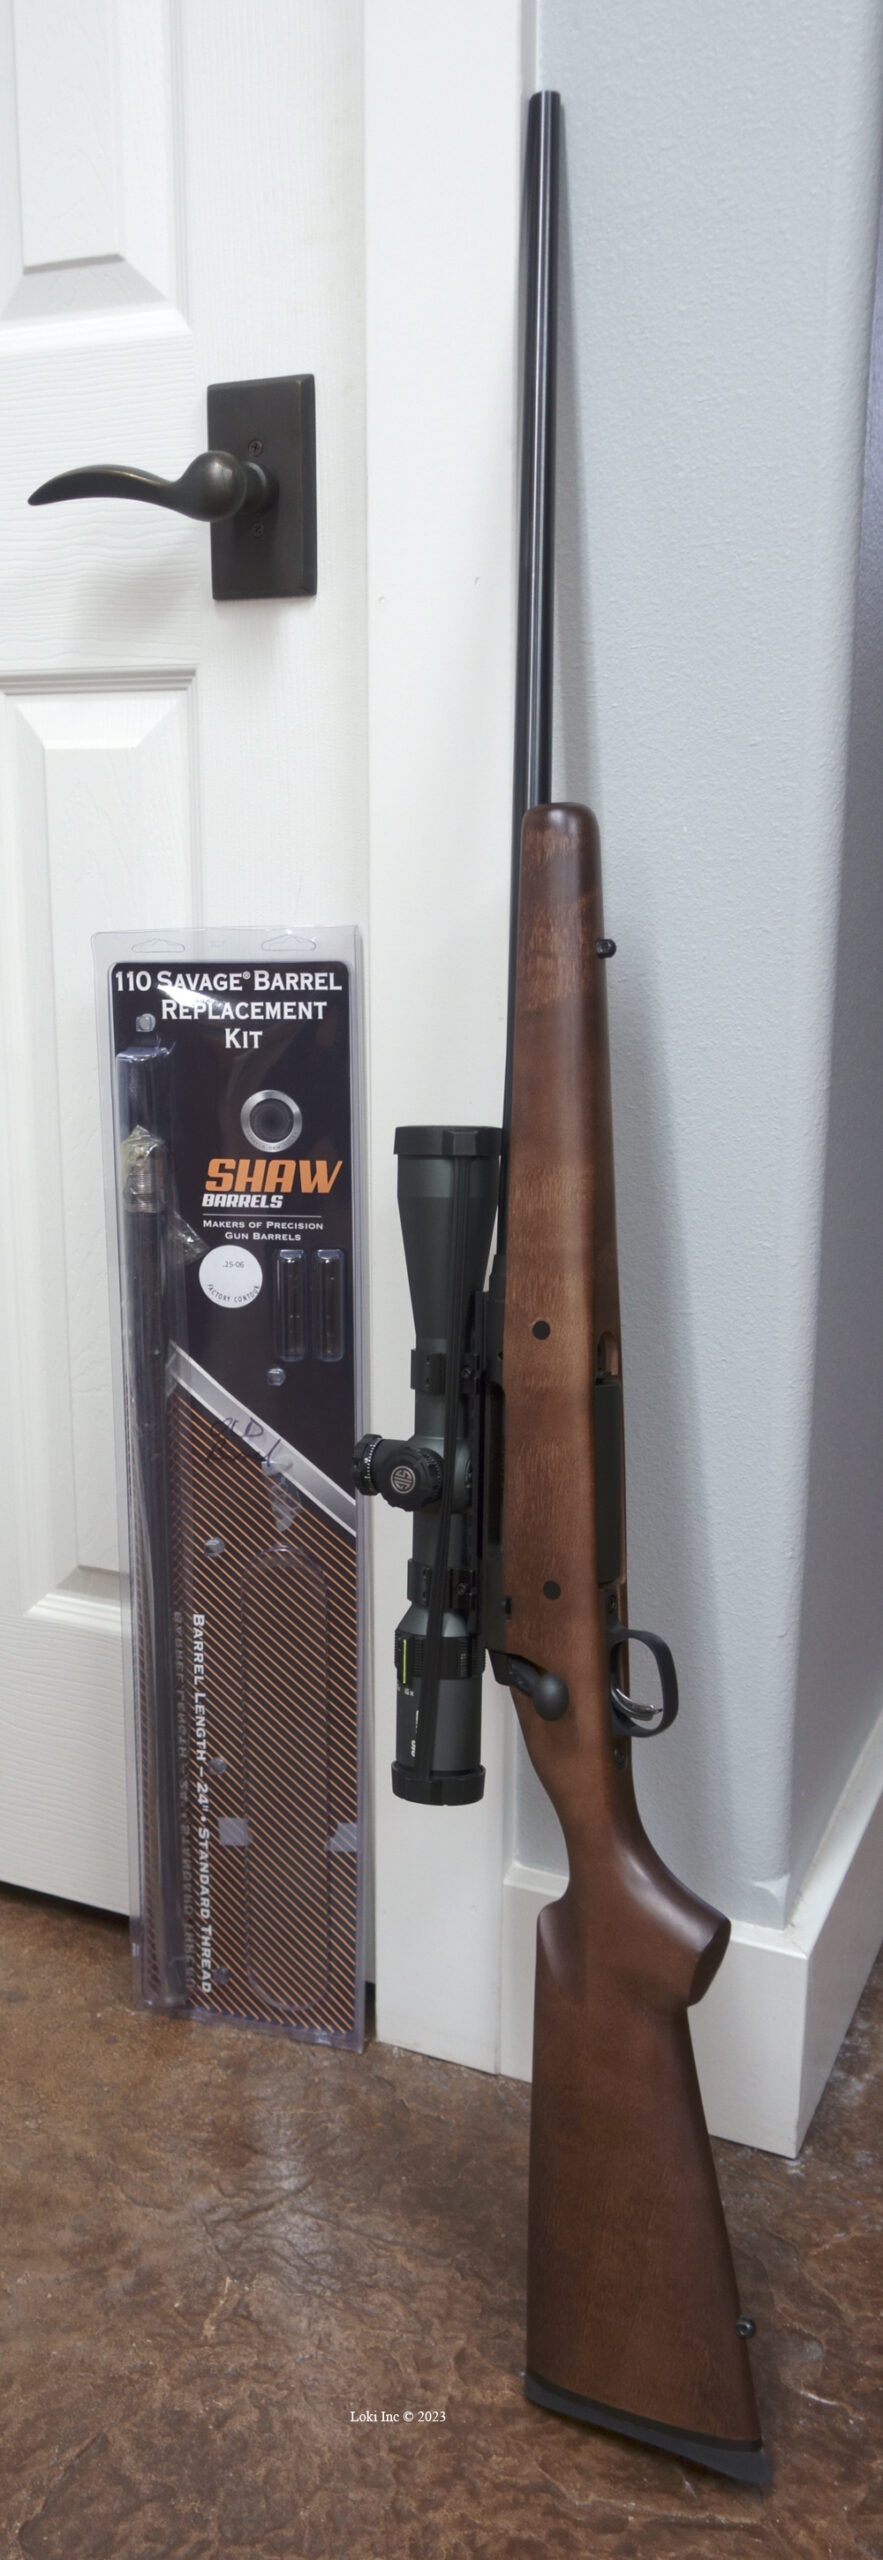
Original Savage Axis II rifle with Shaw barrel kit
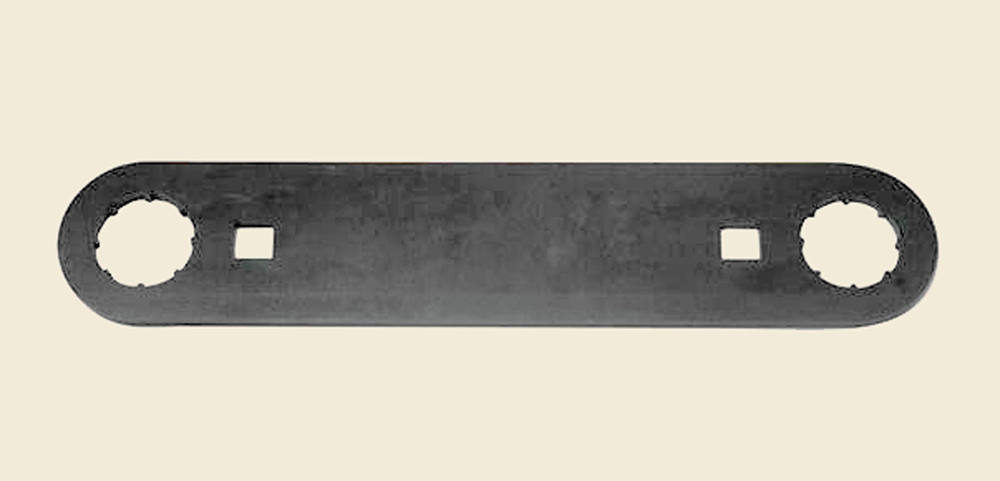
Savage barrel nut wrench-2
Headspace gauges – GO on the left, NO GO on the right
One of the many good things about the kit was its detailed set of instructions on installing the barrel. Even though I have installed Savage and Mauser barrels before, and knew the process, I still followed Shaw’s instructions to ensure I didn’t mess-up something. It behooves anyone barreling a firearm to be sure of the process, to avoid creating a dangerous situation with the wrong headspace.
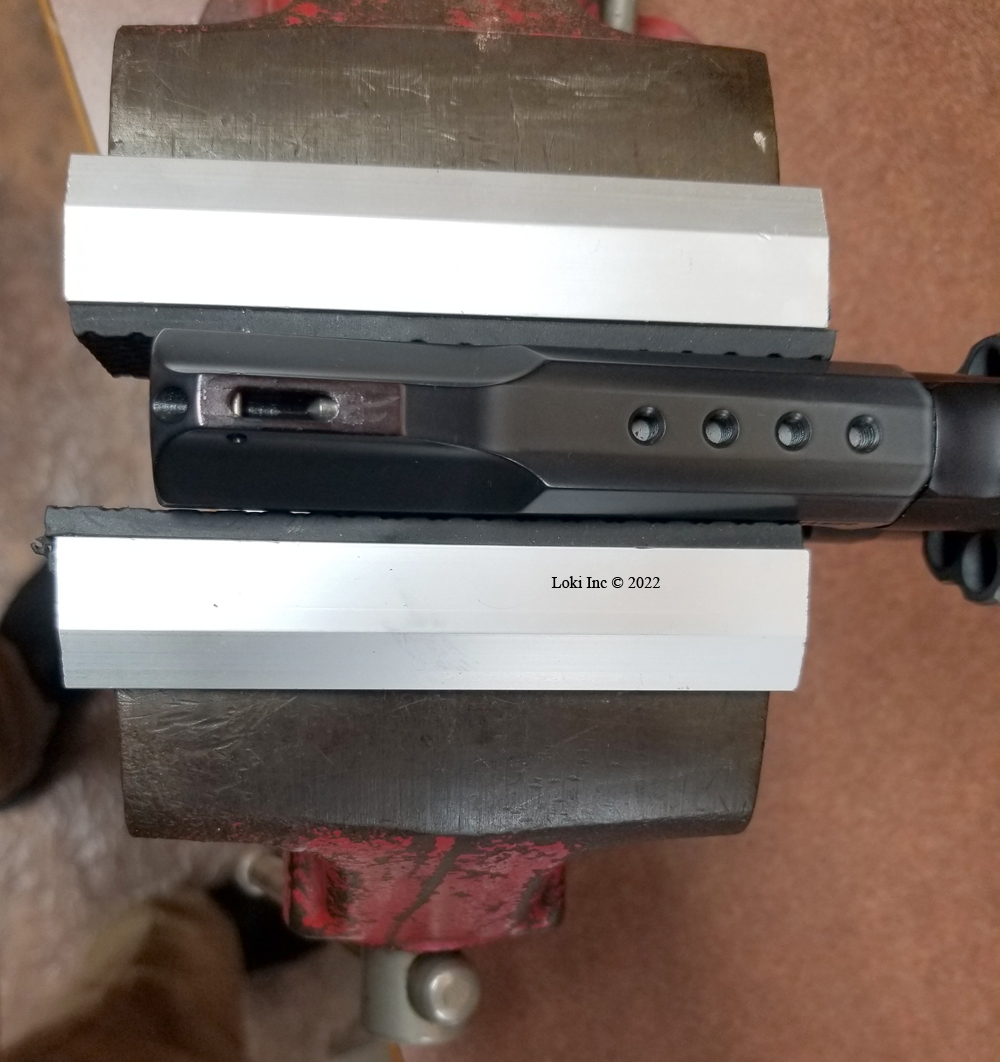
Rebarreling the Axis II went smoothly. After removing the scope and its mounts from the receiver of the rifle, I removed the barreled action from the gunstock. I clamped my barrel vise in my big mechanic’s bench vice, and then after fiddling around a bit to decide which bushing to use in the barrel vise, I put some rosin on the rifle’s barrel. You don’t always have to use rosin to keep the barrel from slipping in the vise, but the inserts in my vise weren’t a perfect fit on the barrel so I needed to use rosin. At that point, to remove the barrel it was a matter of using the barrel nut wrench to remove the nut, and then sliding the barrel out of the action. Installing a new barrel included several important details, as addressed in the Shaw installation instructions, so I followed them closely. The barrel nut should only go on in one way, and the gun’s recoil lug has one way to install it. To achieve the required 75 to 100 ft-lbs of torque on the barrel nut with the GO gauge installed in the gun, I inserted the square driver part of my big torque wrench into the square cutout in the barrel nut wrench, and used the torque wrench/barrel nut wrench combination to tighten down the nut.
Even though the new barrel was noted to be the factory contour, when I seated the barreled action into the gunstock I noticed some interference between the barrel and portions of the stock’s barrel channel. As I mentioned in my 6.5 Creedmoor rebarreling blog, I prefer to have a business-card-thick gap between the barrel and the stock for the entire length. So, I got out my barrel channel scrapers and enlarged the forestock channel wherever needed to achieve that gap. I put a little sanding sealer onto the newly exposed wood in the channel to help seal it against moisture.
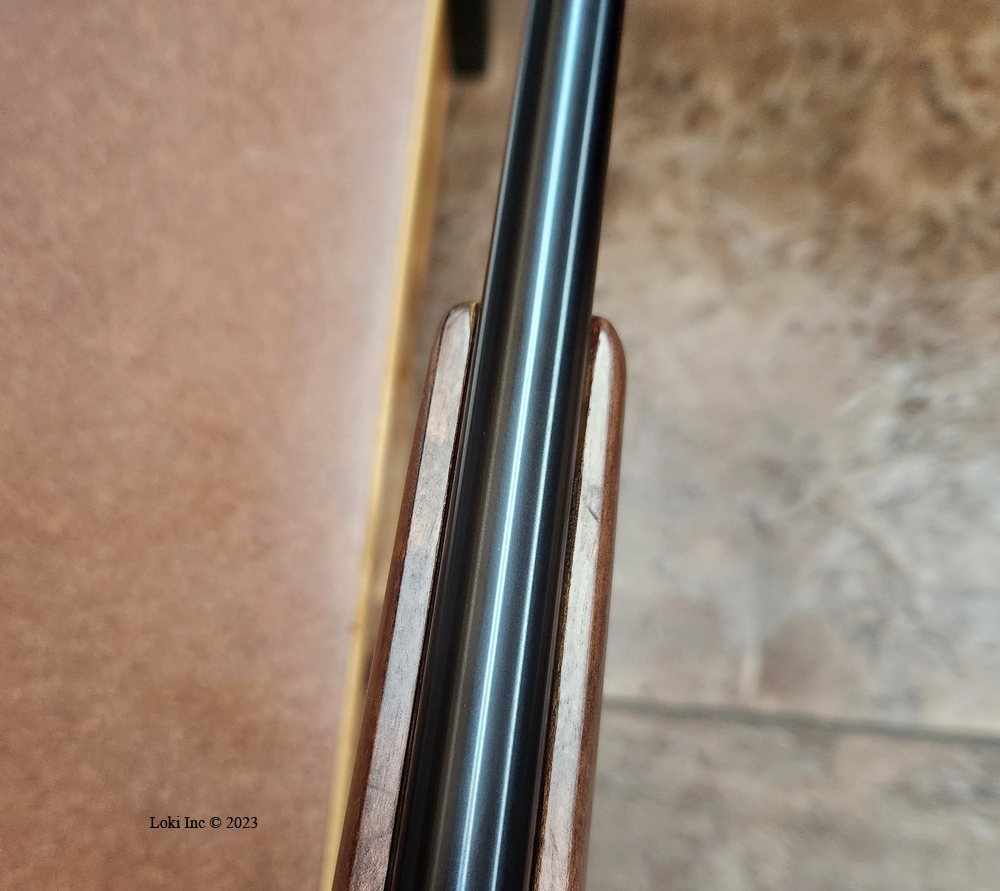
Barrel in forend showing gap
After re-assembling the rifle and re-mounting my scope on it, I thoroughly cleaned the gun’s bore.
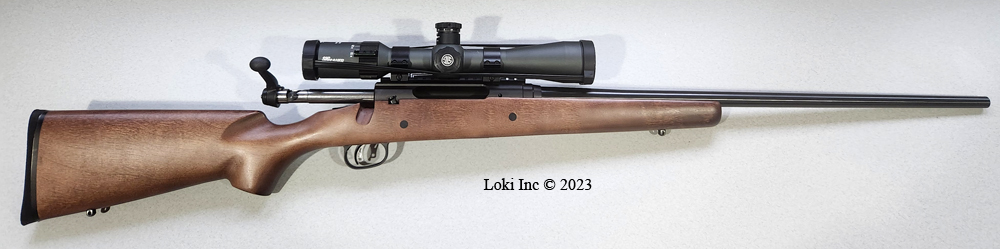
Completed rifle Savage
I was anxious to take the Axis II to the range to see if my work had made any improvement on the rifle’s accuracy, so I grabbed a couple of boxes of different brands of ammo, plus some of my handloads.
On the range, the rifle shot very well – its accuracy was a vast improvement over what I was able to achieve with the gun and its original barrel. Rebarreling it was worth the effort!
New front sight for S&W Model 327 or TRR8
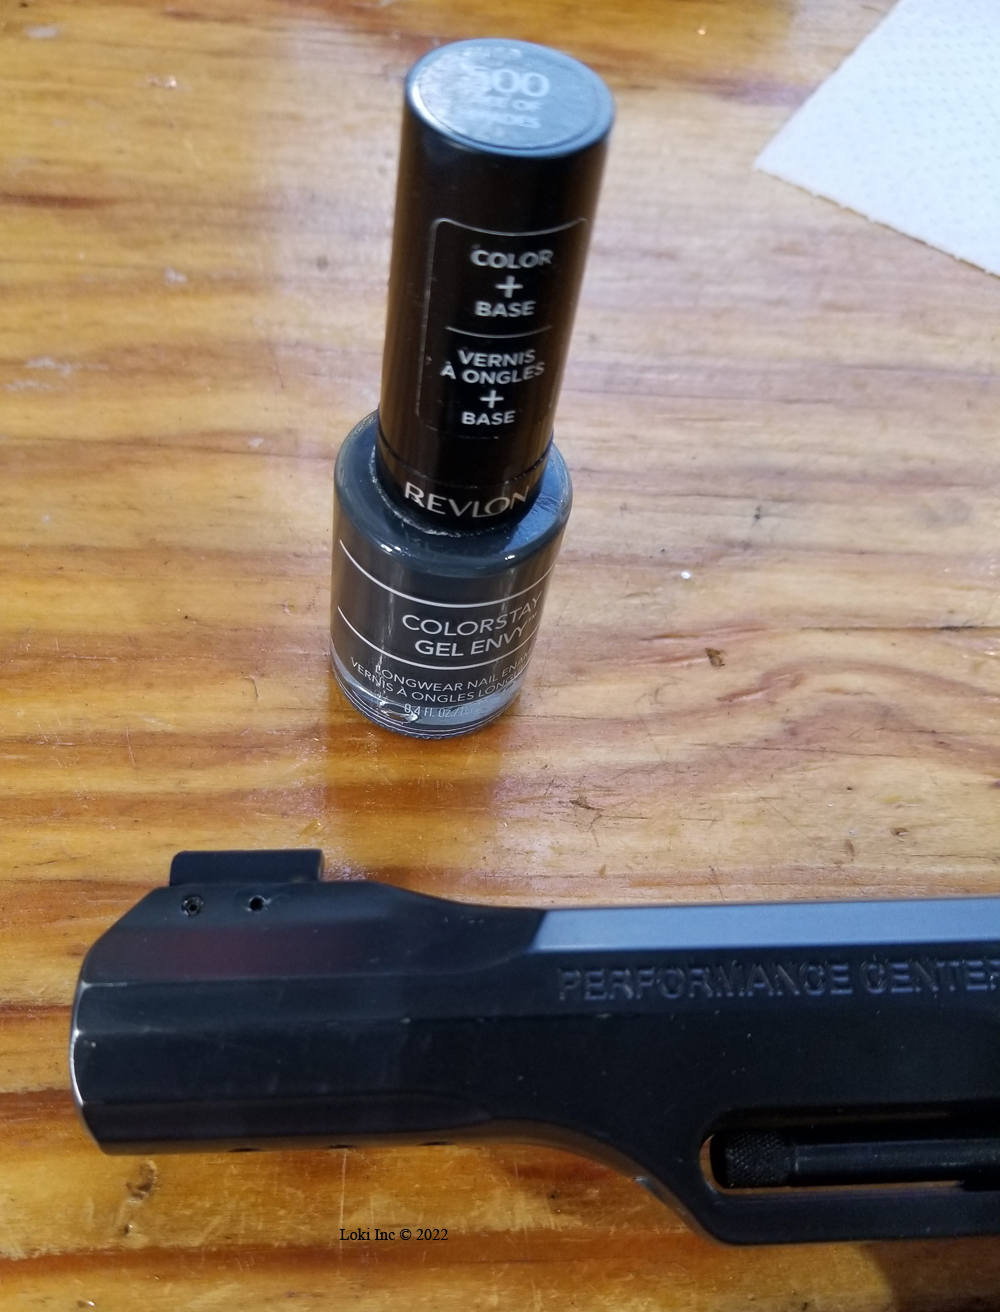
I’ve had a S&W Model 327 TRR8 for several years, now, and it is one of my favorite guns to carry when I’m out and working on my Missouri Ozarks property. I never know when I might come across a four- (or two-) legged varmint that needs to be shot. Unfortunately, I had to replace the gun’s front sight.
Light in weight for a Smith N-Frame because of its scandium alloy frame, the TRR8’s stainless steel cylinder holds eight rounds of .357 Magnum ammo (or .38 Special if you wish for a bit less recoil) that can be full-moon clipped together for quick reloading of the chambers. Since I handload my ammunition, I typically chamber 158 grain JHP rounds loaded to a velocity that I know from experience will expand effectively in raccoon, groundhog, and armadillo-sized animals. As backups, I put two ammo carriers on my belt that can each hold a full-moon clip of .357; one clip has 180-grain solids hot-loaded for black bears, and the other has 140-grain FTX polymer tipped bullets loaded for deer-sized animals.
You can also single-feed the chambers, as the extractor star can pick up the cartridge rims for easy extraction. It’s called a TRR8 because it’s a “tactical rail revolver”, the cylinder holds 8 rounds, and the gun is finished in black.
If you wish to do so, you can install a short piece of Picatinny rail atop the gun for optical sights and another section underneath to attach a light, as the barrel shroud is drilled and tapped at the factory. I chose not to do either, as I want a rugged gun that I can carry in a hip holster when I’m dragging myself through briars and thorny bushes, and when I’m driving a cab-less tractor through the same sort of stuff. More stuff hanging on a gun means more stuff to hang-up in the holster, or in brush when I’m drawing-down on something.
My gun was from Smith’s Performance Center, and they fine-tuned the action so everything about it is smooth – it has a consistent, slick double-action trigger pull, and the hammer release during the single-action pull is like the proverbial “break of a glass rod.” I’ve lost count of how many armadillos, prairie dogs (during a trip to northern New Mexico) and other varmints I’ve killed with the revolver. While carrying it as a backup to my primary arm, I even killed an eight-point whitetail buck with it when (due to a failure on my part) my .30-’06 rifle was out of action.
So, what’s not to like about the TRR8? The interchangeable front sight, in my opinion, is a bad concept. I like iron sights on pistols, and the gun comes with a gold bead Patridge-type front sight blade that worked very well for me. I say “worked” because I lost two of them over the past few years due to the interchangeable design. As it turns-out, holster carry is anathema to this sort of front sight. My holster happens to have an open end at the part where the pistol’s muzzle resides, so twice at times unbeknownst to me when I re-holstered my gun out in the woods, the front sight blade caught on something inside the holster and removed itself. Of course, the blade proceeded to fall through the bottom opening of the holster to be lost in the leaf litter on the forest floor.
Unfortunately, I only had two sight blades from the start. The second time this happened was in the midst of the great Covid-everyone-stay-at-home-and-close-your-business lunacy. I called Smith & Wesson to order a replacement sight blade only to be told that they didn’t have any and didn’t know when they would have any more.
New Front sight for S&W Model 327 or TRR8
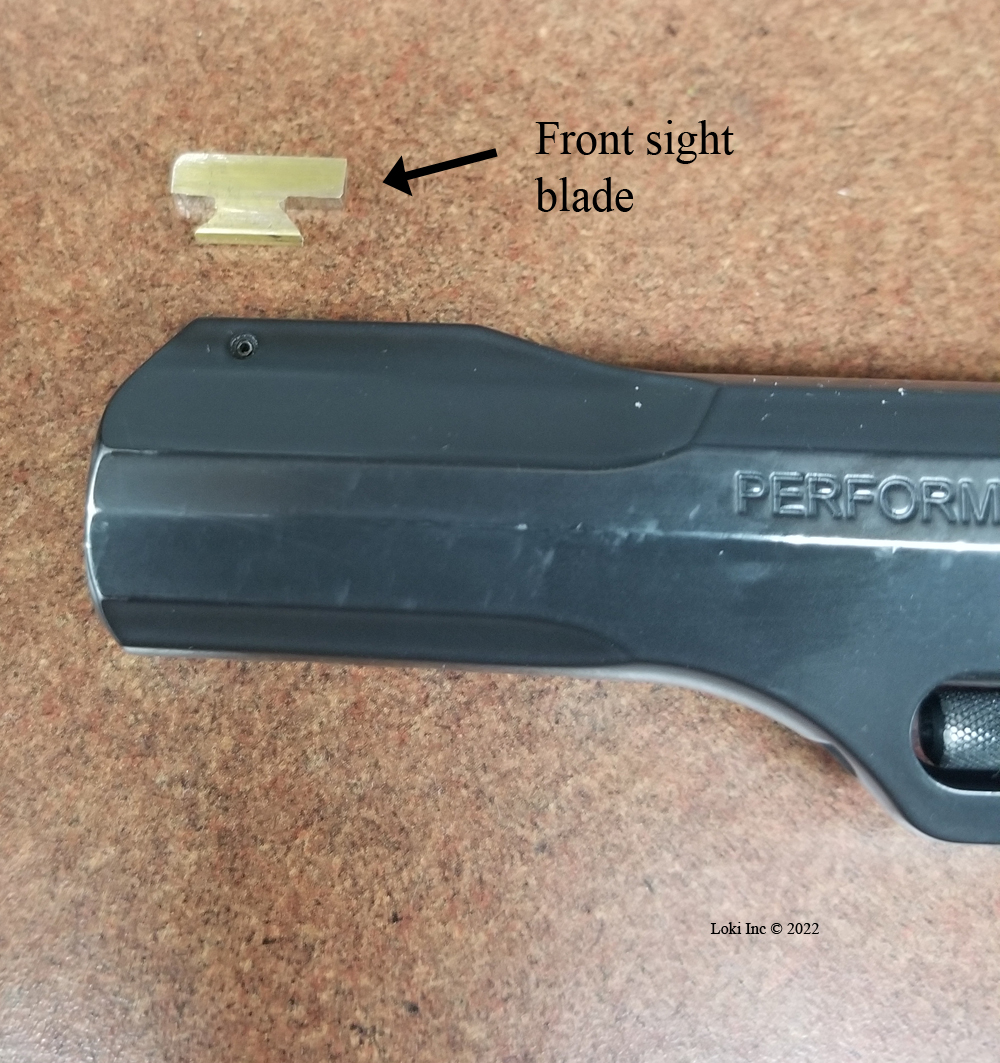
What to do? Well, with necessity being the Mother of Invention, I decided to build my own sight blade out of a piece of sheet brass scrap I had left over from another project. Of course, I could have used a hacksaw and needle files to make the blade, but I decided making the blade would be a good time to use my mini-mill and practice my detailed machining skills.
Empty front sight mount in barrel shroud
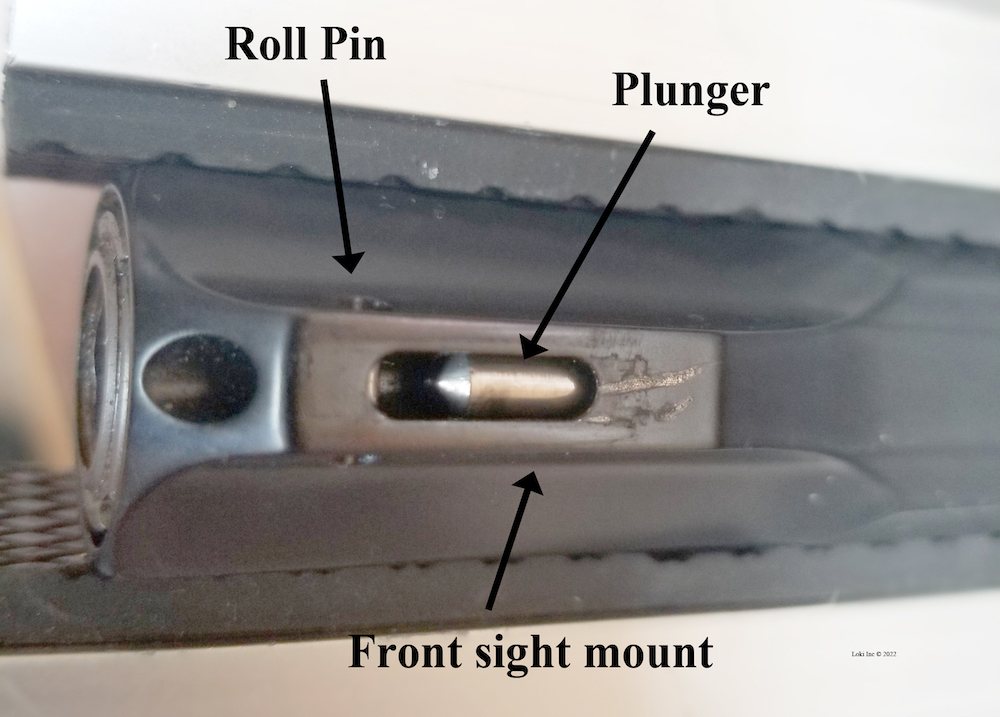
Front sight mount
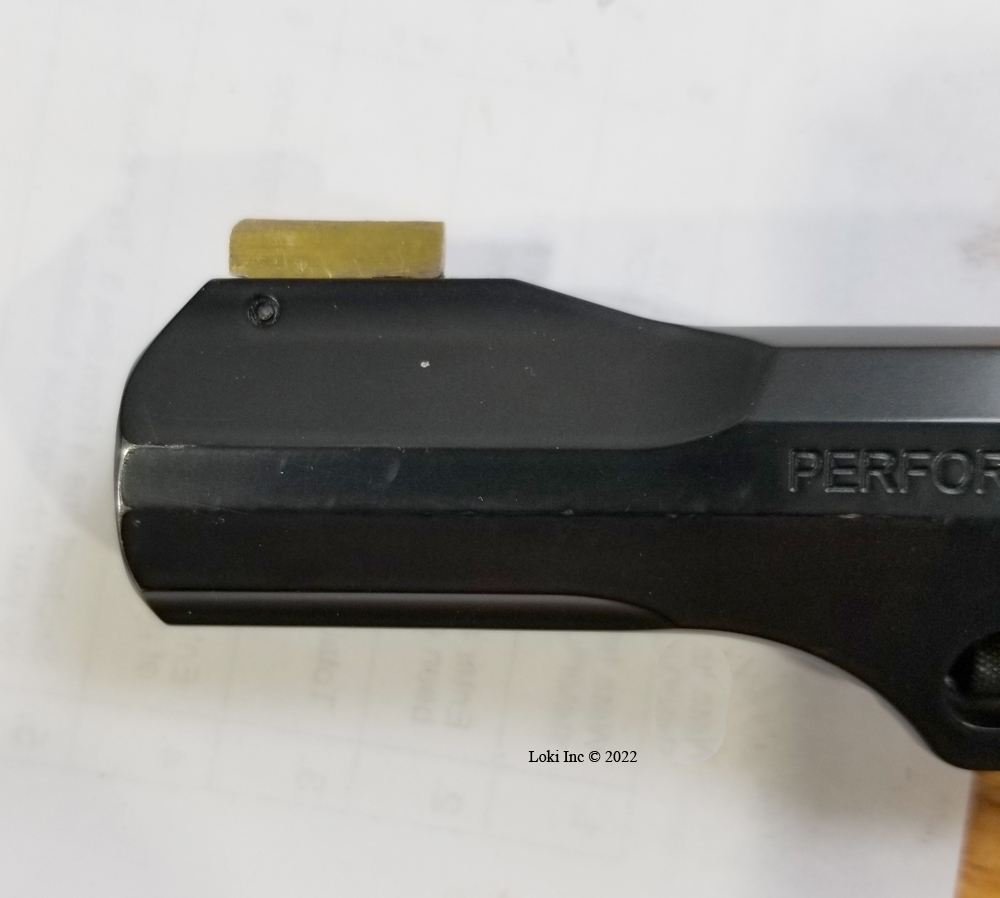
The front sight mount in the revolver’s barrel shroud has a small roll pin in the front and a spring-loaded plunger in the rear, and the blade has corresponding notches to engage the pin and the plunger.
Measuring the dimensions for the base portion of the sight (the part that would fit into the front sight mount in the barrel shroud) was easy using a caliper; I paid close attention to the dimensions so I could get the front and rear lower angles right. If these front and rear angles aren’t correct where the sight hooks under the front roll pin and where it hooks under the plunger, the sight won’t stay engaged in the sight mount.
I used my metal cutting band saw to cut a rough representation of the sight shape from the brass strip, and then I used a small end mill in the mini-mill to finish shaping the sight blade.

Scrap brass after sight blade cut out
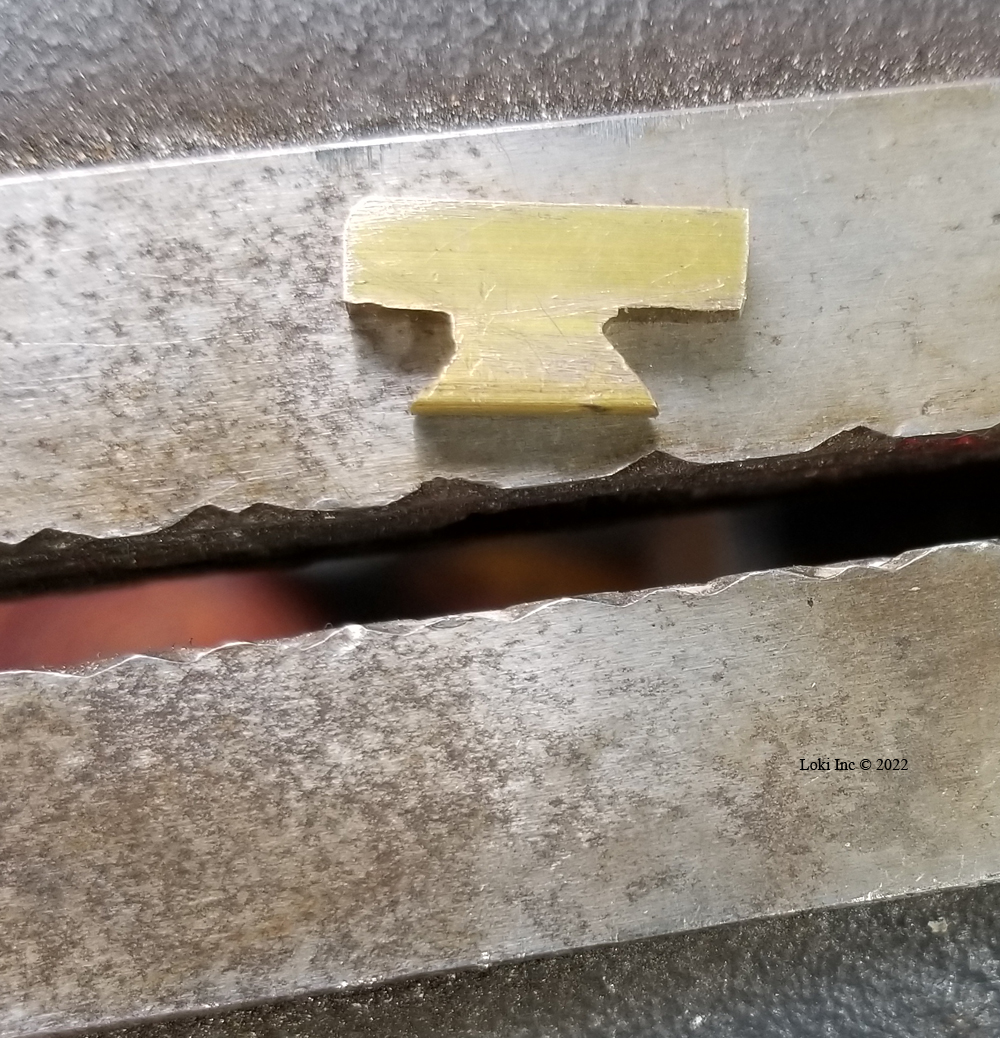
New front sight blade rough cut
Front sight blade shape
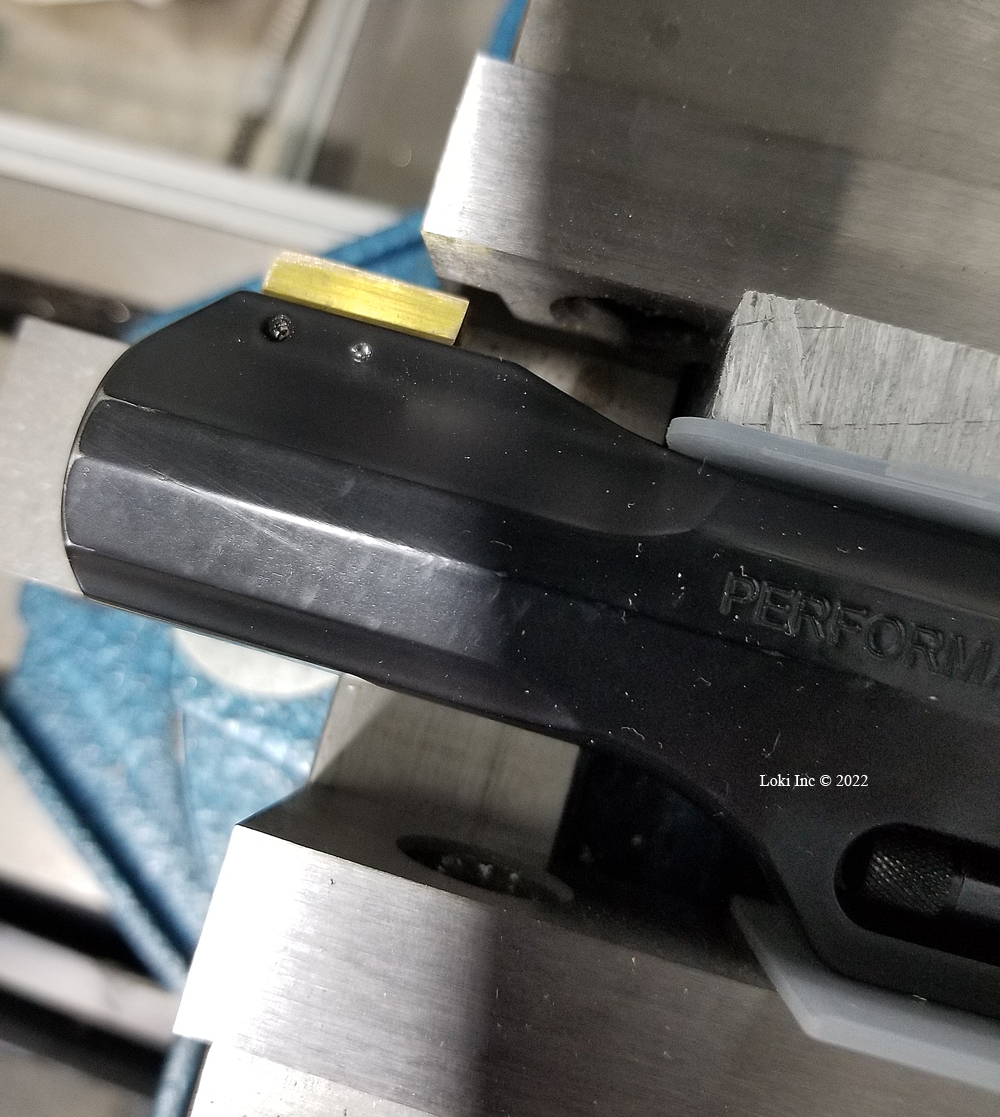
I wanted the new sight blade to have an interference fit within the revolver’s front sight mount in the barrel shroud, but the blade was a bit thinner than I liked and rocked back-and-forth when I inserted it into the mount. So, I used a center punch to peen both sides of the blade that would be buried in the mount, until the blade had a press-fit and wouldn’t wobble back and forth.
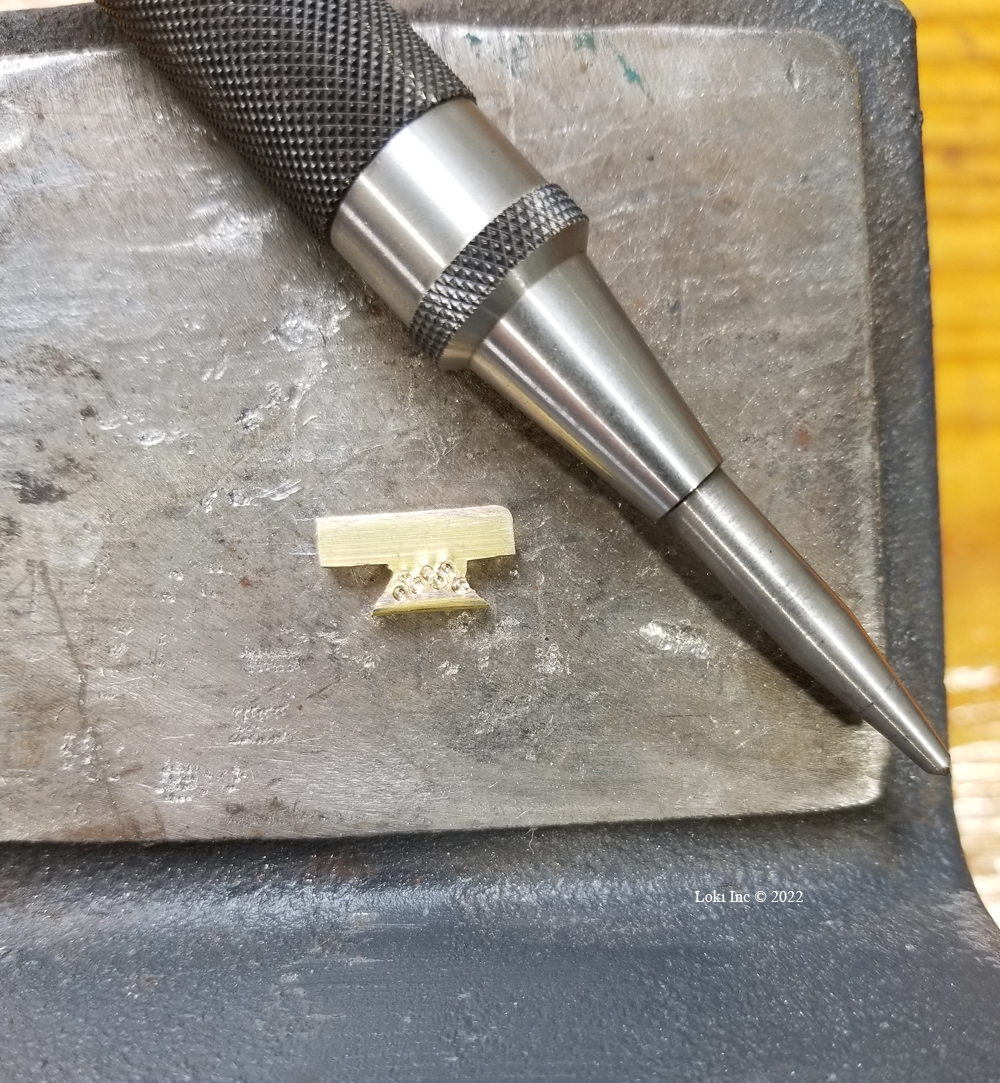
New front sight blade after peening
Front sight blade fitted to barrel shroud
At that point, I decided to put a small roll pin in the rear portion of the sight, inserted through the sight mount. After choosing a roll pin that would be about the same size as the factory pin in the front portion of the sight mount, with my new front sight in the mount, I used a center drill in my mini-mill and started the pin hole.
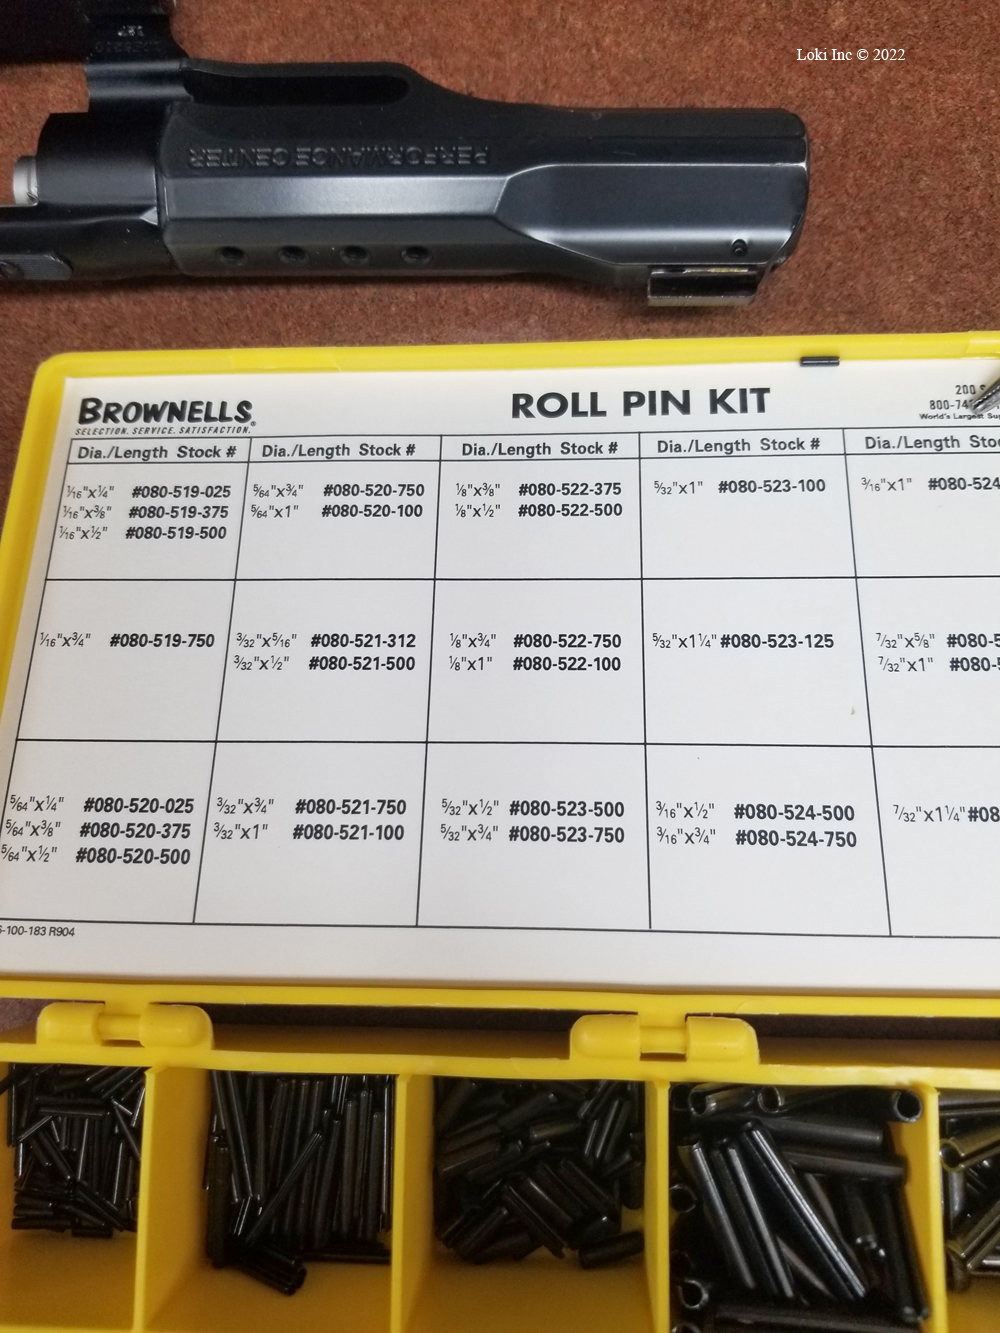
Roll pin kit
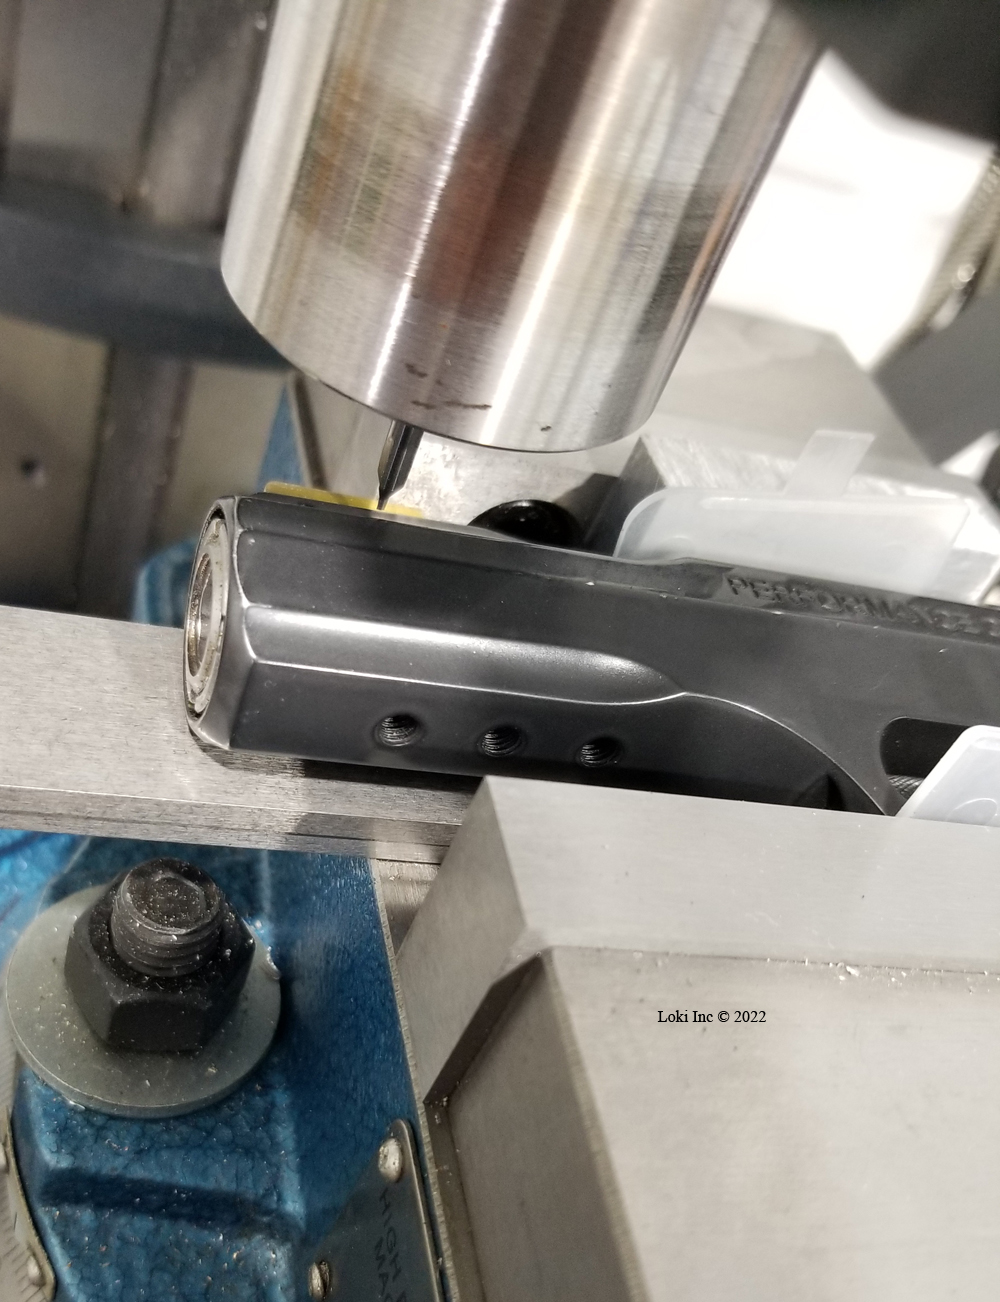
Preparing to center drill hole in front sight mount for retaining pin
Front sight mount center drilled for retaining pin
Then, using the correct sized twist drill for the roll pin, I drilled the hole all the way through the sight mount and sight, and deburred the hole edges. I used the calipers to measure the correct length for the roll pin, from one side of the mount to the other at the hole openings, and then used a small cutoff wheel in a Dremel rotary cutting tool to cut the pin to that length.
After that, it was simple to insert the roll pin into the hole and tap it into place with a small roll pin punch.
New front sight blade after black nail polish application
A little bit of my wife’s surplus black nail polish worked to cover the edges of the roll pin hole where the bare aluminum of the mount showed, as well as to paint the new front sight. I keep the nail polish bottle handy in case I need to touch-up the sight when it wears from drawing and holstering the gun.
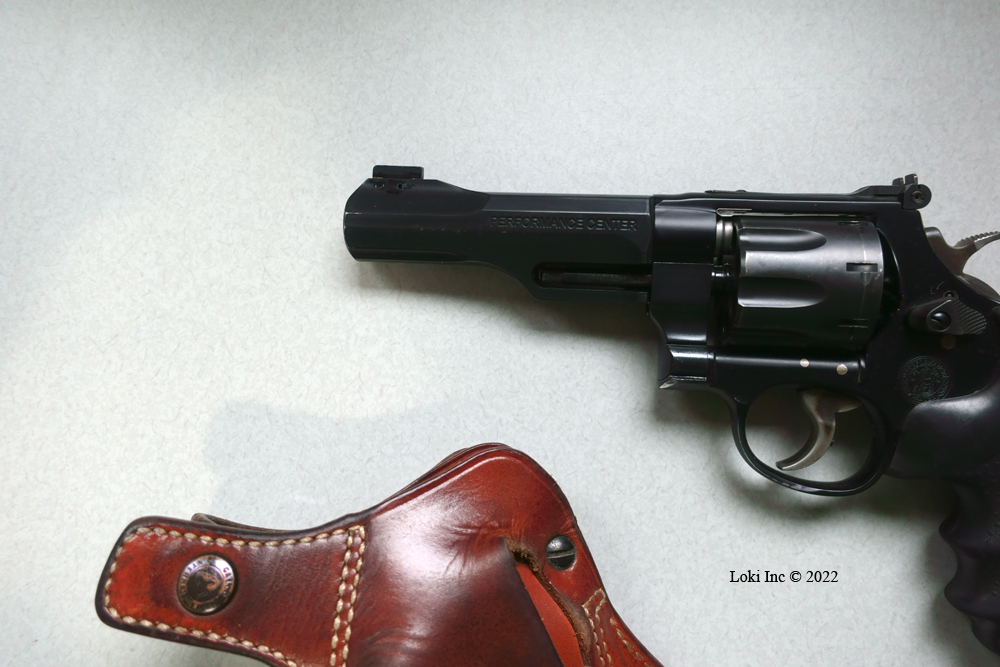
Finished product new TRR8 front sight
Since I completed the project, I’ve used the gun quite a bit and am very happy with it and the sight has never loosened or come off the gun, to the chagrin of many armadillos.
How to Mount an Aimpoint Red Dot on a Henry .450 Bushmaster Rifle
As a sponsor member of our local National Wild Turkey Federation chapter, Loki Incorporated gets a chance at winning a firearm at yearly fundraising banquets. At last year’s (2022) event, Loki won a Henry single-shot rifle in .450 Bushmaster caliber. This was a new caliber to me; I had heard of it as a cartridge for AR15-type Modern Sporting Rifles (MSRs), designed to fit within the magazine well size of those guns. I knew the creation of the cartridge had something to do with certain states’ restrictions against using bottlenecked cartridges for hunting large game. I hadn’t investigated it further, because I’m fortunate to live in a state with no such bullshit restrictions.
So, my investigation of the .450 Bushmaster caliber started serendipitously with winning a rifle chambered in it. It turns-out the .450 is nearly the ballistic equivalent of the legendary .45-70 in modern loadings, with all other factors (barrel length and bullet weight, mainly) being equal. The .450 was initially loaded by Hornady, adapting previous attempts to create a large diameter “Thumper” (the late Col. Jeff Cooper’s term) cartridge pushing a heavy bullet capable of whacking enemies or big game at relatively close range from a compact firearm. The concept is sorta like a .45-70, but the round works in an MSR. Hornady’s adaptation was successful, and now several different arms manufacturers sell not only MSRs, but conventional guns too, in .450 Bushmaster.
The .450 has a rebated-rim “straight-walled” case; it’s actually slightly tapered, enough to make feeding into the gun’s chamber easier than for a truly straight-walled case. The case has no distinct neck, though, making it acceptable to the drones who came up with the bottlenecked cartridge restrictions and demonstrating their ignorance of the terminal performance of small arms.
Why would I mess with a close-range, single-shot rifle in a “Thumper” caliber when I live and typically hunt in a state that has no bottleneck cartridge restrictions? Well, my deer hunting can be over open fields where high velocity .30 caliber arms excel or in hilly and thick cover where a short, handy gun capable of thumping a deer (or opponent) at face-to-face ranges would be useful. I thought it would be interesting to see if the Henry rifle would fit that role.
Henry .450 Bushmaster Rifle
The Henry .450 Bushmaster is only 37.5 inches long, but has a 22-inch barrel. The barrel isn’t threaded, so you cannot attach a muzzle device without gunsmithing. The gun is a lightweight, tipping the scales at about 6-¾ pounds, so it thumps at both ends when fired. Tiger-striped matte finished walnut furniture embellished with swivel studs complements the dark blued barrel and matte black receiver. The gun came with a brass bead front sight and a folding leaf rear adjustable sight, and was drilled and tapped for a Weaver 82 scope mount.
If my old eyes could accommodate the iron sights, I would have left the gun alone because I wanted to use it at short ranges for quick shots. But, that feat is getting more difficult for me each year, so I decided to mount a red dot sight on the rifle. I wanted a sight that was robust and wouldn’t easily hang-up on brush, and would allow me to quickly aim at my target with both eyes open. My choice was the Aimpoint Micro H-2 with a 2 MOA dot. This sight mounts to a “Picatinny” rail, and my measurements of my eye high above the rifle bore indicated the combination of sight and rail would center the red dot in my line-of-sight when I shouldered the rifle. Perfect! Now to mount the sight.
How to Mount an Aimpoint Red Dot Sight
I did a search online for a Weaver 82 compatible rail, as Henry didn’t offer any to fit the H015 rifle series my rifle belonged to, and immediately found several sites that sell them. The only problem was that no one sold a shortie version – the rear sight on my rifle is so close to the scope mount holes above the chamber that I would have to remove the sight to install a standard length base.
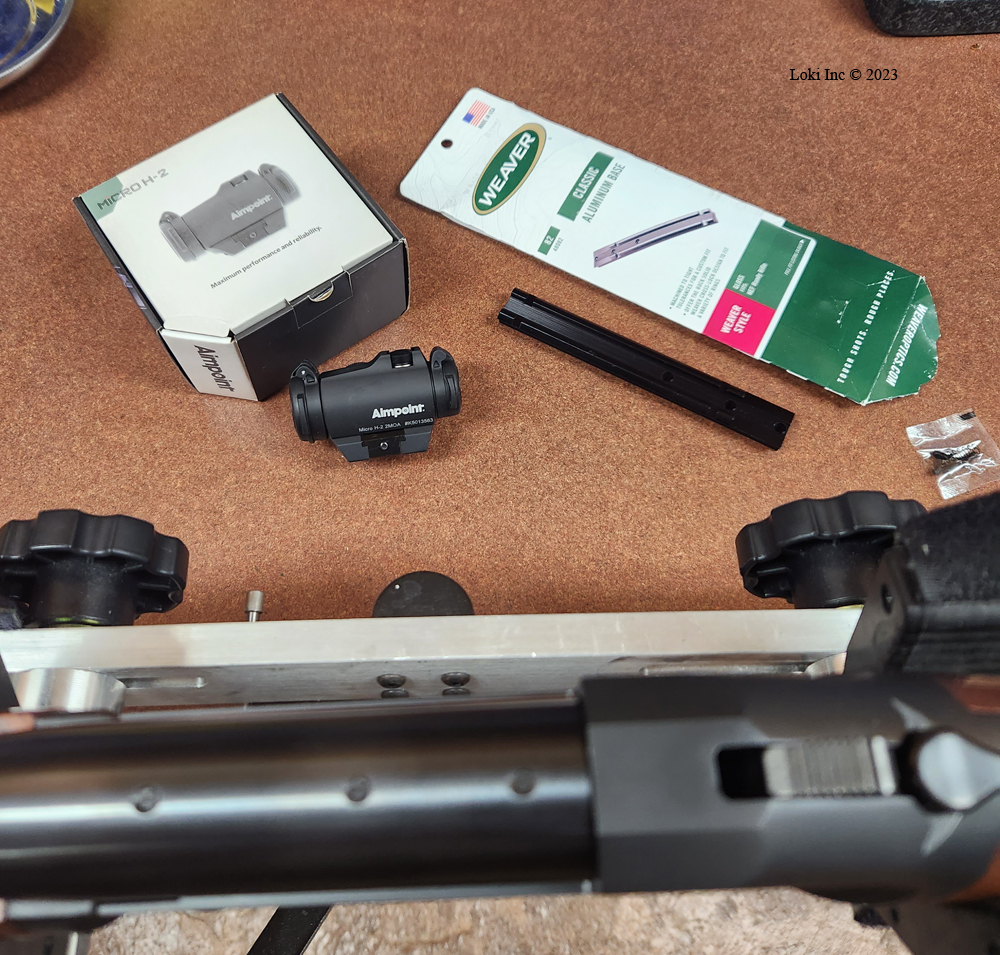
View of Rifle, Micro H-2 and Base
Also, as you can see from the photo even if I removed the rear sight or machined the rail to fit over the sight, the short chamber contour of the rifle would have require cantilevering the rail over most of its length. Bad Juju.
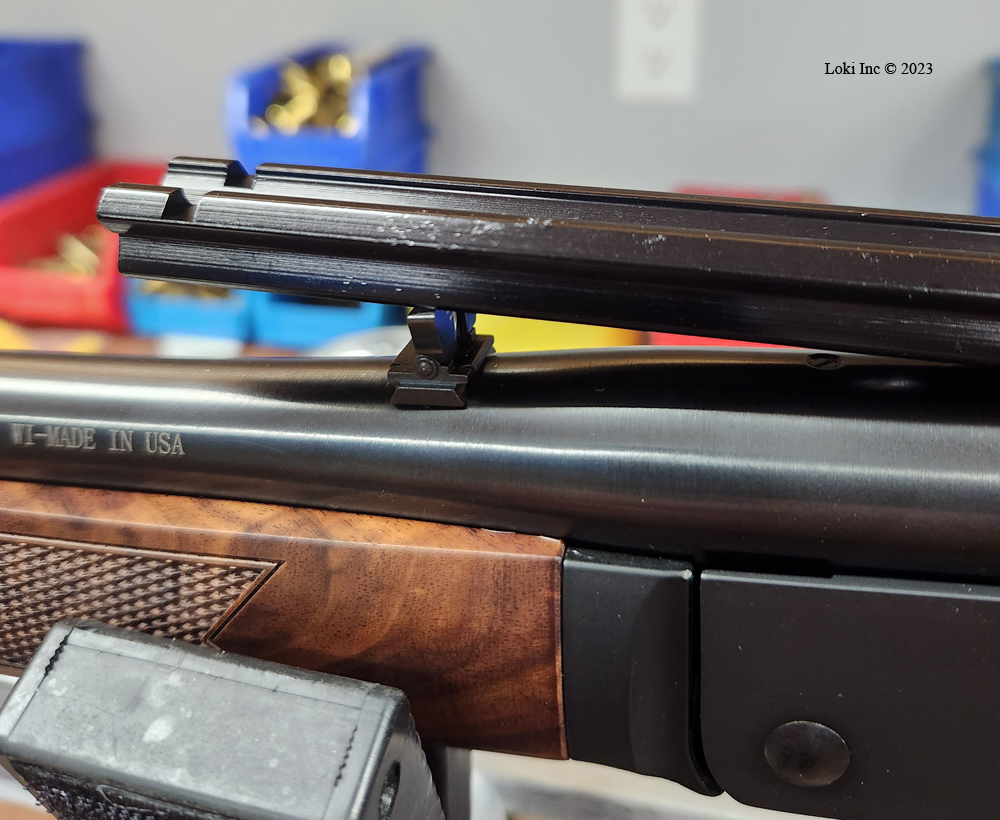
Rear Sight and Base
So, I mounted my optic on the rail and then checked how long the rail would have to be to include all three mounting screw holes and be well short of interfering with the gun’s rear sight.
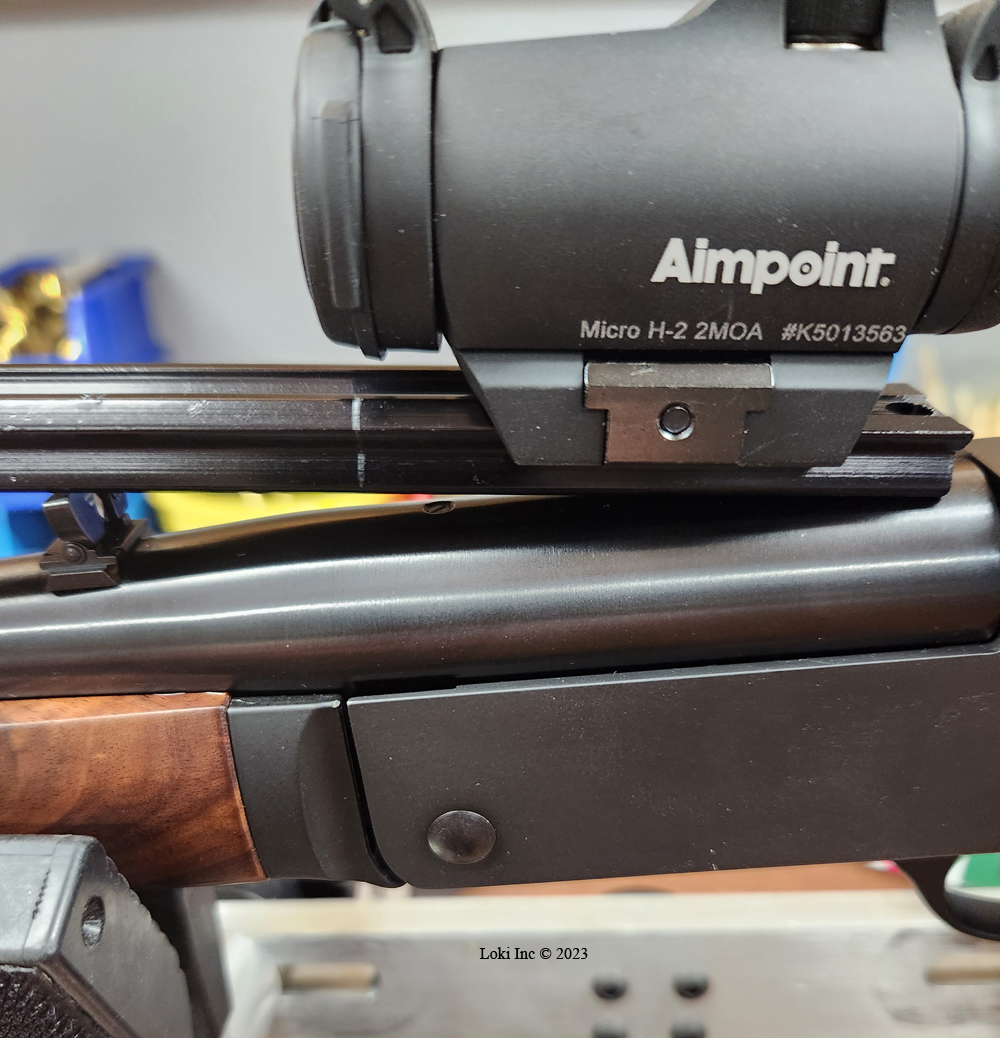
Checking Rail Length
Once I determined and marked on the rail the length I wanted, I clamped it in my horizontal bandsaw and cut it off.
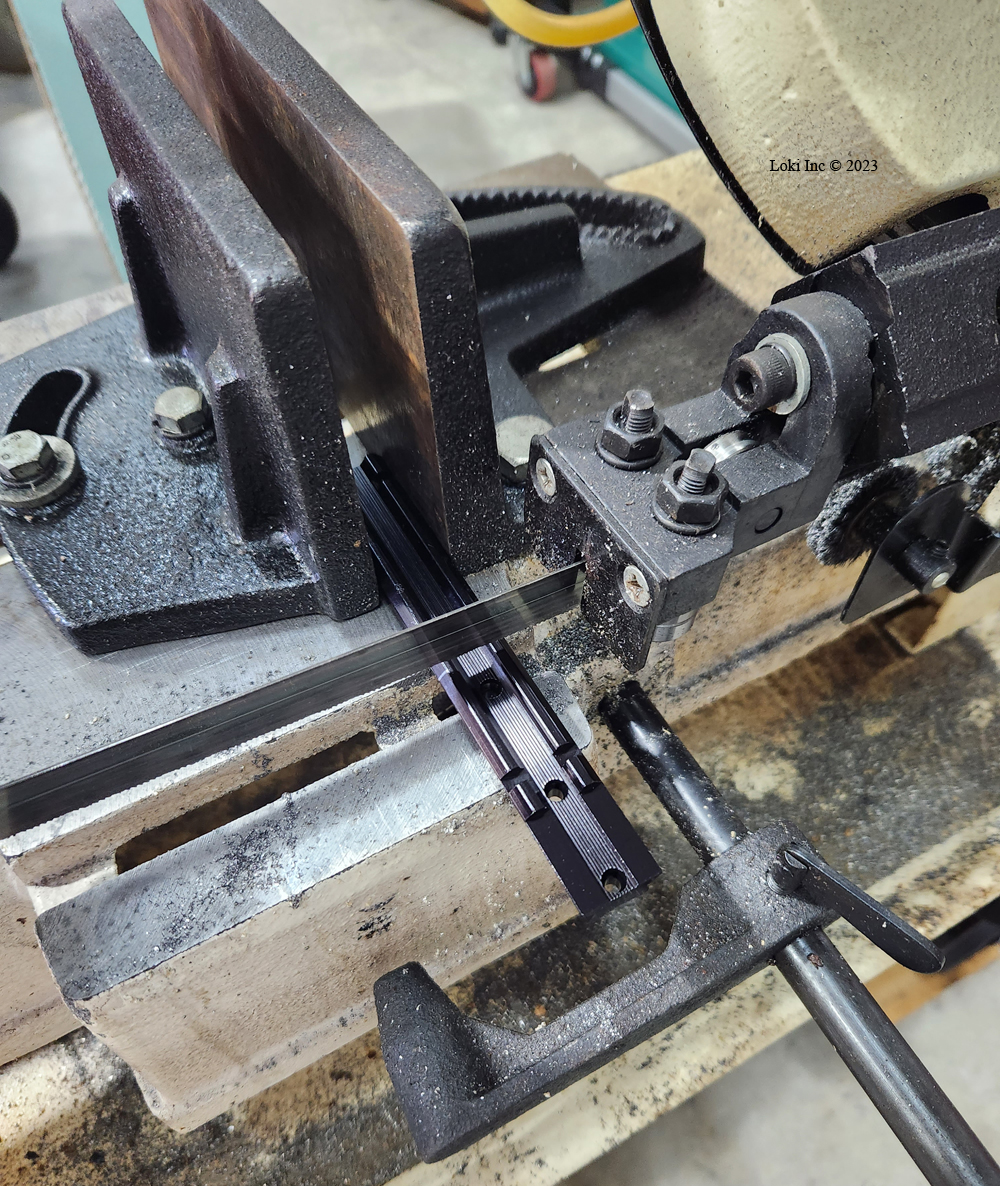
Cutting the Rail
Then, using some scrap cardboard in my machinist’s vise, I clamped the piece I intended to install on the rifle in the vise and smoothed the cut edges with files.

Filing the Rail
After cleaning the filed end of the rail, I used some aluminum blackening finish to “paint” the cut end of the rail.
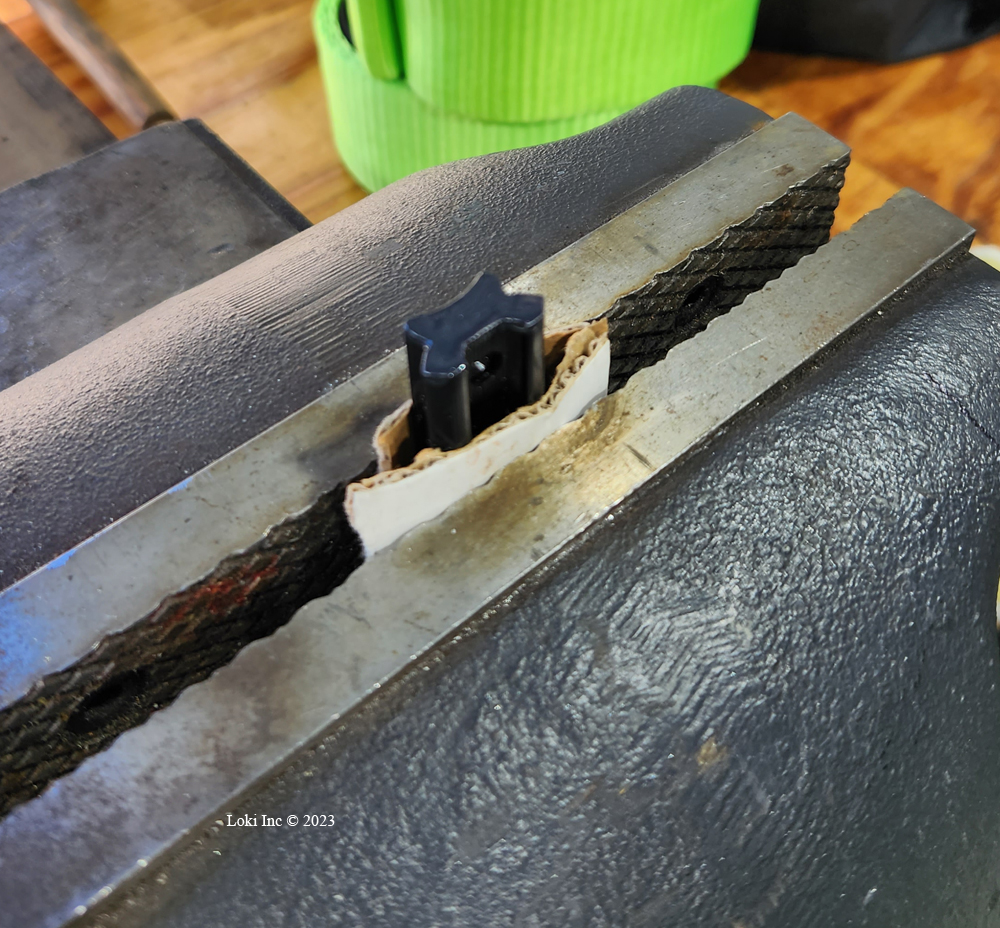
Blackening the Rail
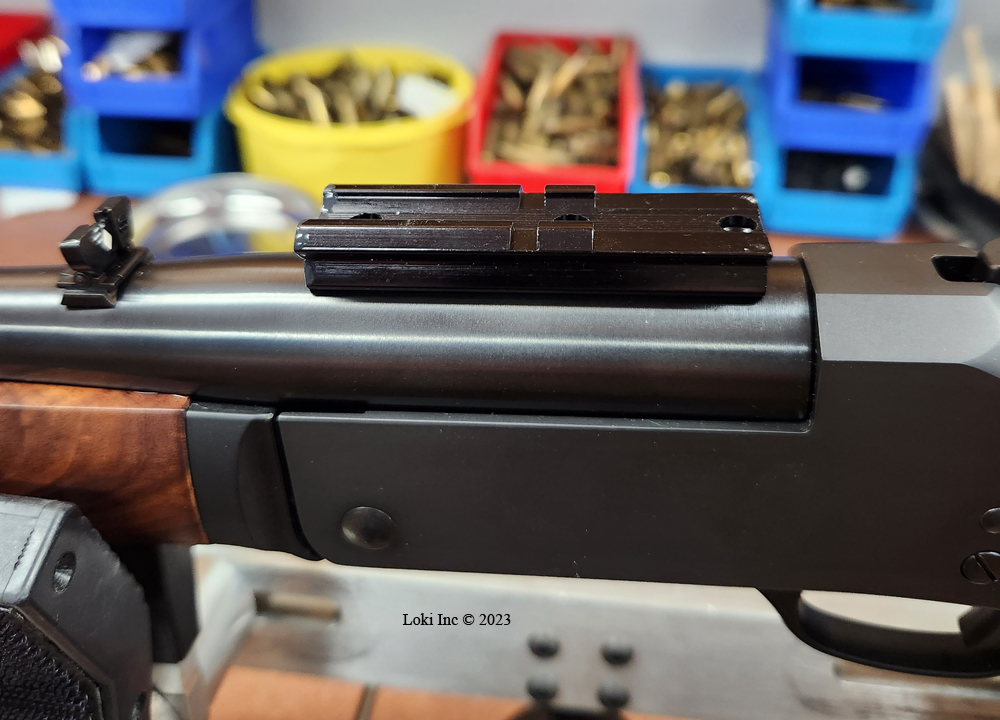
Fit Check
After a fit check to ensure the mount interfaced properly with the rifle and the mounting holes in the rail aligned with the ones in the gun, I degreased the scope mount holes on the rifle with carburetor cleaner.
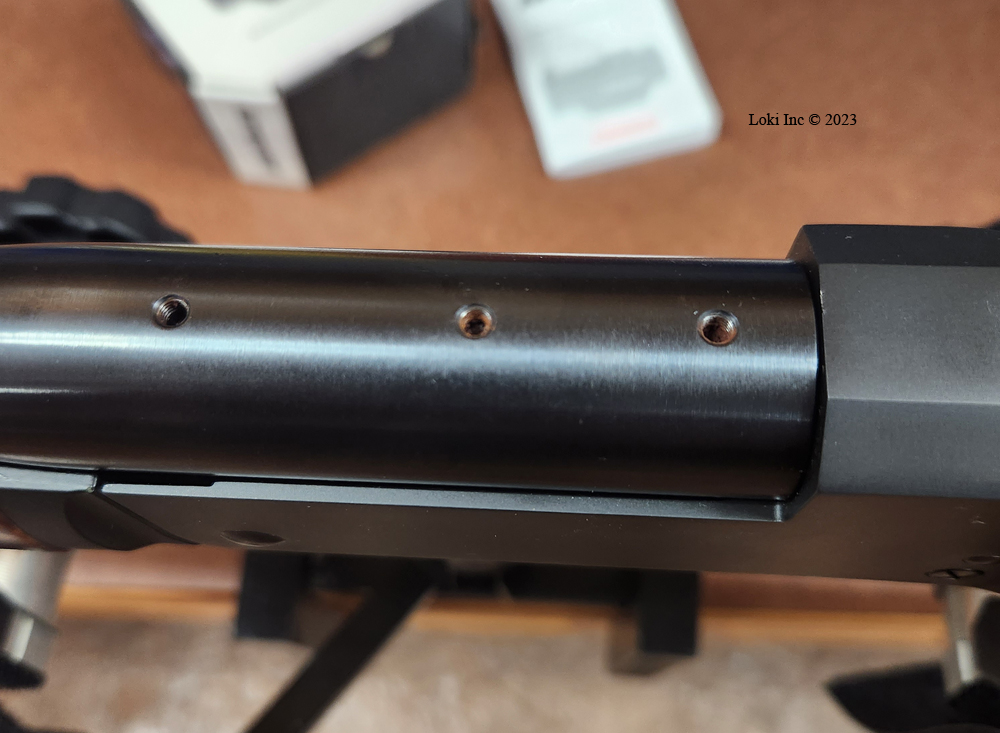
Scope Mount Holes
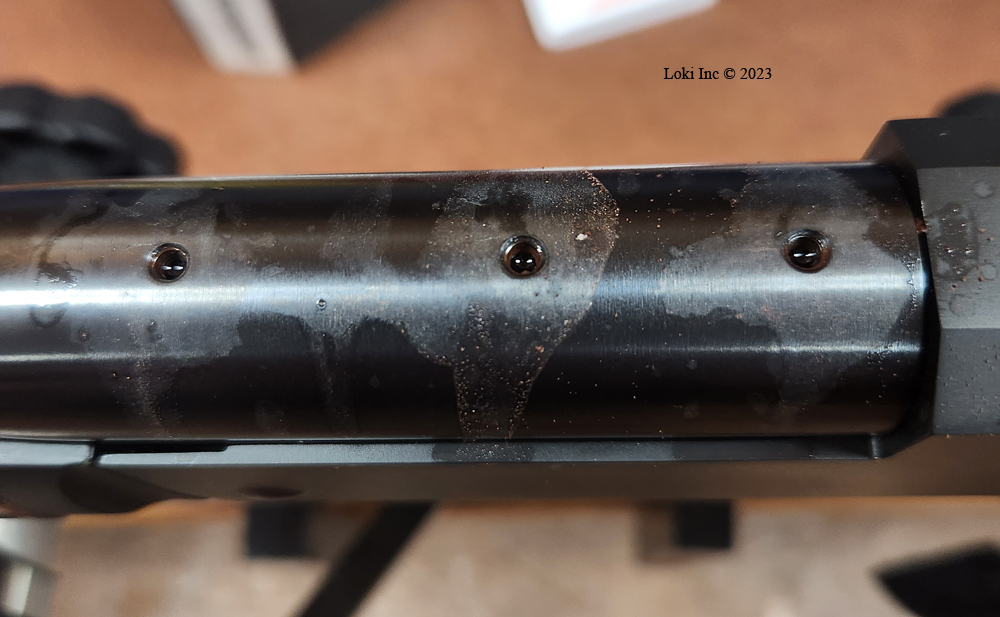
Mounting Holes Degreased
If you use a solvent that produces hazardous vapors to degrease the holes, be sure to work in a well-ventilated and flame/spark-free environment. Also, if your solvent is in a spray can be sure to wear safety glasses to defend your eyes from spray kick-back, and use an apron to protect your clothing when you are spraying the stuff. After letting it work for a few seconds, use a cotton swab to soak up any degreaser that may have settled into the mounting holes.
Since the mounting screws that came with the rail had slotted heads, instead of hex or torx heads made for higher torque attachment, I used blue thread sealant in the mounting holes to secure the mounting screws.
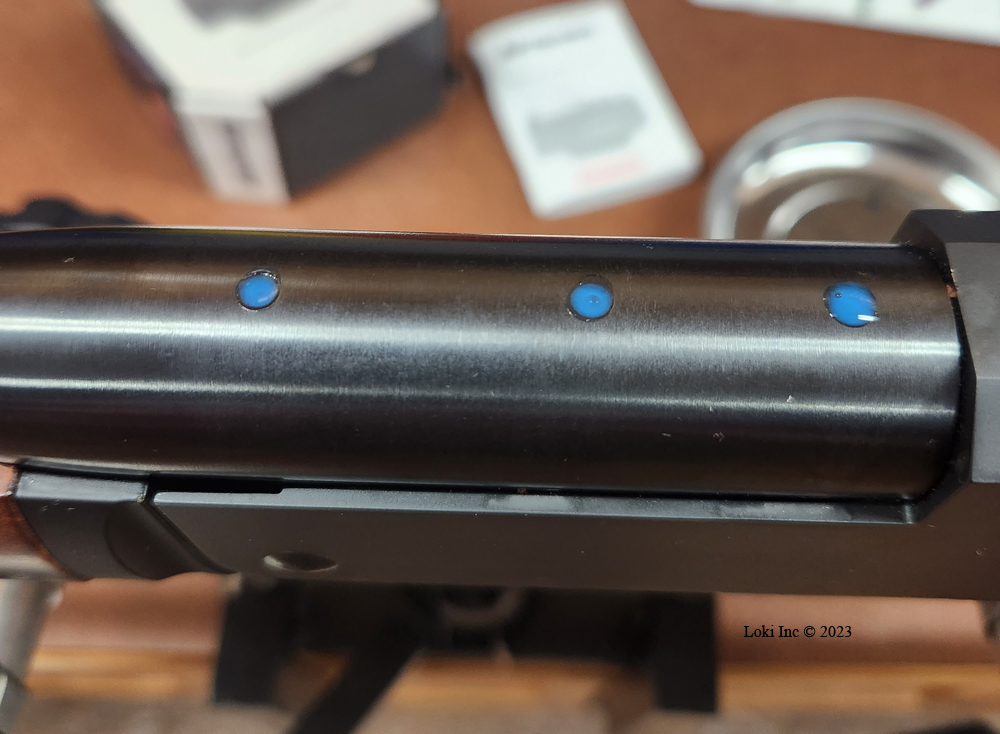
Thread Sealant in Mounting Holes
Then, before the sealant could set-up, using a small torque wrench set to the rail manufacturer’s recommended level I installed the mounting screws through the rail into the mounting holes in the rifle.
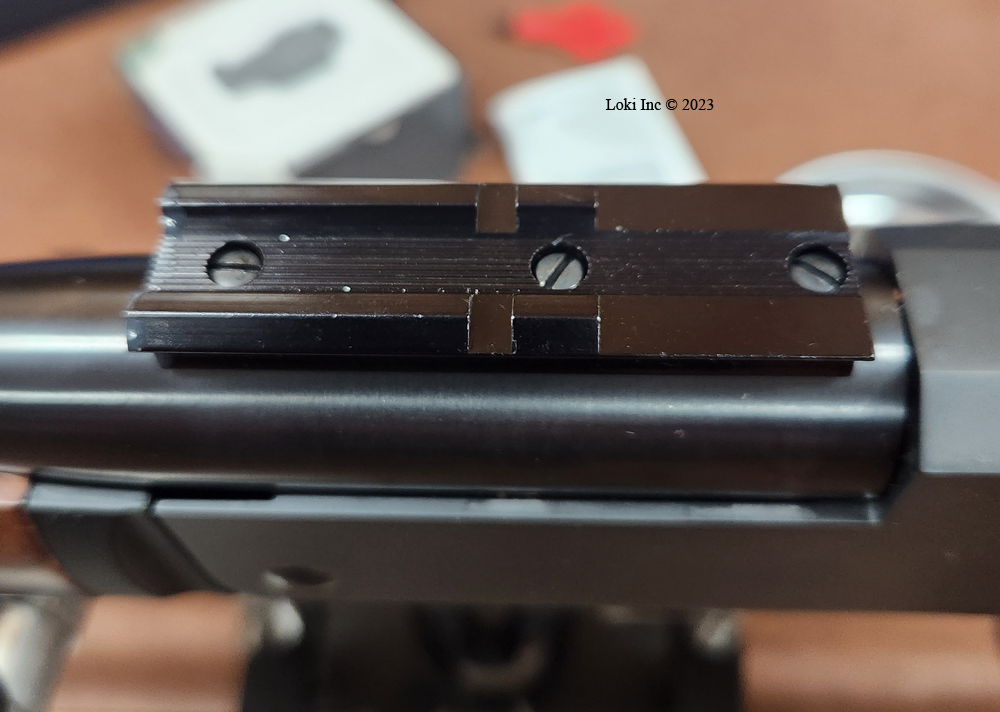
Rail Attached
All that was left to do in the sight mounting process was to attach the Micro H-2 to the rail, using my small torque wrench to turn the sight mounting screw to the manufacturer’s recommended level.
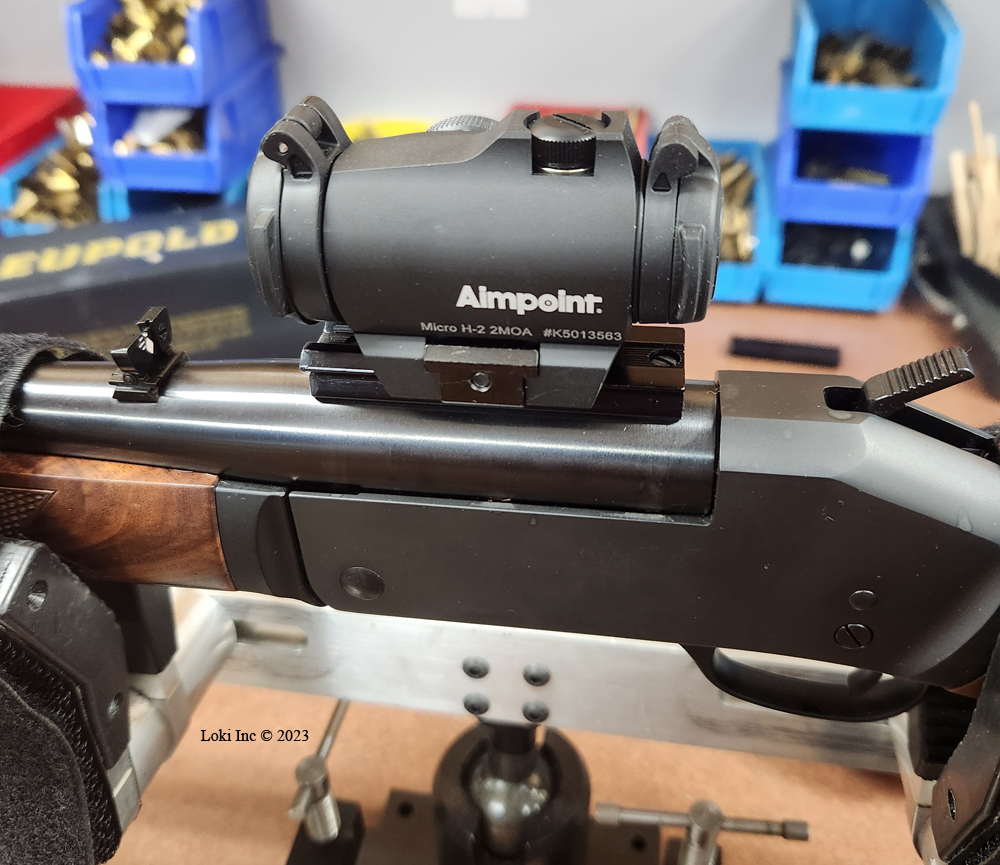
H-2 Mounted on the Rifle
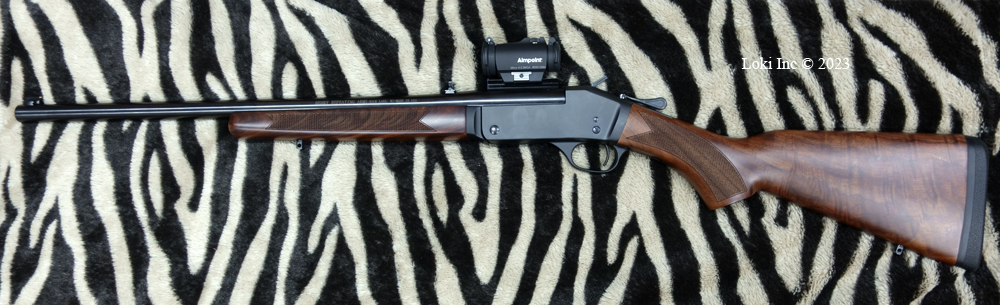
Henry .450 Bushmaster Rifle with Aimpoint Micro H-2
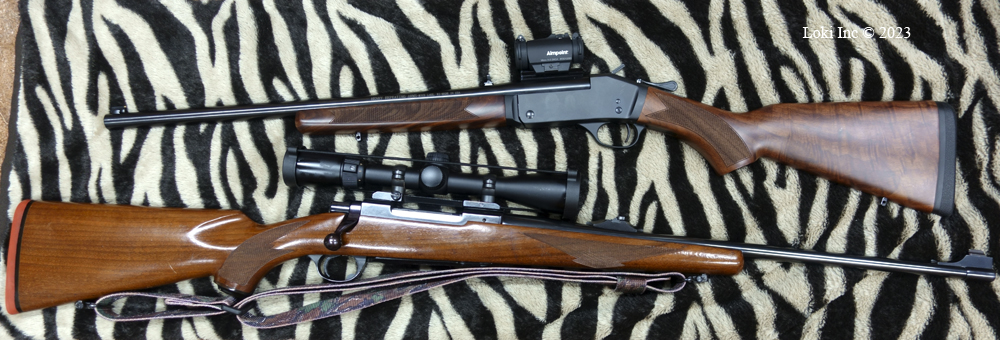
Henry and Ruger Rifles
For comparison purposes, I took a photo of the Henry rifle alongside my favorite deer rifle, a Ruger M77 Mk1, and a photo of their respective fodders.
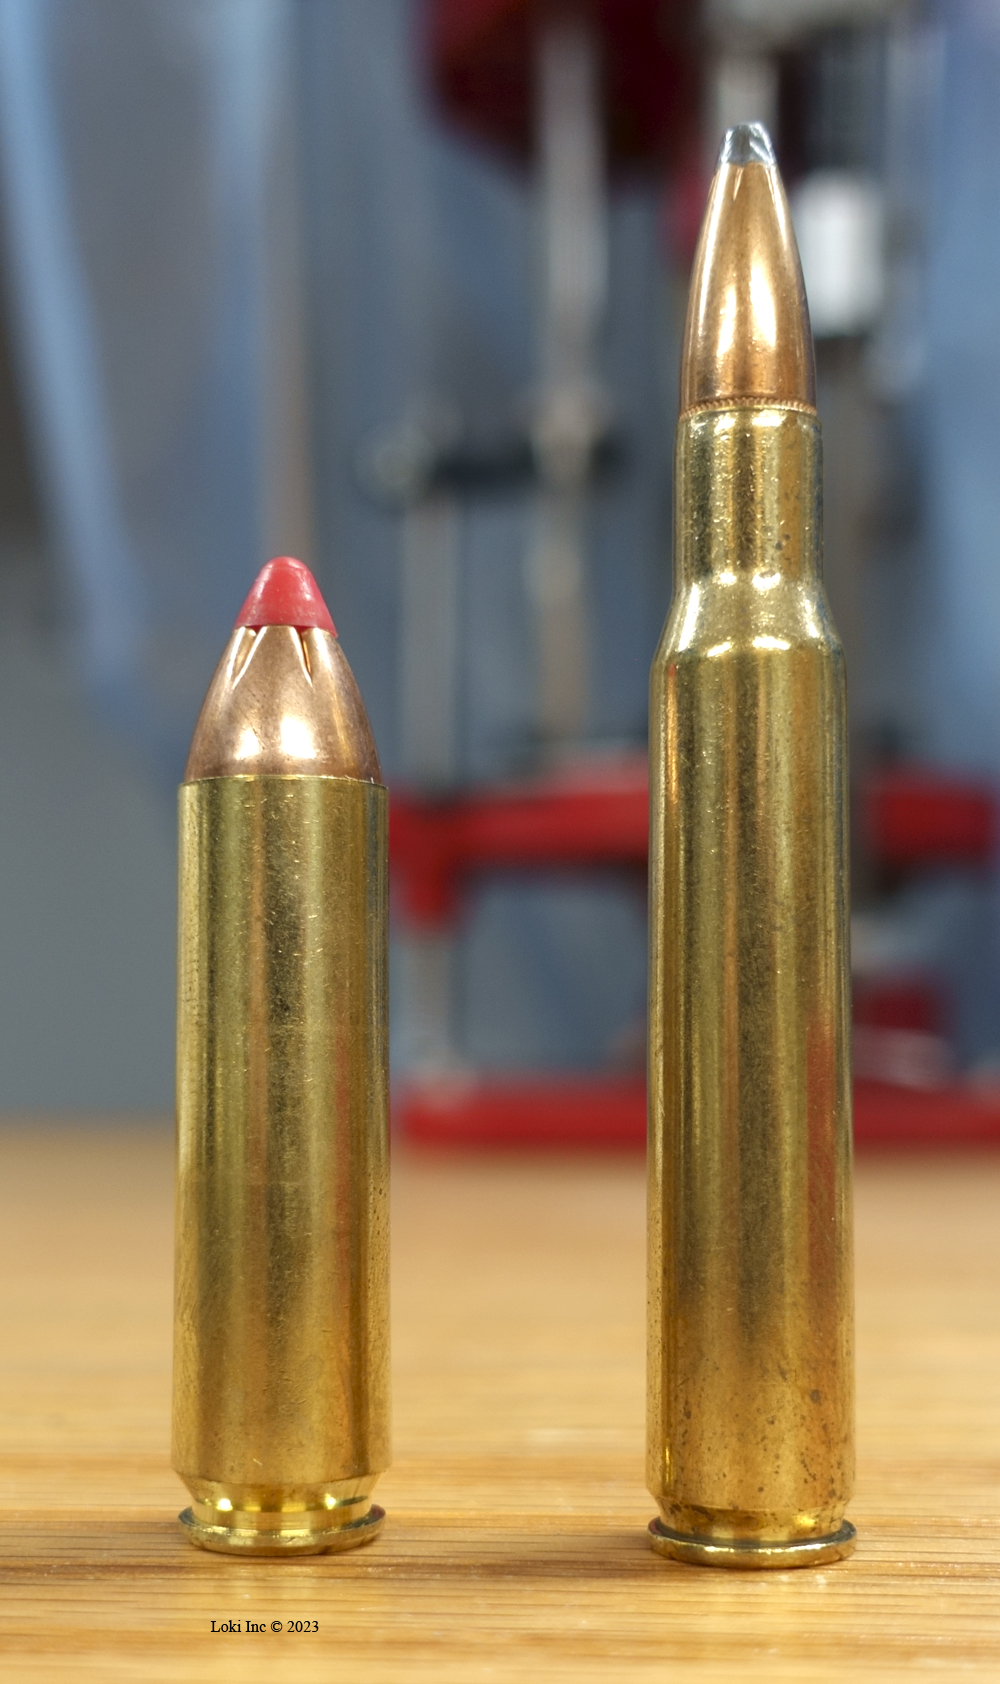
.450 Bushmaster on Left, .30-’06 on Right
The Ruger is longer and heavier than the Henry, and the .30 caliber cartridge is longer than the .450. Notice the latter bullet has a larger diameter, and it is heavier by 100 grains (250 vs 150). The .30 caliber bullet leaves the gun muzzle at over 700 feet per second faster than the .450 and has about 250 foot-pounds greater kinetic energy because of its higher velocity (recall that Ek = 1/2 mV2, so energy increases faster with increasing velocity than it does with increasing mass). Even so, the shape of the Henry’s stock, and its lighter weight combined with shorter length, causes the muzzle to rise more when I shoot it offhand than the rise of the .30-’06.
Now, the fun began! I got ready to take the rifle out to the range to test it, with the only commercial ammo I could find at the time, Hornady Custom with 250-grain FTX bullets. As part of my range preparation, I looked at the particulars of this round. On the cartridge’s web page under Specifications, you’ll be able to compare each of the .450 Bushmaster cartridges that Hornady loads, and also view the data for each cartridge in Hornady’s Ballistic Calculator. I reproduced the results for the 250-grain FTX load, below.

Ballistic Calculator for .450 Bushmaster
Looking at the results, I see the big slug slowing down rapidly, becoming subsonic somewhere between 300 and 400 yards downrange. Given a 100 yard zero, the bullet stays within a point-blank range (a dinner plate sized impact zone) from the gun’s muzzle out to nearly 200 yards, where it drops almost nine inches and loses nearly half of its kinetic energy. That tells me that if I do my part, I can make killing shots on deer-sized targets to nearly 200 yards by merely holding the red dot on my desired impact point when I fire the rifle. Given my intended use of the gun, that is more than enough range.
At the range, the rifle and cartridge combo truly is a thumper! The felt recoil is on a par with a 12-gauge turkey shotgun firing 3-inch magnum shells.
Reworking a Savage Axis 6.5 Creedmoor Rifle
My original rifle for this project was a new Savage Axis rifle in 6.5 Creedmoor caliber that I won at a benefit banquet. I anticipated enjoying hours of shooting this new rifle, but quickly learned that it needed to have its rifle barrel reworked.
As per my usual process with a new rifle, I mounted a good scope on it, cleaned it, bore-sighted it, and shot it. I wasn’t happy with the groups I was getting, using two different loads from Hornady (140 grain ELD Match, and 147 grain ELD Match) and one handload with four different powder weights (140 grain ELD bullets, H4350 powder @ 38.1, 39.0, 40.0, and 40.9 grains). There wasn’t much difference among the group sizes of any of the loads; the groups were twice as big as those fired from my S&W M&P 10 in 6.5 Creedmoor, and I knew a good bolt-action rifle should be able to shoot at least as well as an AR-type rifle.
I was not happy about the so-so group sizes, and after examining everything else I could think of as causative factors (action bedding, scope ring and mounting screw torques, etc.) I used my borescope to see if the problem was in the bore. The bore looked OK until I examined the last two inches or so of it at the muzzle of the barrel. There was severe corrosion pitting of the entire last two inches of the bore reminiscent of the entire original bore of a 1913 Spanish Mauser barrel I used to have that had been fired in its early days using ammo with corrosive primers.
Corrosion damage to rifling 1
Corrosion damage to rifling 2
Reworking a Savage Axis 6.5 Creedmoor Rifle
Therefore, if I wanted to improve the group size, at the very least I would have to either cut-off the damaged part of the barrel and re-crown it, or re-barrel the gun. I decided to re-barrel the gun, rather than lose ammo velocity by shortening the barrel. At the same time, I decided to improve the trigger pull consistency and weight.
After searching around the Internet for replacement 6.5 Creedmoor barrels, I decided to buy a varmint (heavy) contour barrel from E. Arthur Brown Company. I already had a Savage barrel locknut wrench, but I needed headspace gauges to properly install the barrel, so I also ordered a Forster No-Go gauge from eabco.net, and as eabco.net didn’t have any Field Gages in stock, I ordered one of those from Amazon.
As the Forster directions say:
“The “No-Go” Gauge is used to set your headspace when installing a new barrel. Forster gauges allow for a very close .004” headspace setting with the Forster NO-GO gauge. SAAMI spec allows up to .010”. So if your action closes on this gauge it doesn’t mean you have excess heads space. … Only that its more than the gauge allows. We recommend NO-GO gauge for setting the headspace on a bolt action barrel installation. … We recommend the closer fitting NO-GO gauge for installing a new barrel on a bolt gun.”
A Field gauge is for checking that the headspace is not too long, after setting it with the No-Go gage.
Because the new varmint barrel had a different contour than the original Axis barrel, and the original Axis gunstock was made of webbed plastic, there was no easy way for me to re-cut the barrel channel in the gunstock.
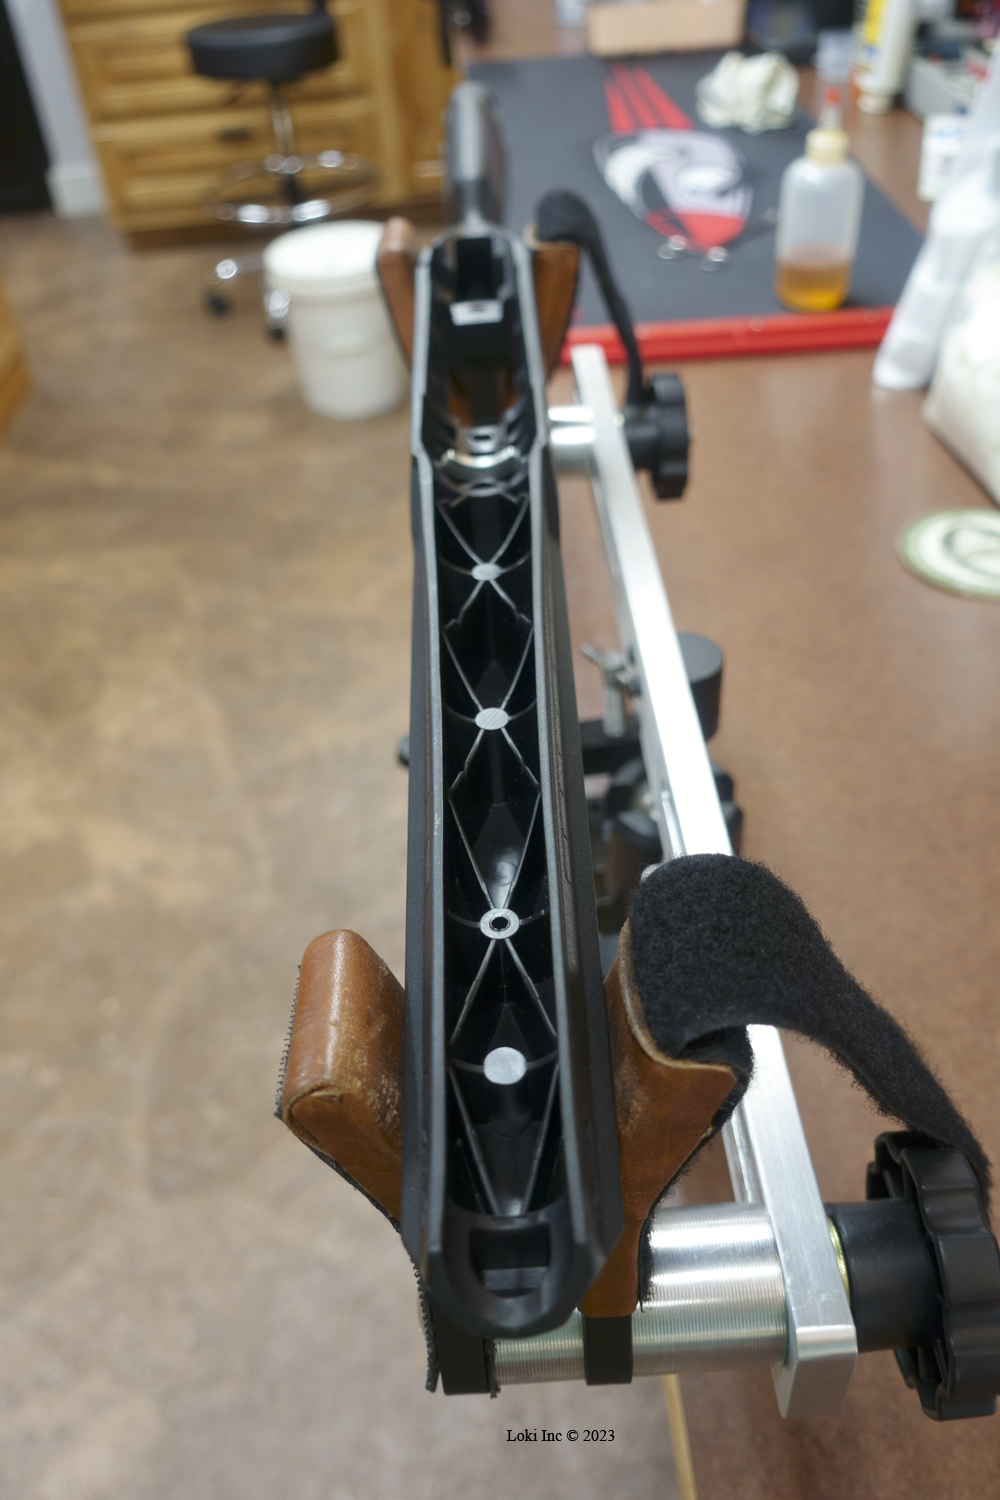
Barrel channel of original Savage rifle stock
Therefore, I needed a new gunstock. I spotted a Boyds Hardwood Pro Varmint gunstock on sale at Optics Planet that would fit my Axis with its new barrel, so I ordered it. I knew that it would take a bit of fitting to get the barrel channel relief I wanted, but I already had a set of barrel channel bedding tools that I could use for that task.
The receiver and chamber portion of the rifle fit well into the Boyds gunstock, but as I suspected I needed to cut some material out of the barrel channel to achieve a business card gap thickness between the barrel and the stock.
The stock came pillar bedded, and I may decide to glass bed the stock later after I shoot the reworked rifle, if I think it needs it.
I decided to improve the stock trigger on the Axis while I was doing all this other work on the rifle. What I did was similar to what the Hunting Gear Guy did, except that I already had a set of small gun springs and screws I could use. I recommend using springs specifically made for guns for the overtravel spring, and choosing the correct length instead of cutting coils off a longer spring. I also smoothed the mating surfaces (along the top) of the trigger sear – don’t try to do anything but slightly polish these surfaces, or you’ll make the trigger unsafe by taking off too much metal.
I wanted to mount a Leupold Mark 5HD scope on the rifle, and needed medium height rings to fit a 35 mm scope body diameter, so I purchased a set of Leupold Mark 4 rings for the project.
I assumed the scope base on the original Savage rifle was a Picatinny pattern rail, but when I checked the rings against it I was dismayed to find the rail slots were not in the Picatinny pattern; they were narrower and spaced differently than the slots on a Picatinny rail. I don’t know; they may have been Weaver pattern, but my rings wouldn’t fit in the slots.
So, I bought a Leupold Mark 4 one-piece base with a 20-MOA taper to fit a Savage 110 round receiver, after checking to make sure it would also fit the Axis receiver.
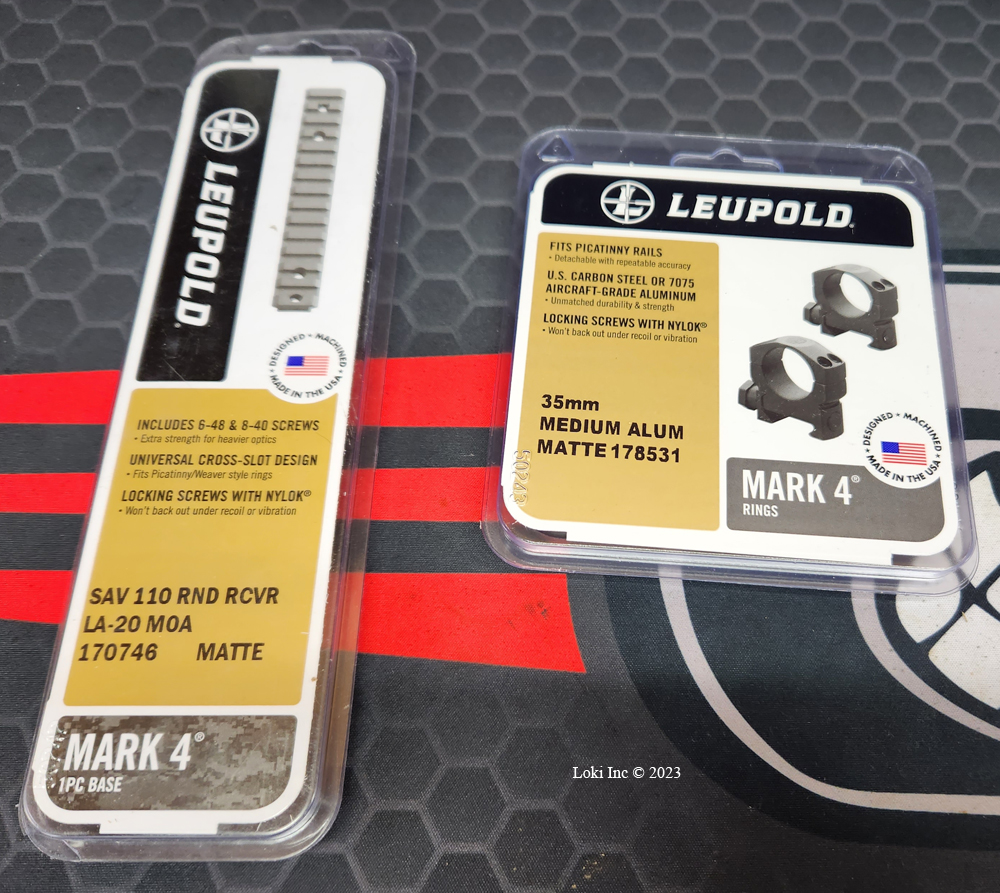
Scope base and ring set
Most of the aftermarket items made to fit the Savage 110 will also work on Axis receivers, but check before you invest in one. I removed the original Savage scope base rail, and cleaned the mounting holes with carburetor cleaner to degrease them. After letting the carb cleaner soak the mounting holes for a while, I used cotton swabs to absorb as much of the cleaner from the holes as possible, and then I blasted the holes with canned air to dry the remaining cleaner.
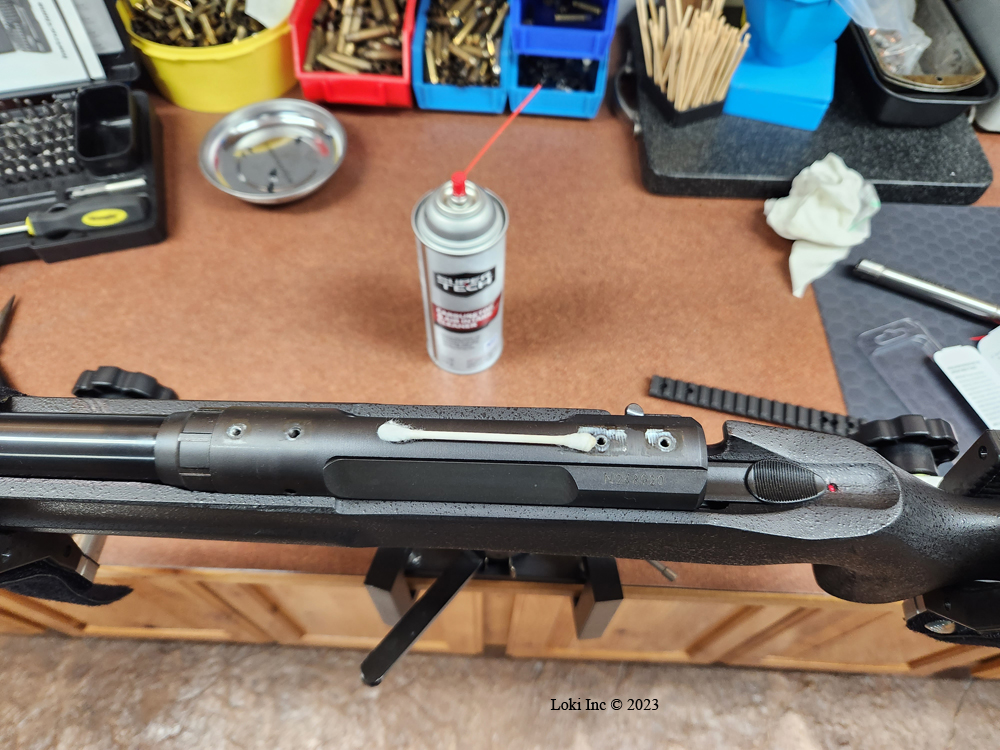
Degreasing receiver top and scope base mounting holes
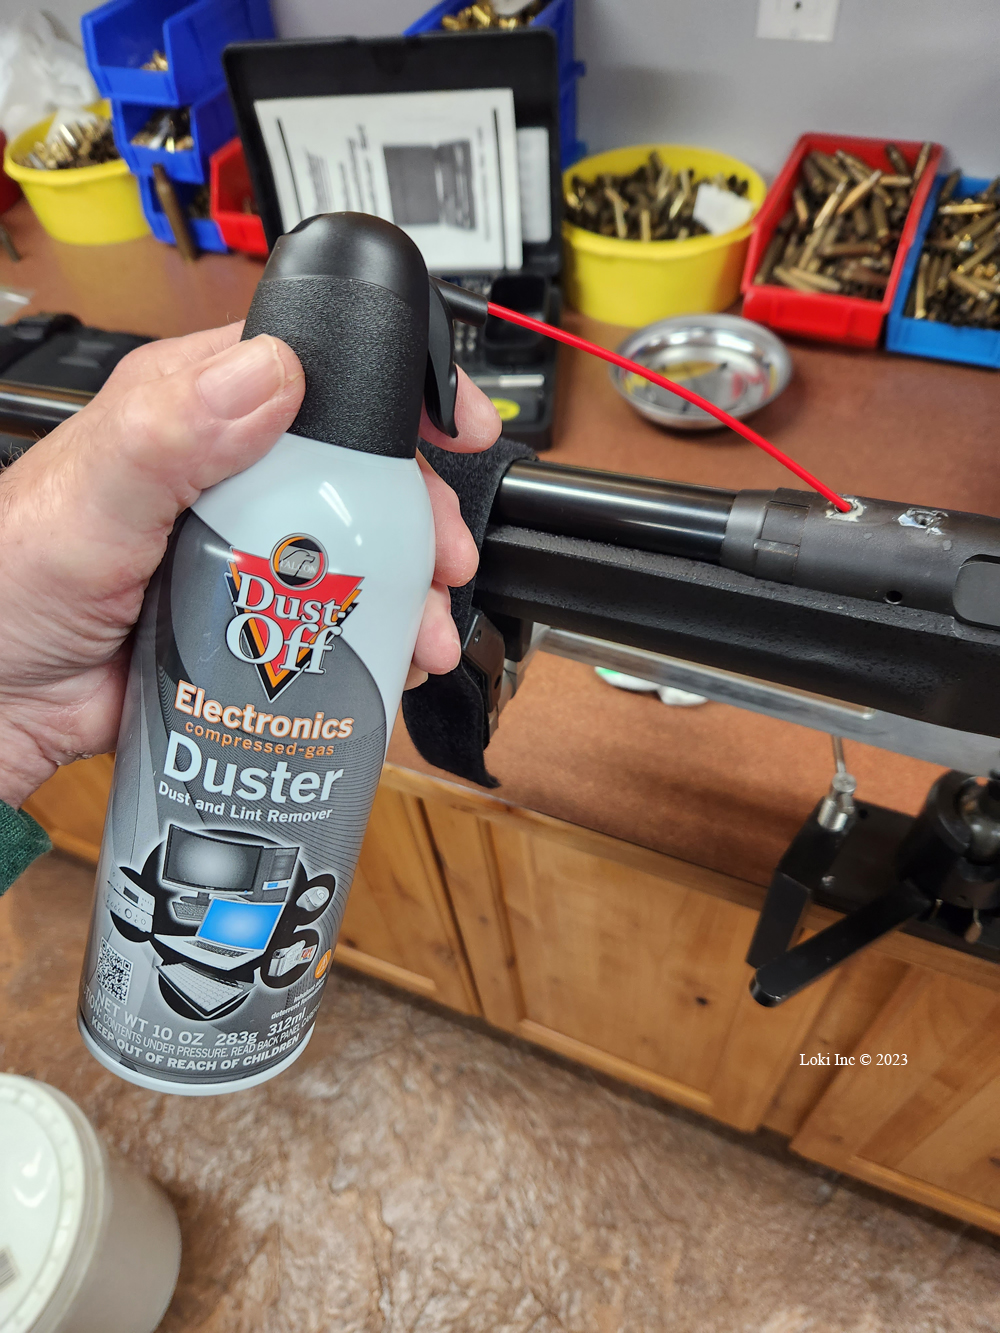
Drying degreaser out of mounting holes
The base came with both 6-48 and 8-40 screws. After pre-mounting the new Mark 4 base to make sure the screws would line-up with the receiver holes, and that the screws fit the holes, I used a torque wrench to secure the screws in the holes. The instructions that came with the base said to use 22 in-lbs for the 6-48 screws, and 28 in-lbs for the 8-40 screws.
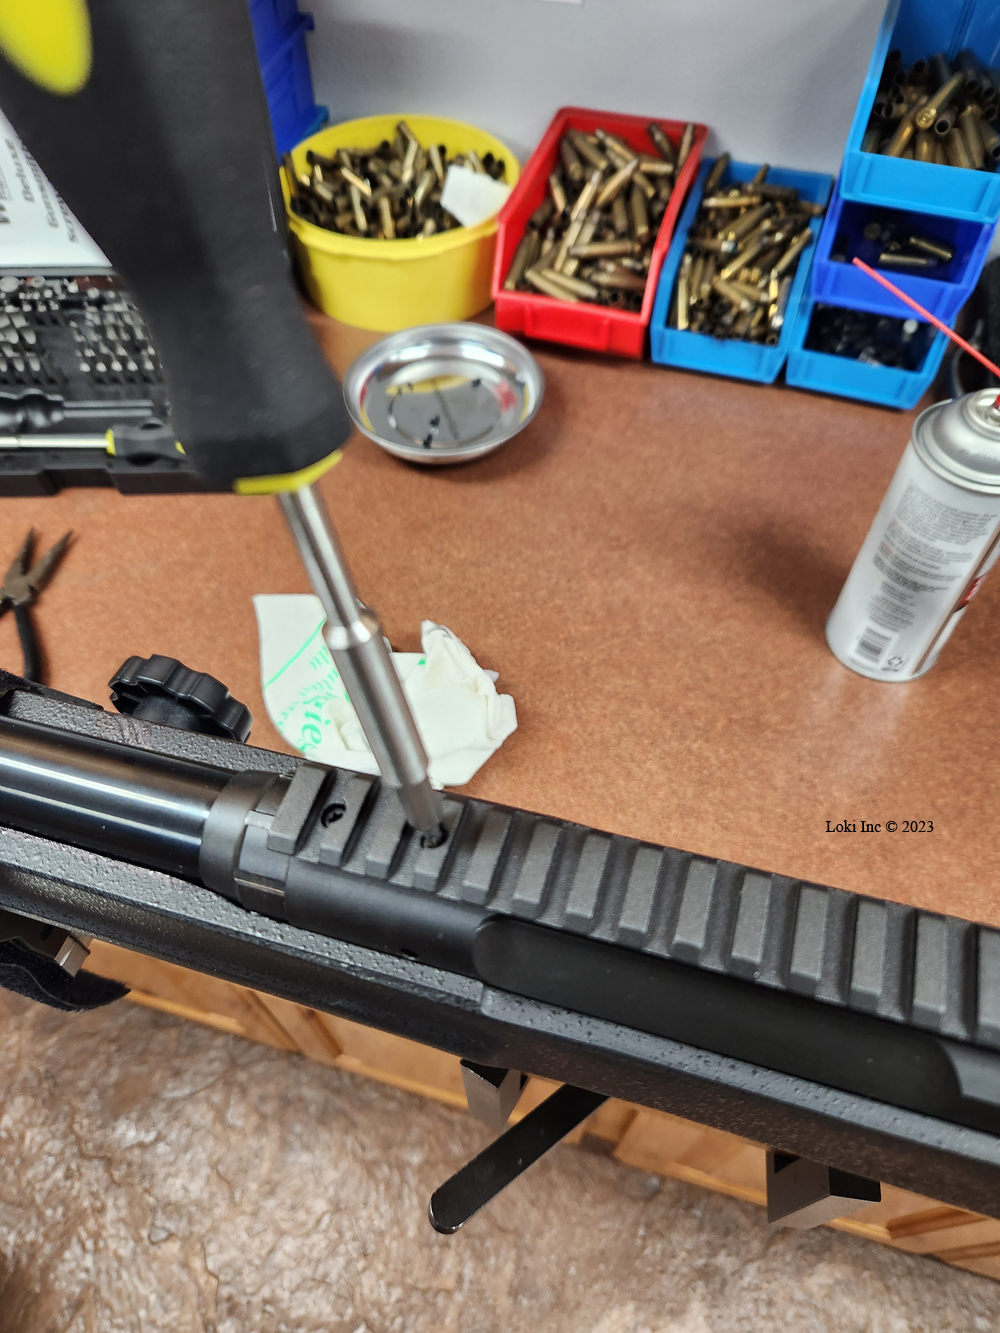
Installing scope base mount screws
Because the base had a 20-MOA taper, I had to be sure to mount the base in the correct orientation. To do this, I merely mounted the base with its arrow mark on the underside so the arrow tip pointed to the gun’s muzzle.
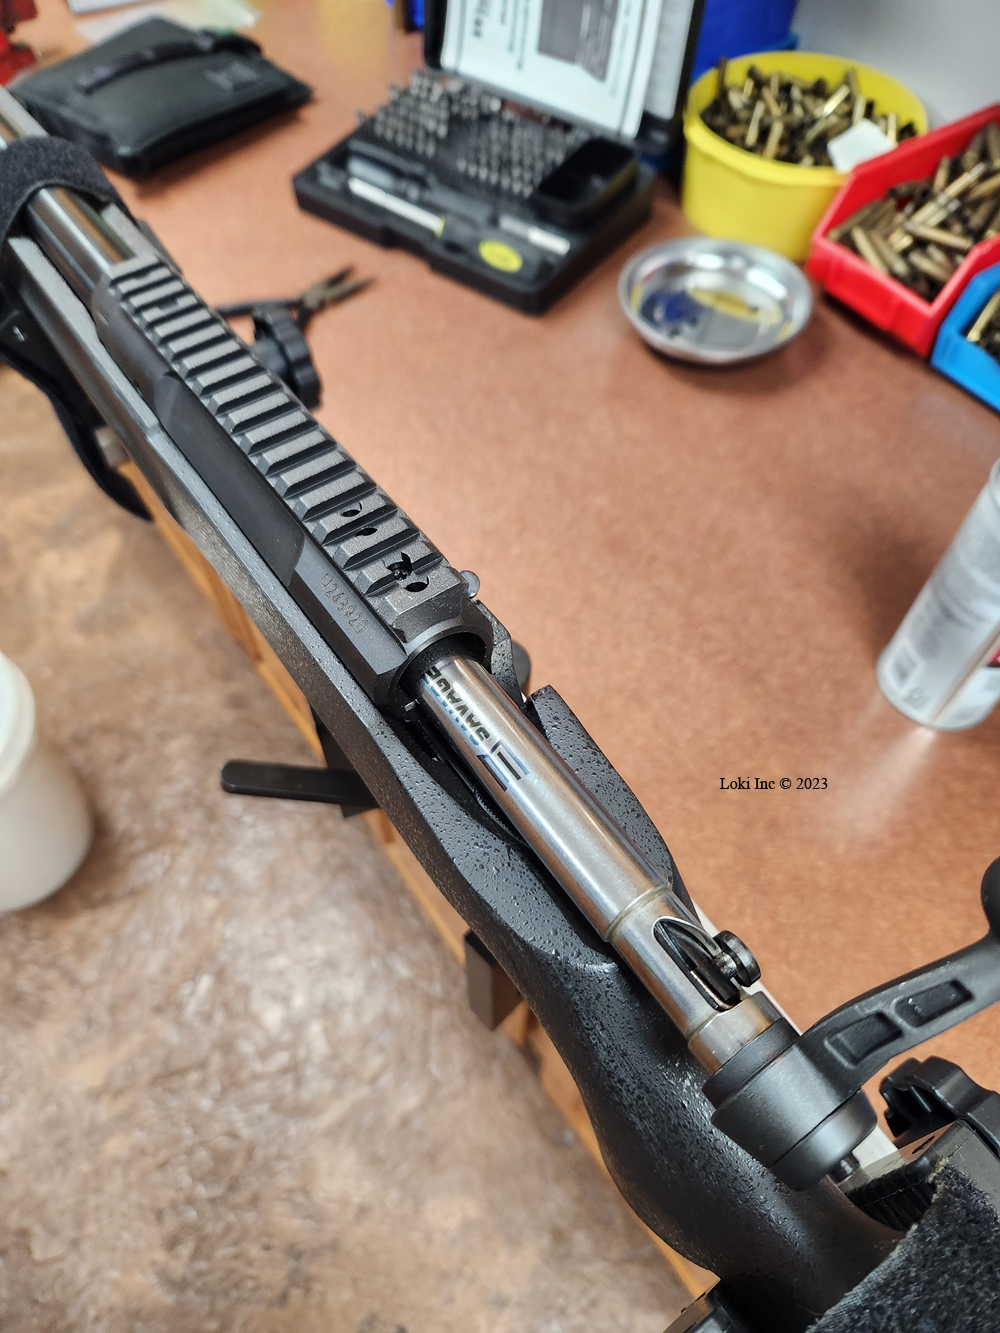
Scope base on receiver
Leupold used a Nylok® thread locking system on each of the screw threads for the base, so I didn’t have to use any liquid thread locker compound.
I removed the Torx screws holding the halves of the Mark 4 rings together, and positioned the lower halves on the base while ensuring the lug on each ring lower half engaged a slot on the rail. I set the variable-power scope to its highest magnification setting and carefully placed it onto the ring lower halves. I checked the front and rear ring positions to make sure they would hold the scope securely when fully mounted. I like to have the rings as far apart from each other as the scope will allow, giving the most stable scope mounting position.
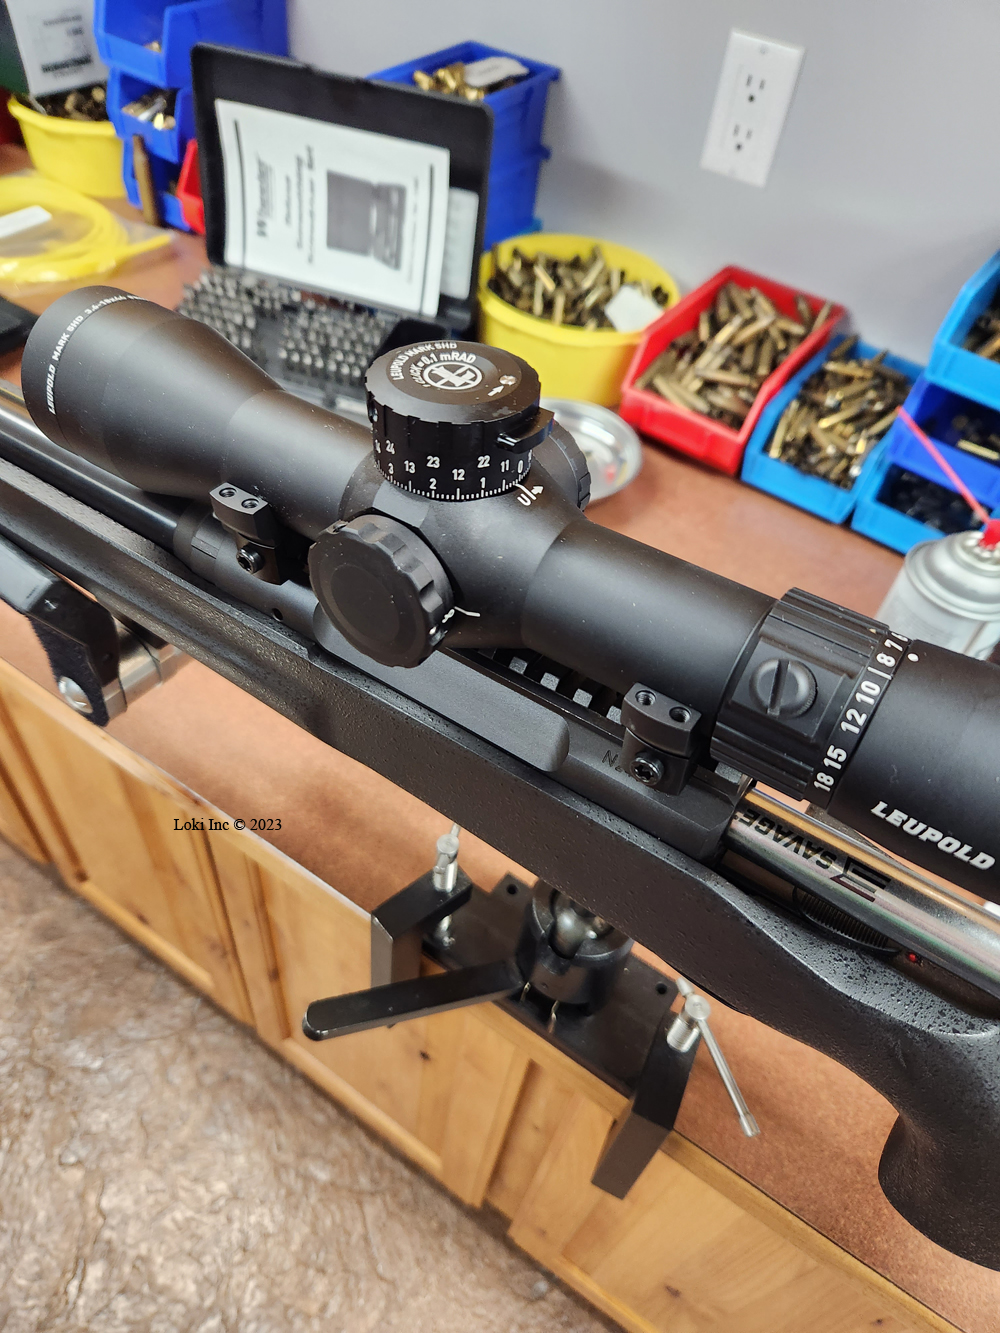
Placing scope on lower bases to check eye relief
Once I established the lower ring positions with respect to the scope, I loosely installed the upper ring halves onto their respective lower halves. I tightened the ring screws finger-tight, enough to keep the upper halves (and the scope) from falling off during the next step.
I carefully lifted the rifle to my shoulder to check the eye relief, or distance from the scope eyepiece to the shooter’s eye. One has the proper eye relief when vignetting is minimized while looking through the scope; to achieve this, I mounted the rifle to my right shoulder in the way I would instinctively when shooting, and then I looked through the scope while slightly moving the rifle forward and backward relative to my right eye. One achieves the correct eye relief when the circular area enclosing objects visible through the scope is maximized, while the dark border at the periphery of that area (the vignette) is minimized. Then, I moved the scope ring positions (with the scope in place) so that the vignetting was minimized.
Having decided where my scope would be fixed into position, I removed the ring upper halves and the scope, placed the rifle in my rifle vise, and used a small level on the scope base to level it.
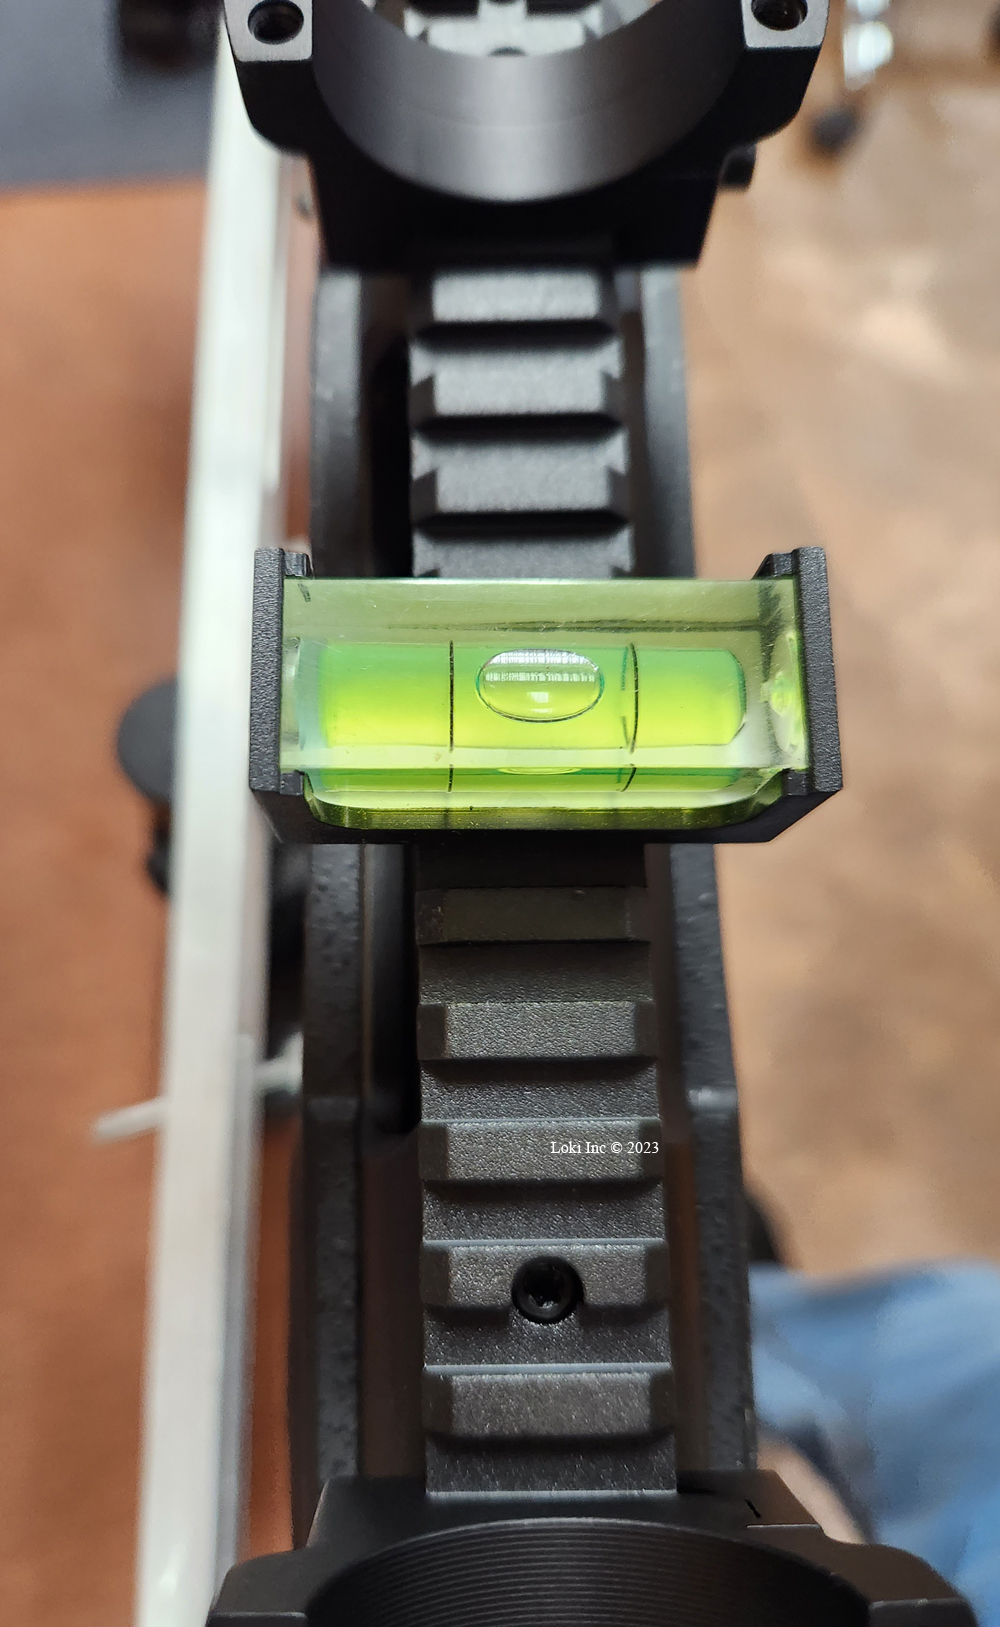
Checking level of base prior to leveling scope in rings
I also torqued each lower ring mounting bolt to the correct amount, 45 in-lbs, to secure the lower rings to the base in their correct positions while pushing each ring forward against its rail mounting slot.
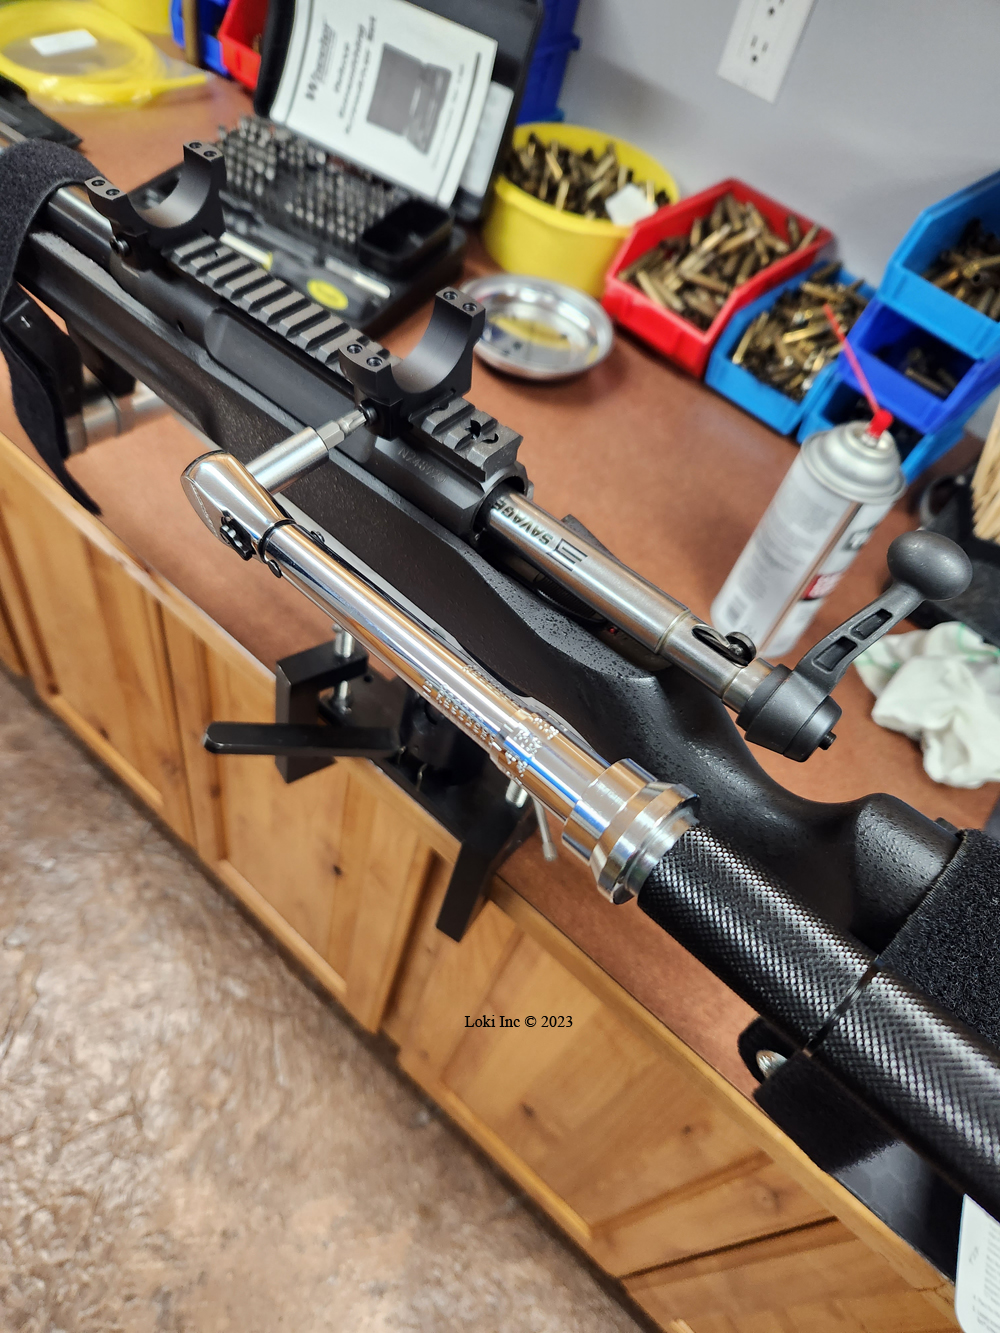
Using torque wrench to tighten lower halves of rings on scope base
Then, I put the scope back onto the lower rings and used my level atop the vertical crosshair adjustment turret to level the scope on the (already) leveled base.
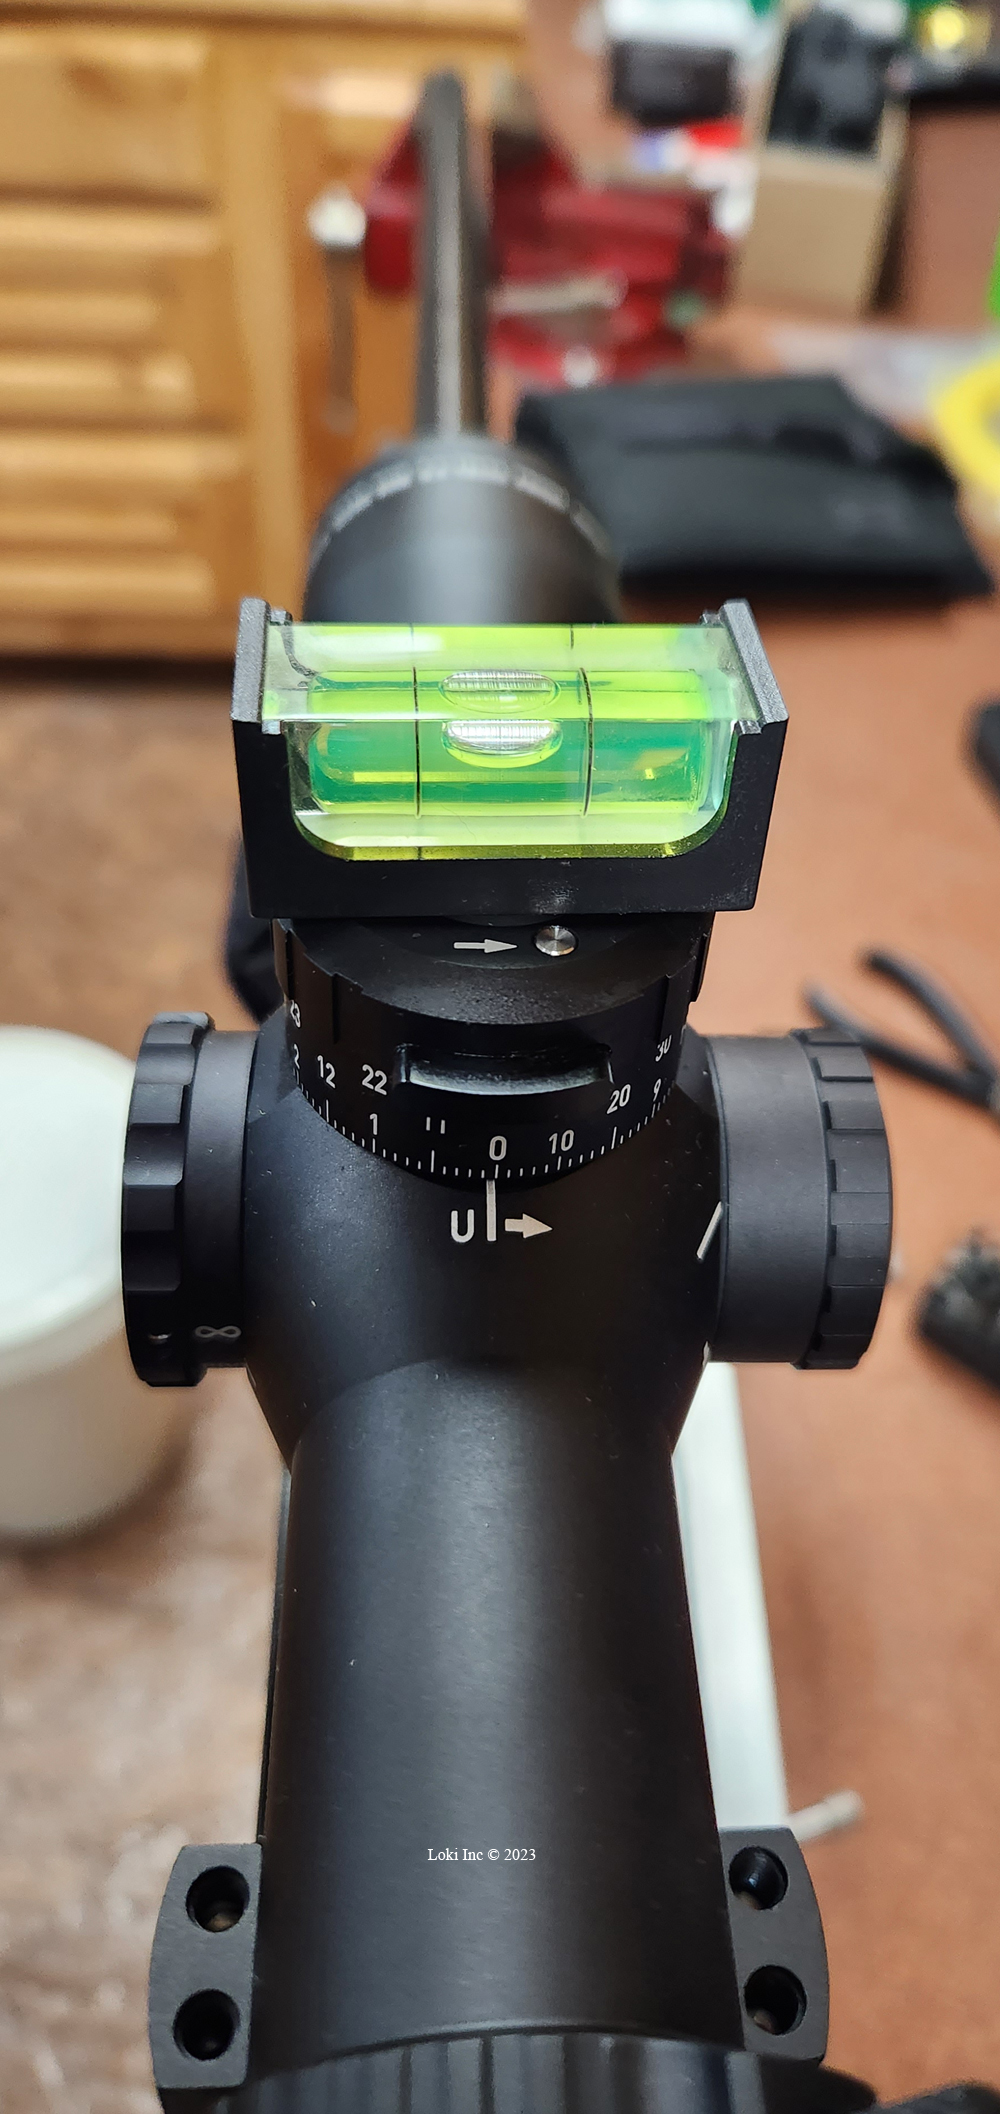
Checking level of scope prior to installing ring upper halves
Next, after installing the upper rings, I snugged the ring screws down enough to keep the scope from slipping or rotating. I shouldered the rifle to check that the eye relief hadn’t shifted, and that the crosshairs were vertical and horizontal. If not, or if there was a shift, I would have re-done those steps in the scope mounting process until the eye relief was correct and the crosshairs oriented correctly.
As with the base, Leupold used a Nylok® thread locking system on each of the threads on the ring screws, so no additional thread locking was required. I used my torque wrench and tightened the ring half screws to 28 in-lbs per the instructions that came with the rings.
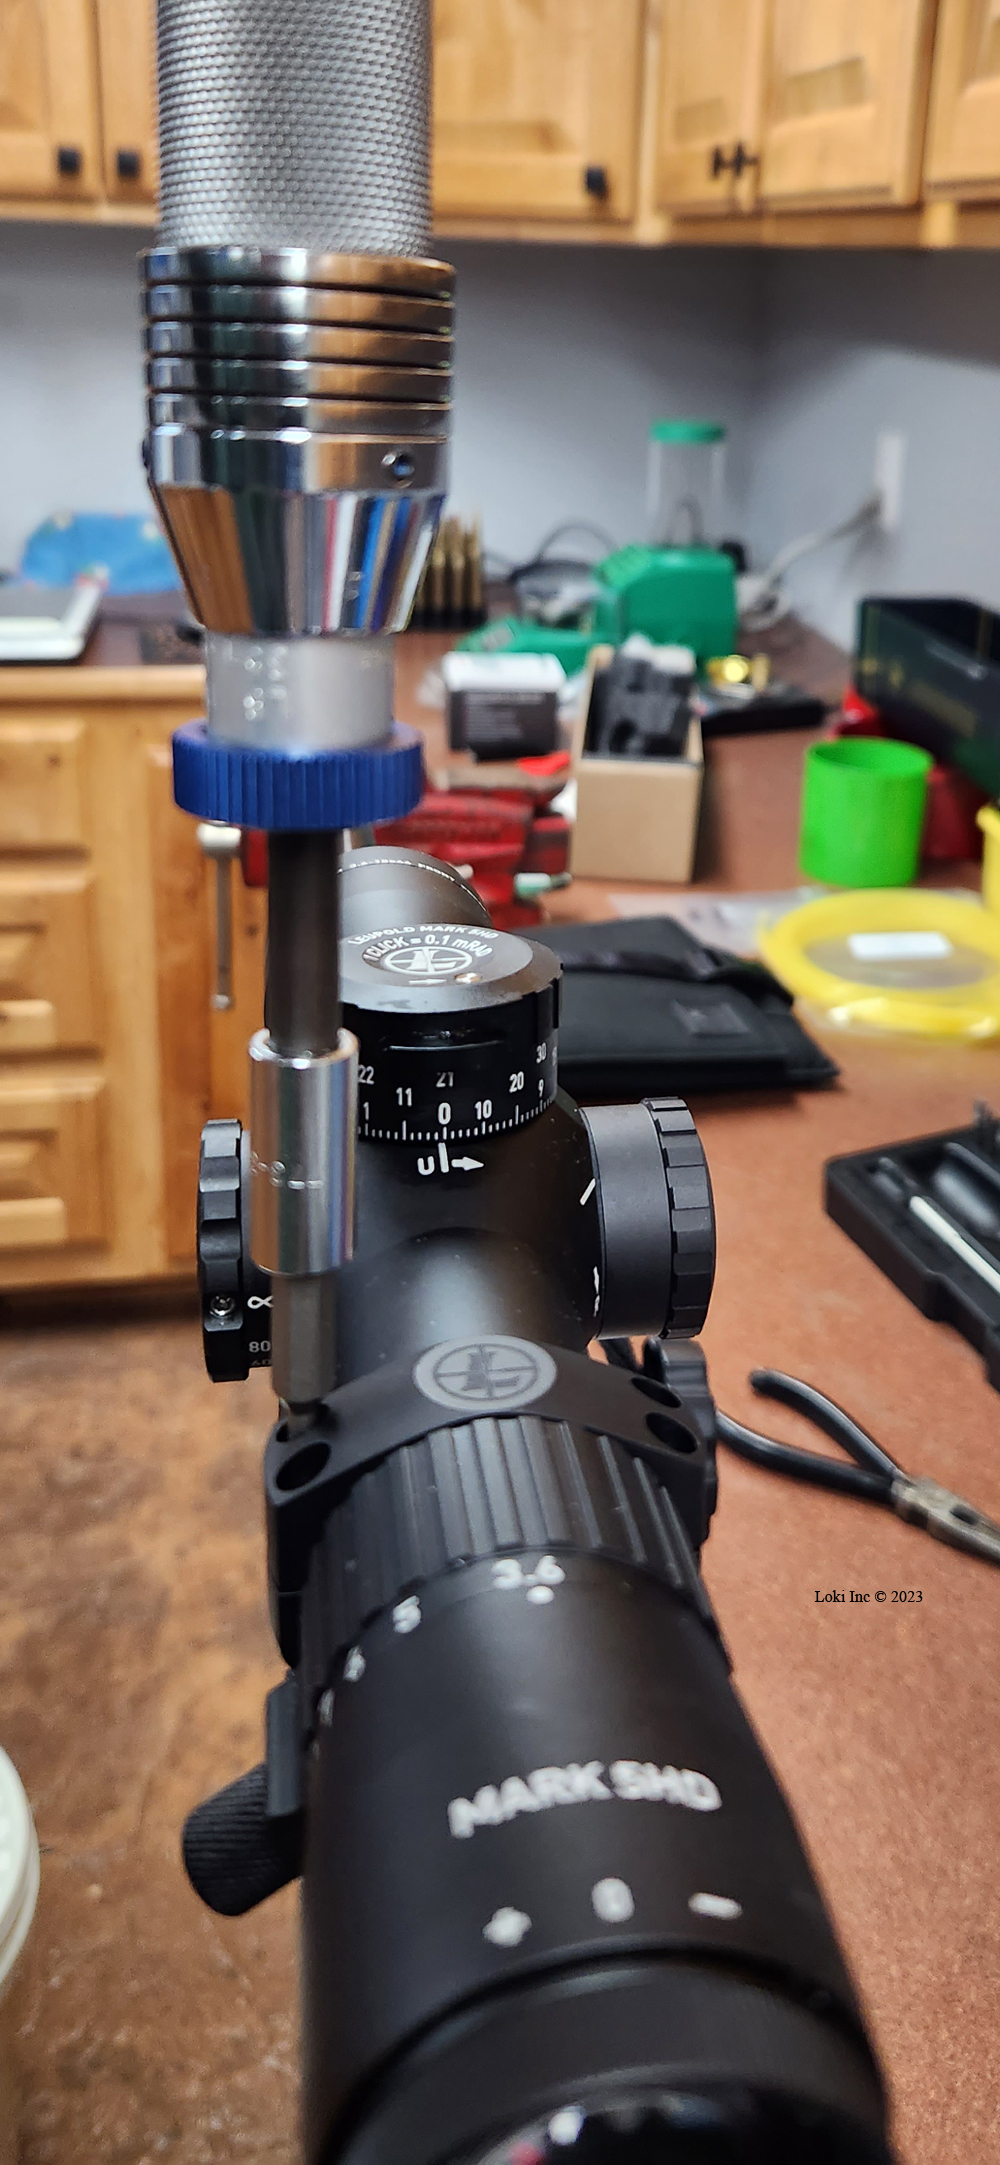
Using torque wrench to tighten scope ring screws
I made sure to use a crossing pattern when tightening the screws, gradually tightening them while checking the gaps between the top and bottom ring halves to ensure even spacing
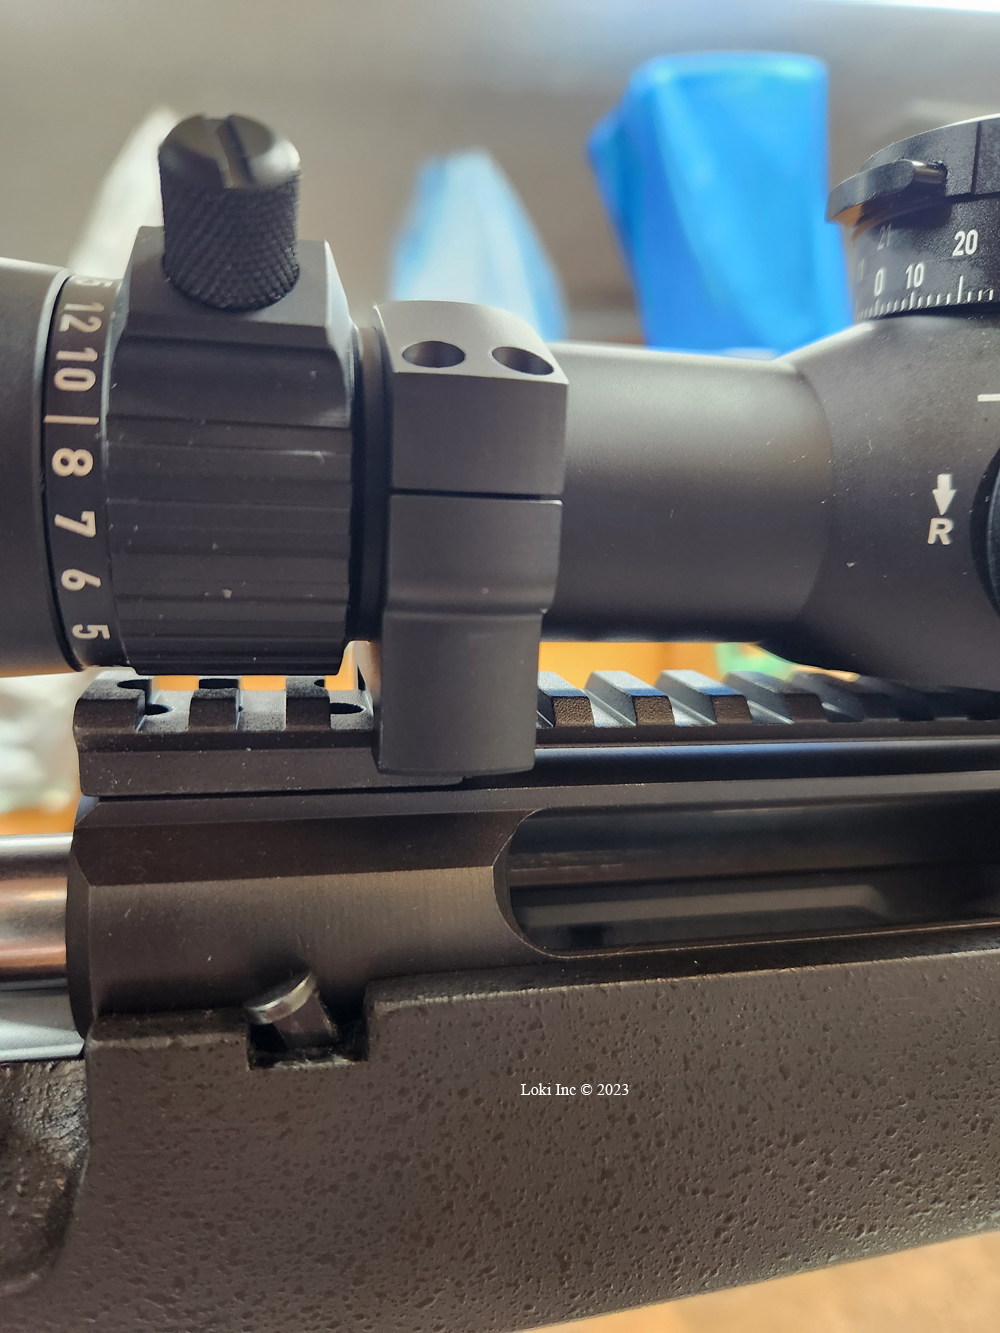
Ring gap right side
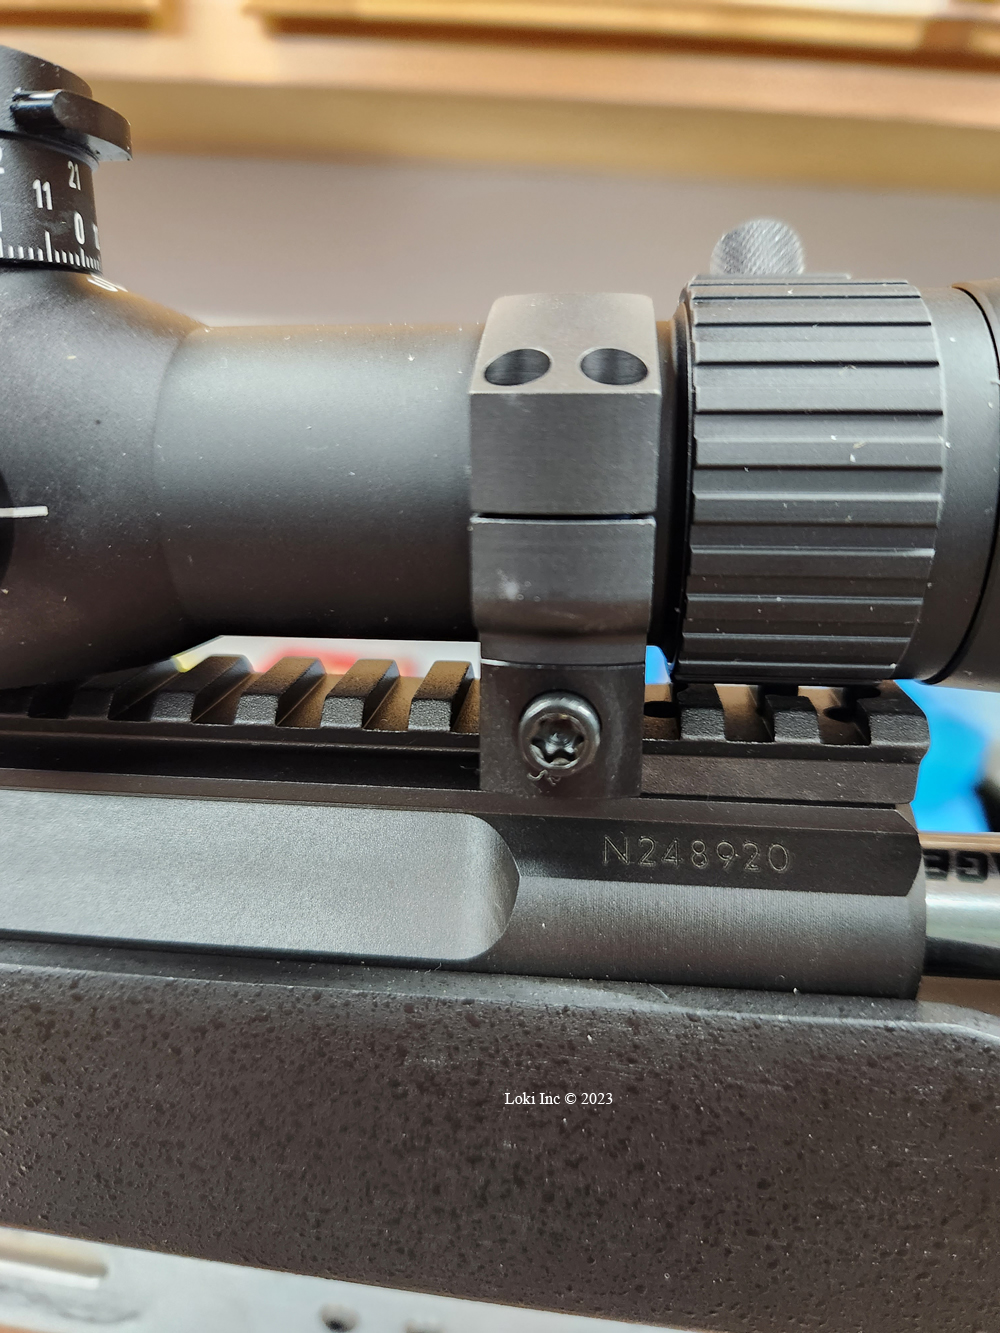
Ring gap left side
This is critical to ensure the scope rings exert an even squeeze on the scope.
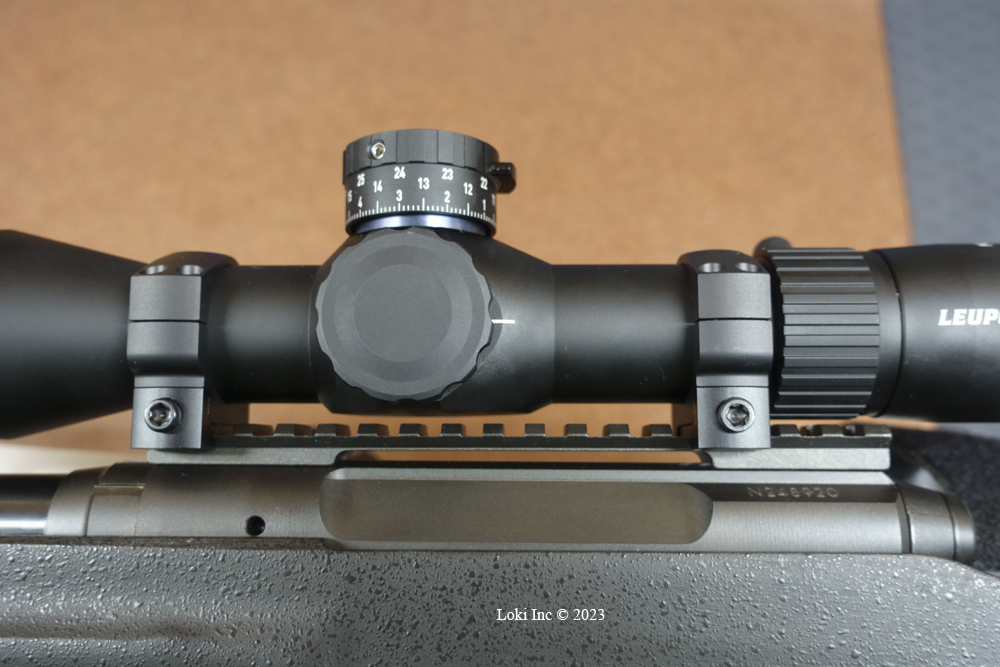
Scope mounted on 1 piece base
A sunshade came with the scope, and I purchased Leupold scope caps to complete the setup.
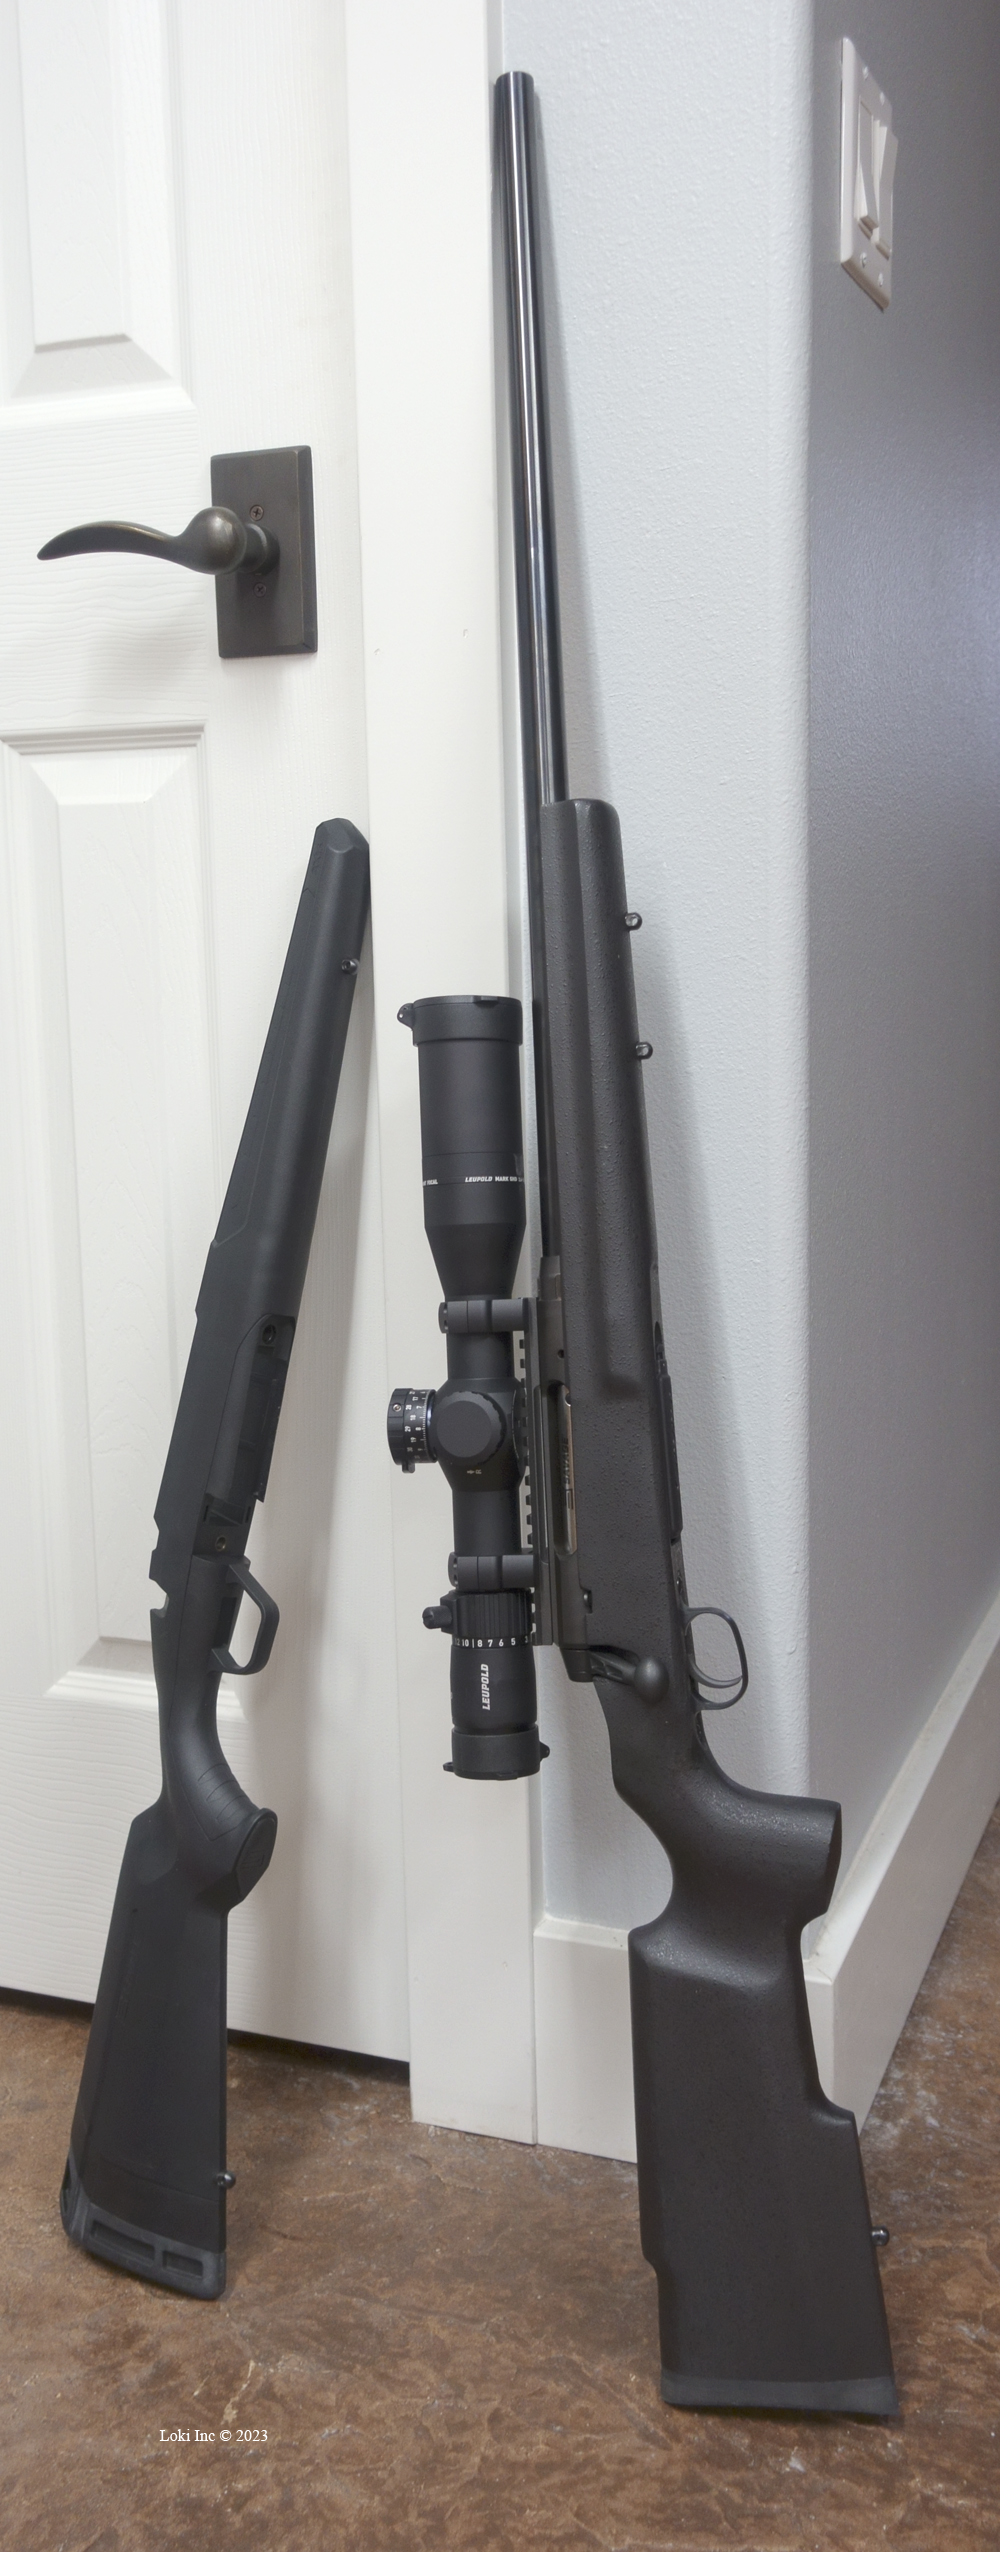
Reworked rifle next to original Savage rifle stock
I now had a well-mounted scope system that, when combined with my new rifle system and tuned handloaded ammunition, proved very accurate at long ranges.