
.22 Caliber Suppressor Cleaning
Introduction to .22 caliber suppressor cleaning
On assignments for SilencerCo, I wrote blogs about cleaning suppressors for .22 caliber firearms, but I decided to modify and repost them for my weblog because I have no control over how long the company keeps blog posts up at their website, and I think this information is too important to lose. As sequential blog posts, they documented my learning trip from manually cleaning the little buggers, through experiments with surface treatments and mechanical cleaning method, to using a soda blaster for cleaning. For a discussion of suppressor use, and the application of subsonic ammunition in a suppressed firearm, see my blog post at https://lokiconsult.com/on-target-performance-of-subsonic-ammo-in-suppressed-rifles-hype-versus-reality/.
Do you have a rimfire suppressor? If you do, you have probably experienced the “joy” of taking it apart and cleaning it. In this blog, I detail my experience in discovering the best way I know, so far, of cleaning the little buggers. Since I really enjoy shooting suppressed .22 rifles and pistols with my wife, I did some research to see if there is anything I could do to make the cleaning of .22 suppressors easier. I’m presenting the results of my efforts in two parts – for those who don’t want to invest in a soda blaster, the first part covers the effectiveness of pre-shooting treatments, and the second covers soda blasting. Up to the point where I learned on a SilencerCo plant tour about soda blasting a suppressor I had not even considered it, but it has become my go-to cleaning method.
Part 1 – Pre-treatments for .22 caliber suppressor cleaning
I don’t know about you, but I do not like to clean things unless the cleaning process is pretty simple and doesn’t take long. I imagine this is news to my wife and other people who know me pretty well, but I am not OCD about cleaning (anything). Keeping my stuff clean was drilled into me forcefully, however, as an Air Force Academy first year cadet way back when. As I aged, experience reinforced that dictate, particularly in the areas of tools and equipment. I learned that some things needed cleaning more thoroughly, such as the items I depended on for safety or life, but others would still function with a “lick and a prayer.”
In my world, since I don’t depend on a suppressor for safety or life one might assume that I could get away with a quick suppressor wipe down after using it. It turns-out that is true when it comes to center-fire suppressors, as the experts tell me those cans are pretty much self-cleaning with use. Unfortunately, rimfire suppressors are not so easy.
Rimfire suppressor manufacturers purposely design them so the user can disassemble the cans for cleaning, because without cleaning, carbon and bullet metals (lead and copper alloys) build-up within a rimfire suppressor. The build-up causes lowered noise suppression performance, and if allowed to continue it degrades the weapon’s accuracy. Taken to its fullest, the build-up could be hazardous if it caused bullet strikes on suppressor components. Unfortunately, .22 caliber suppressor cleaning can be a real chore!
The first time I took apart one of our .22 suppressors, a SilencerCo Sparrow 22 (https://silencerco.com/silencers/sparrow-22/) after firing several hundred rounds through it, I had difficulty getting it broken down into its basic components because of all the carbon and metal plated on the internal parts and into the joints between them. Then, not having any other tools at my disposal, I started cleaning those parts using the techniques I use to clean the carbon off a bolt carrier group (BCG) of an AR-type rifle. The chemicals and brushes worked, sort of, and after a lot of elbow grease I had the carbon off but the bullet metals remained (not a problem with BCGs, since bullets don’t pass through them). I had to resort to scraping and soaking the suppressor parts in chemicals I use to clean jacket fouling out of rifle barrels. Note – if you use this method, be sure to remove any suppressor elastomeric O-rings beforehand because many of the chemicals are not kind to O-ring materials. Well, my efforts made me resolve to find a better way to clean the can.
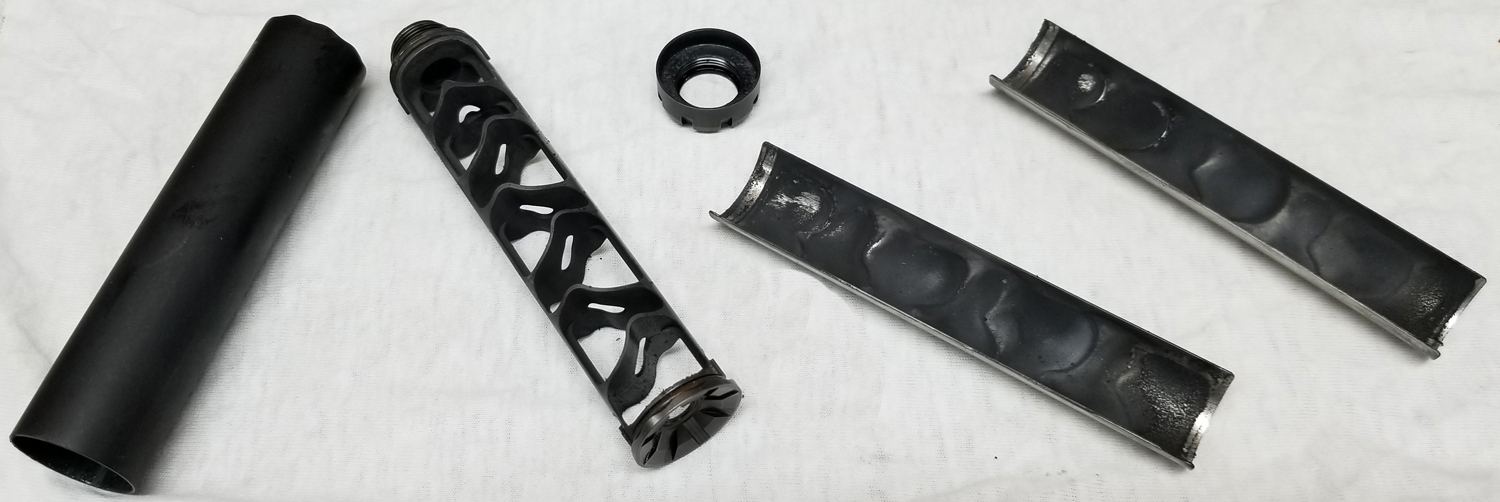
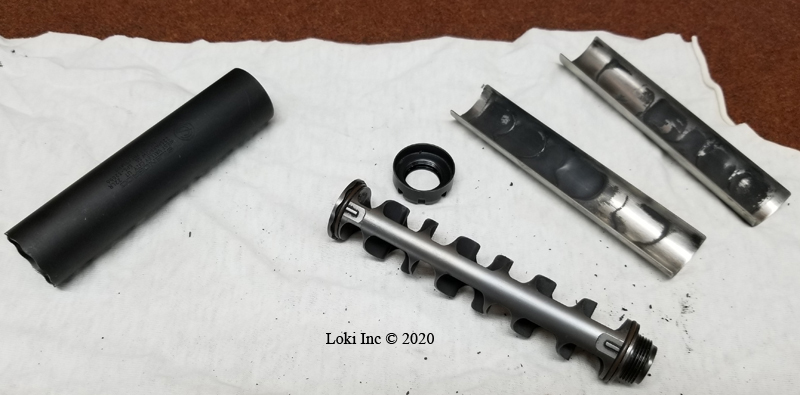
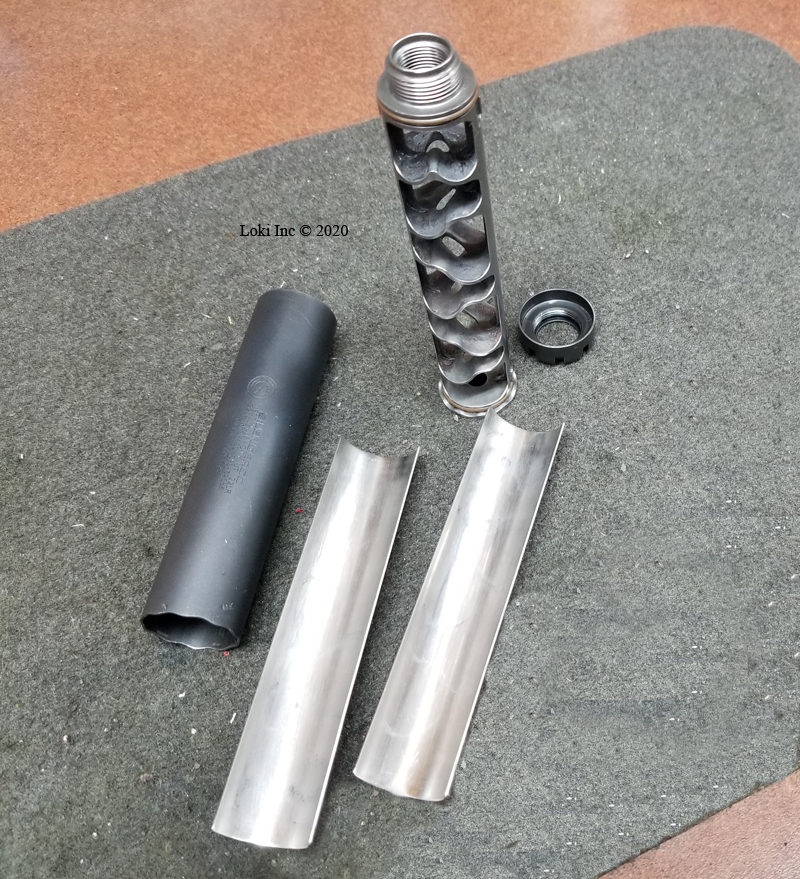
Starting point for cleaning test – clean Sparrow suppressor disassembled
Doing some Internet research on .22 caliber suppressor cleaning led me to three different techniques/products advocated by “experts” to make suppressor cleaning easier, and each of these required pre-treatment of a clean suppressor with chemicals used in other processes. Those chemicals were an anti-spatter spray used in MIG (Metal Inert Gas) welding to prevent the sticking of weld spatter to welded parts, a copper-based anti-seize paste used to lubricate threaded parts and to prevent them from sticking together under severe loads, and FIREClean™ anti-fouling oil designed for use on firearm components to lubricate them and prevent fouling buildup. I used each in turn, and I describe my results, below. Note that none of the companies selling the chemicals I used represented them as effective in preventing fouling of suppressors, and the prices I found for each chemical were not MSRP, but are for comparison purposes and were valid at the link shown at the time of writing. Bidenomics increased the prices of everything, and his inflation made everything cost more, faster, so I offer no guarantees as to the accuracy of the pricing if you check it.
Anti-spatter MIG welding spray
After I had thoroughly cleaned the Sparrow 22, I used Weld-Aid Weld-Kleen Heavy Duty Anti-Spatter Liquid (I got it from https://www.amazon.com/Weld-Aid-Weld-Kleen-Heavy-Anti-Spatter-Liquid/dp/B008RA5JEW, $10.05 for a 20-ounce spray can, but a quick check on Amazon says it is currently unavailable. Amazon does offer alternatives that I have not tried) to coat its internal parts.
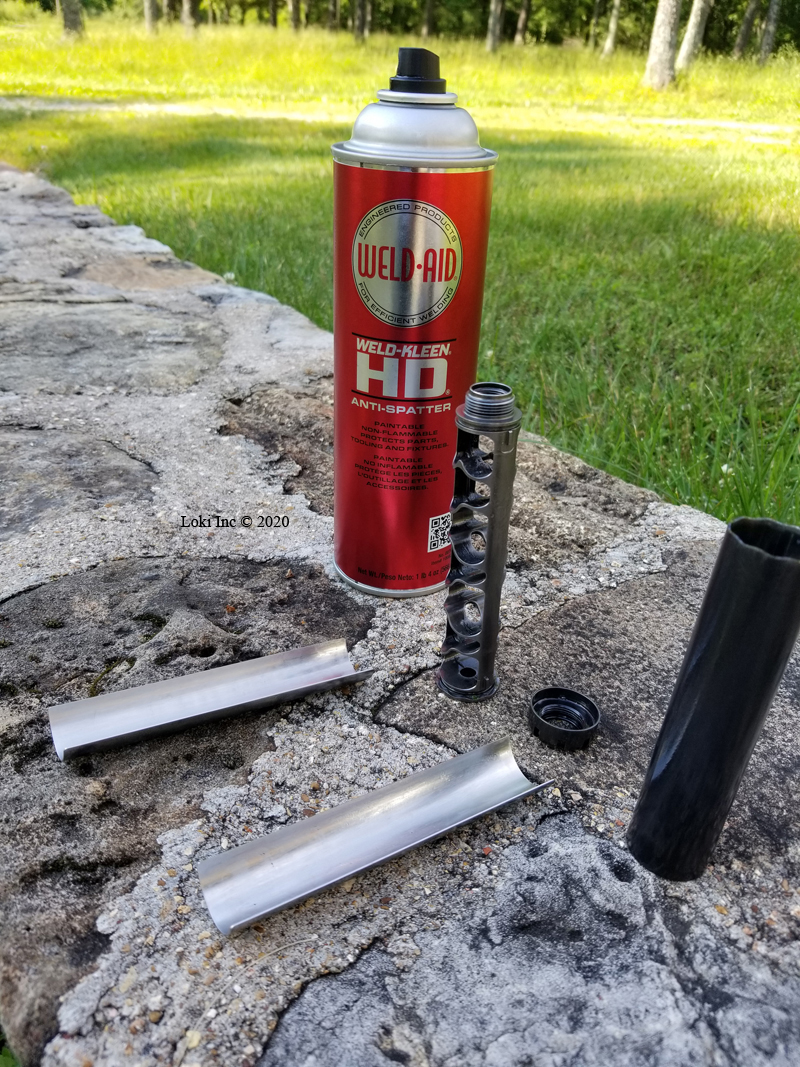
Sparrow parts after spraying with Weld-Kleen anti-spatter treatment
Several days later, I installed the suppressor on my KelTec CP33™ pistol (https://www.keltecweapons.com/firearms/pistols/cp33/) and my wife and I did some slow- and rapid-fire training on paper and steel targets, putting quite a few 33-round magazines through the gun in the process. One of the great things, aside from ear-safe shooting, about using the suppressor on the CP33 is that it allows me to run all and sundry ammo through the pistol. Unsuppressed, my gun is ammo-sensitive, and has difficulty digesting subsonic rounds.
After the range time, I took the suppressor apart, noticing that it was easier to disassemble than when it was dirty and not pre-treated with Weld-Kleen.
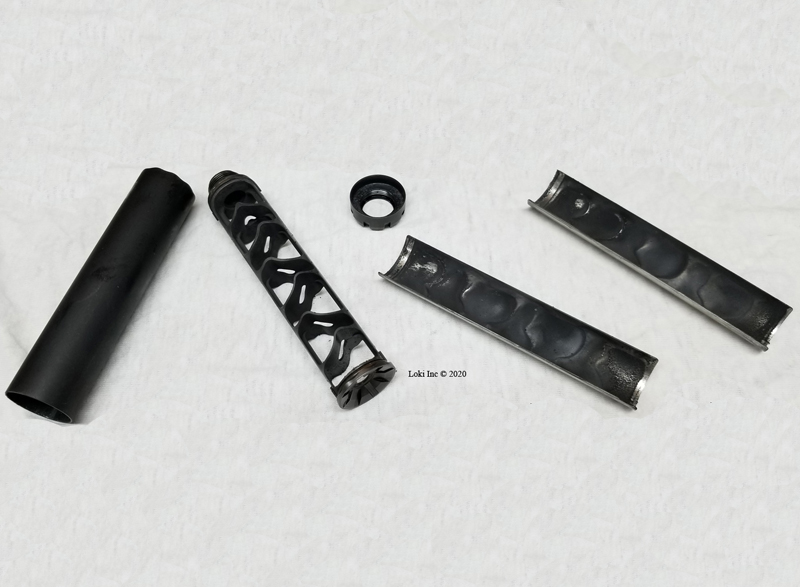
Sparrow disassembled after more than 100 rounds – Weld-Kleen
About 90% of the carbon wiped-off, but removing the remainder required that I use powder solvent and a gun cleaning brush (with plastic bristles) to remove it.
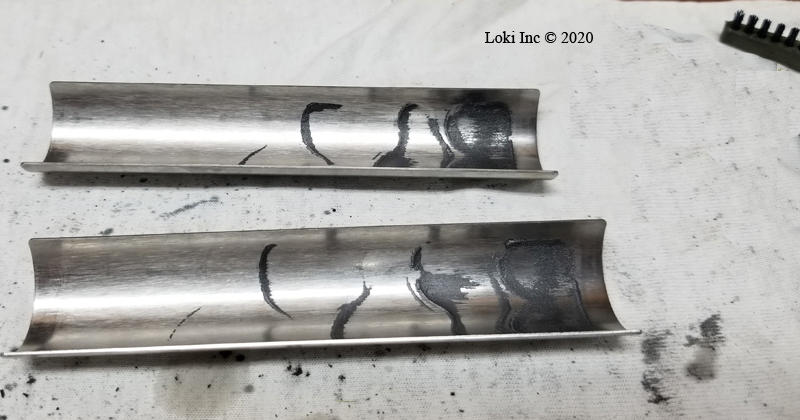
Fired Sparrow parts treated with Weld-Kleen after wipe down
Fired Sparrow parts treated with Weld-Kleen after solvent and brushing 1
Fired Sparrow parts treated with Weld-Kleen after solvent and brushing 2
After spending a few minutes attacking the remaining metal deposits with a scraper and ammonia-based chemicals, I punted and put the parts into my brass-cleaning tumbler with the usual Dawn®/Lemi Shine®/Water/5 lb stainless steel pins combination. After 3 hours of tumbling, all of the metal deposits were gone, and the suppressor was ready for the next test.
Fired Sparrow parts treated with Weld-Kleen after tumbling with stainless steel pins
Copper-based anti-seize paste
For this test, I applied a coat of Loctite 51007 Copper LB 8008 C5A Anti-Seize Lubricant (https://www.amazon.com/Loctite-Copper-Anti-Seize-Lubricant-Temperature/dp/B001HWDEGW, formerly $29.99, not $35.77 for a 1-pound brush-top can) to all the Sparrow 22’s internal parts.
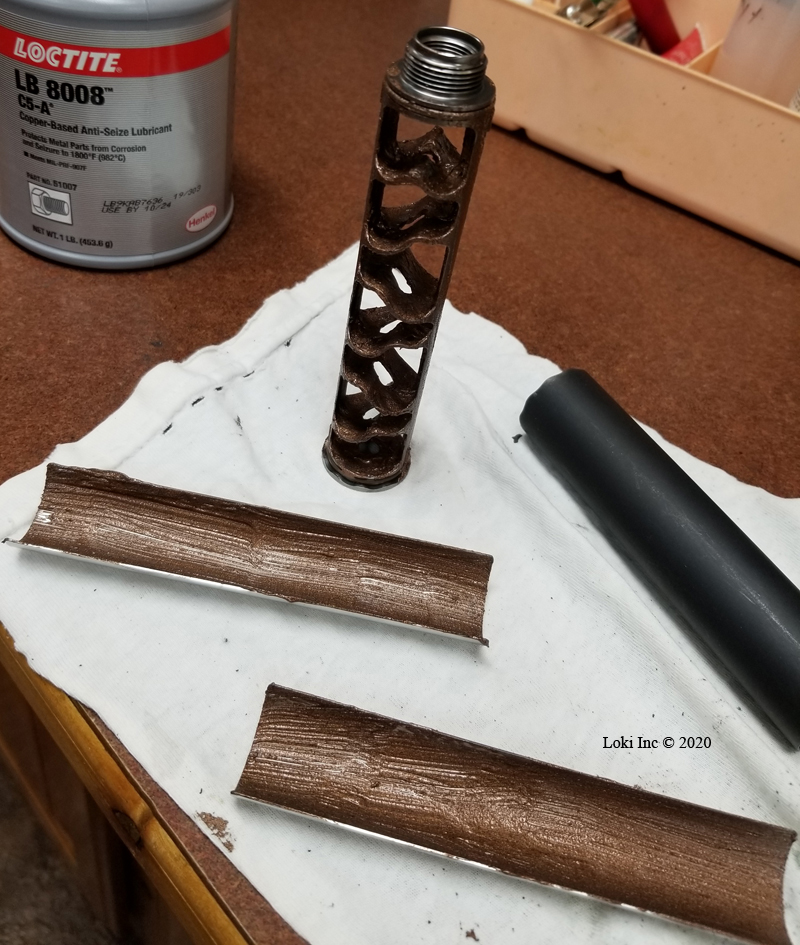
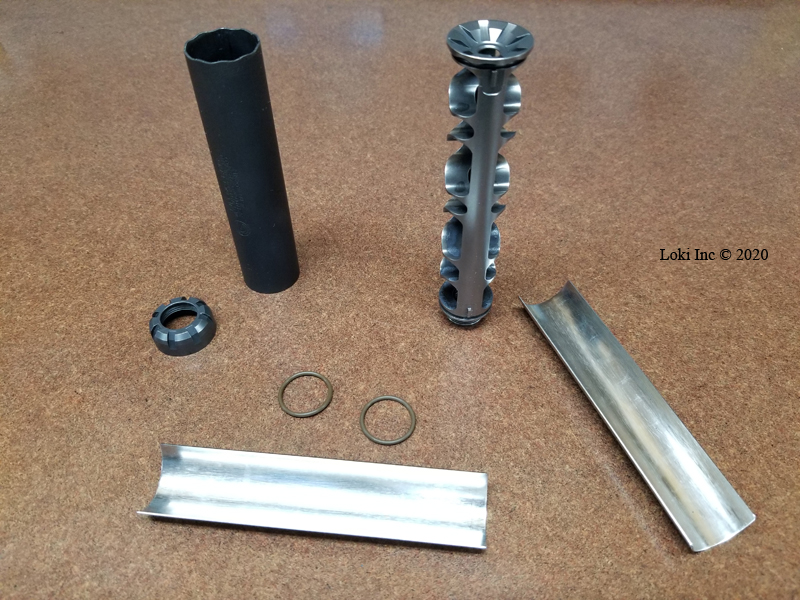
Sparrow parts after Loctite Copper anti-seize application
A few days later, we took the suppressor to the range and shot it on the CP33 as well as on a Ruger American® Rimfire bolt-action .22 rifle (https://www.ruger.com/products/americanRimfire/specSheets/8305.html).
After we put about 150 rounds through the suppressor, I disassembled it for cleaning. The results were the same as I achieved with the Weld-Kleen spray – I wiped most of the carbon off with a rag, and got the rest of it using powder solvent and a gun cleaning brush.
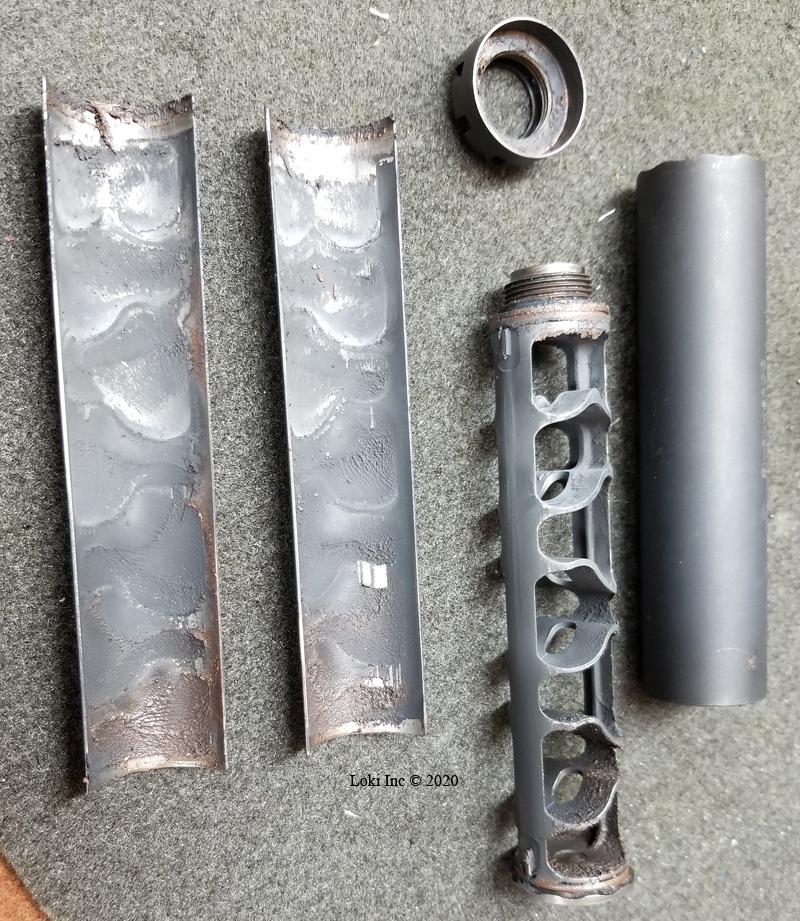
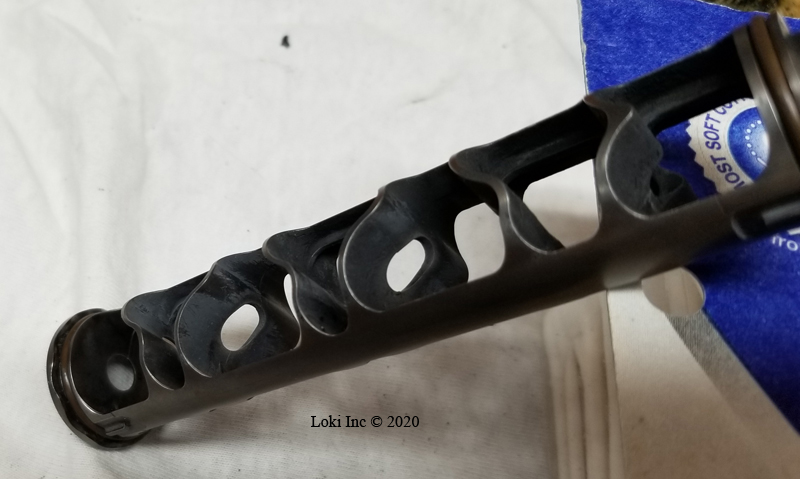
Sparrow with anti-seize after firing
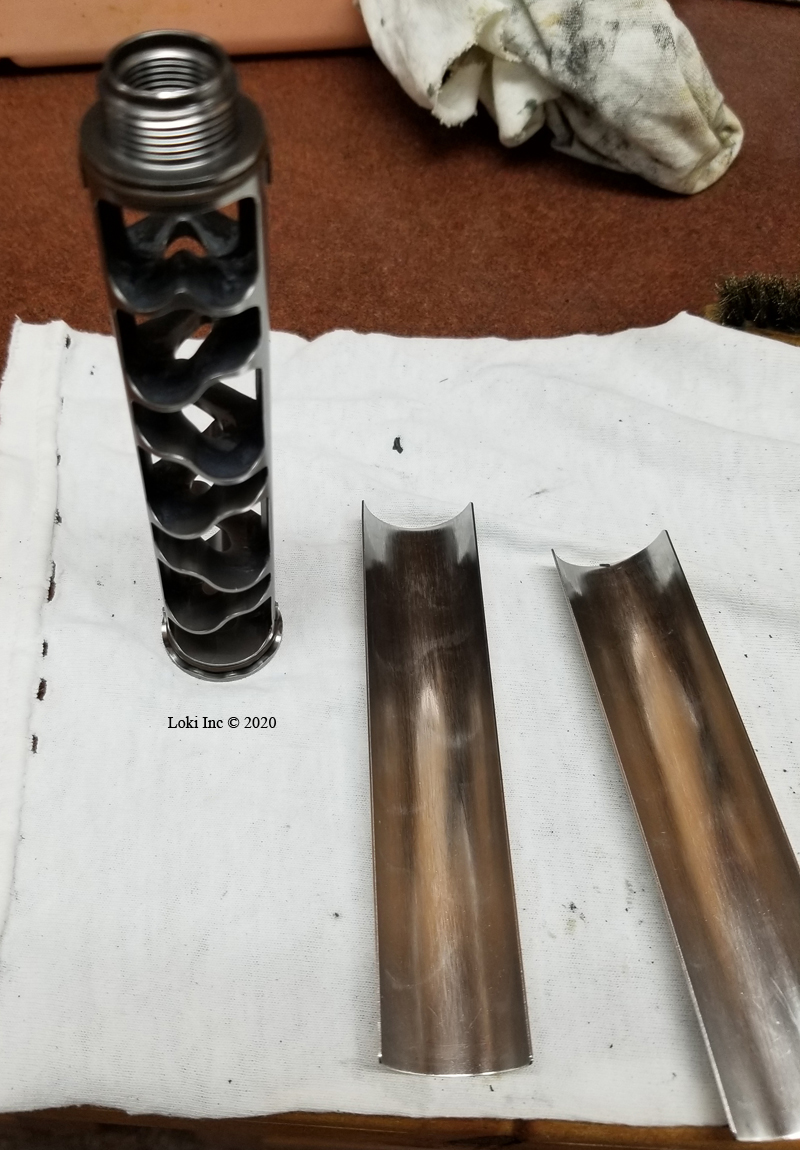
Sparrow with anti-seize after wiping, solvent soak and brushing
Once again, rather than spending much time with a scraper I used my brass tumbler to clean the remaining metal deposits off the suppressor parts.
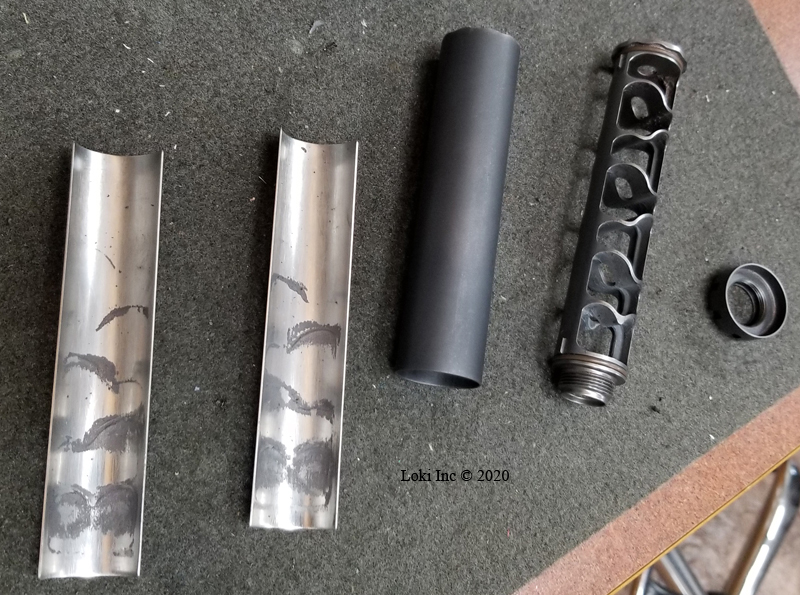
Sparrow with anti-seize after tumbling with stainless steel pins
I had high hopes for the final test using the FIREClean oil, based on what I’d seen online and my experience using it on AR BCGs.
FIREClean Anti-fouling oil
I followed the FIREClean (https://www.lawtactical.com/product_p/2014fc2.htm) instructions as I applied it to the internal parts of the disassembled Sparrow 22, using a swab to be sure to get an even coat on the nooks and crannies of the baffles. Disclaimer – as I noted, above, the manufacturer of FIREClean, as with the manufacturers of other chemicals I used, does not make any claims about the use of FIREClean in suppressors.
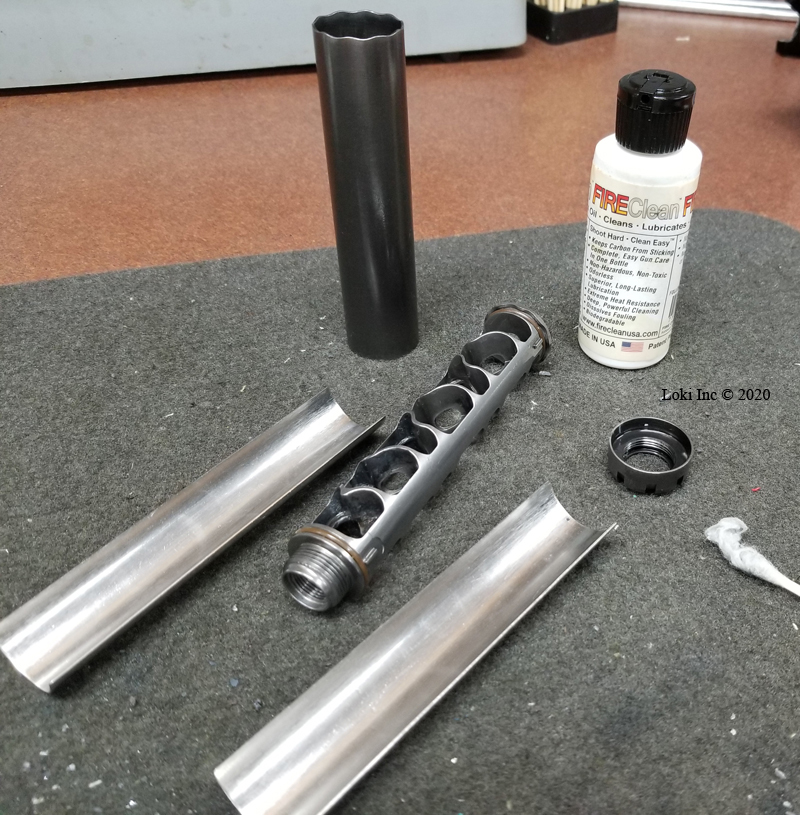
Sparrow after treatment with FIREClean oil
After a couple of weeks, I had the opportunity to test the FIREClean-treated suppressor. My wife and I shot over 100 rounds through her Volquartsen Scorpion® (https://volquartsen.com/products/1120-scorpion) and suppressor combination, as well as 50 + rounds through the Ruger American rifle with the suppressor attached.
After our range session, I disassembled the suppressor for cleaning.
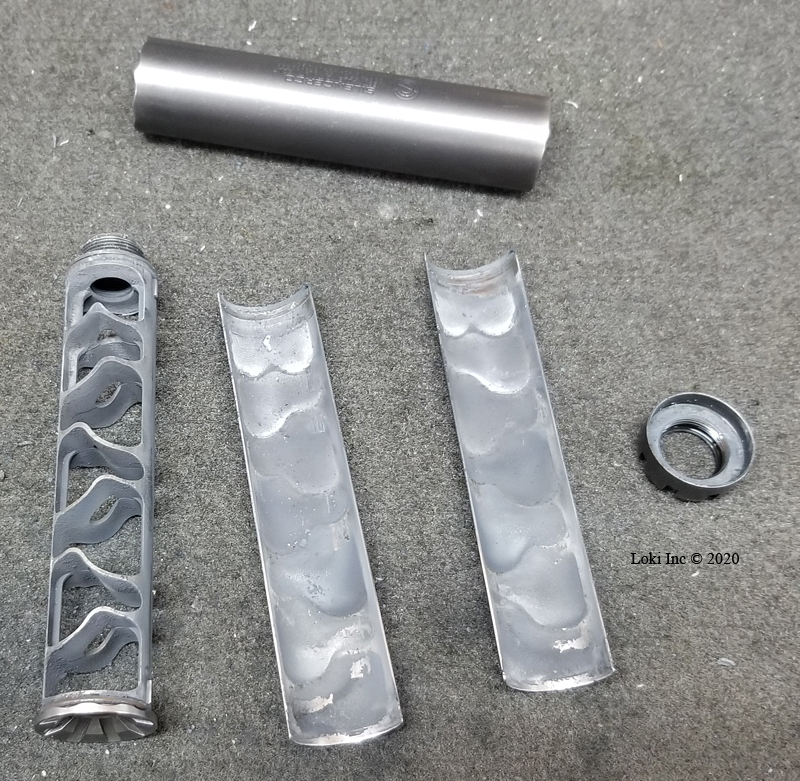
Sparrow with FIREClean disassembled, dirty
As with the tests of the Weld-Kleen spray and the anti-seize paste, I had a much easier time getting the suppressor apart than I did when it was untreated. I wiped about half of the carbon off the parts with a rag, less than the results with the previous two chemical tests, and then re-coated the surfaces with FIREClean as I would if cleaning a BCG (the chemical is its own cleaner, according to the directions). After about an hour, I scrubbed the parts with my gun cleaning brush, removing most of the carbon deposits. Sadly, as far as I could tell none of the bullet metal deposits came off. Out of curiosity and hoping the FIREClean had worked better than the other chemicals, instead of throwing the lot into my brass tumbler as I had previously I attacked the parts with a brass brush, AR BCG steel scraper, and a dental pick to see if the FIREClean had made that process any easier than cleaning the suppressor without any pre-treatment. In my opinion, it wasn’t any easier to get the bullet metals off the parts.
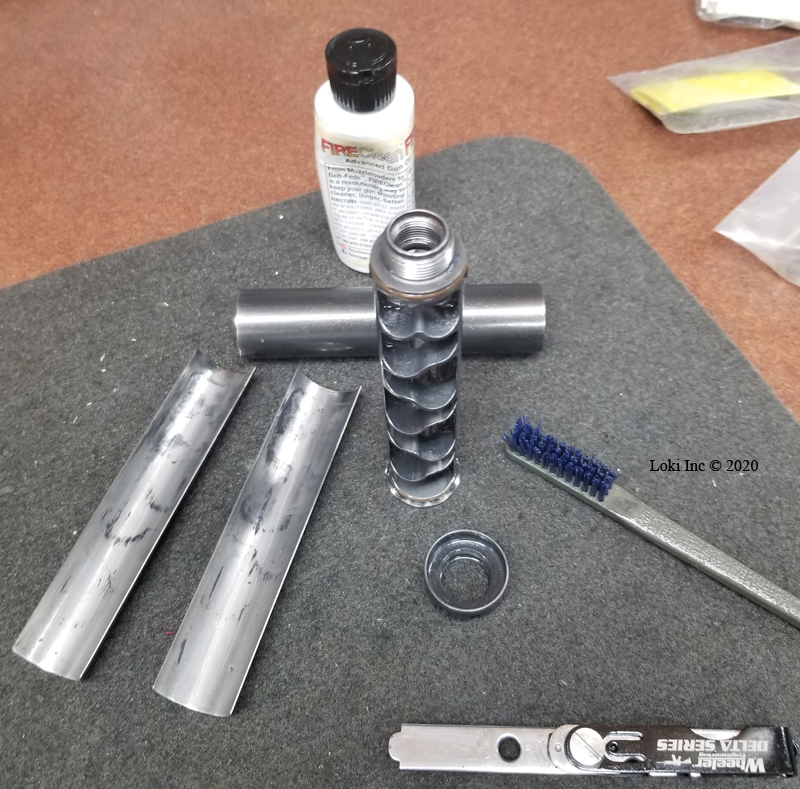
Sparrow after FIREClean soak, brushing and light scraping
So, was pre-treating the Sparrow 22 parts, whether with anti-spatter spray, anti-seize paste, or special gun cleaning oil worth the effort? Until I started using soda blasting to clean our rimfire suppressors, I’d say pre-treating was worthwhile when compared to just using standard gun cleaning chemicals and tools. But, I’d be hard-pressed to say which was better with regard to the effort involved. If I had to make a choice among the three, it would be based on the cost of the chemicals and how many applications I could get out of a container of whichever one I chose.
It so happens that right after I finished this set of tests was when I heard about using a soda blaster for .22 caliber suppressor cleaning. Looked like a good idea, if I could get into soda blasting without too much of a cash investment. I decided to give that a try – the next part of this posting is a report on my experience using soda blasting to clean the Sparrow 22 and another rimfire suppressor of a different design, the SilencerCo Switchback 22 (https://silencerco.com/silencers/switchback-22/).
Part 2 – Soda Blasting for .22 caliber suppressor cleaning
For those who don’t know anything about it, I’ll briefly address abrasive grit blasting, of which soda blasting is a subset (for additional information search for “grit blasting” on the web). Industries use grit blasting to clean surfaces for inspection or coating. As one might assume from the name, grit blasting uses high-pressure air to entrain an abrasive medium (the grit) and propel it at the working surface. Grit types range from soft (sodium bicarbonate, or soda) to very hard and tough (carbides). Soda is good for paint removal, and it so happens that soda blasting cleans the carbon and some stuck-on metals from suppressor surfaces. It doesn’t damage the surface as easily as harder grits. The blasting soda process typically uses small particle sizes, 150 to 3400 microns in diameter; for comparison, the particles in type we have in our kitchens for cooking, etc. are quite a bit smaller, at 65 to 70 microns. Generally, the smaller the particle size, the gentler the stripping effect and the greater the dust cloud created by the blasting process. The larger particle sizes create less dust and remove material from the surface faster, but are more expensive to buy (see https://www.pfonline.com/articles/soda-blast-question-revisited).
I have a sandblasting cabinet and a portable sandblaster in one of my shops, but I didn’t want to go to the trouble of switching back and forth between sand and soda as blasting media in the cabinet. Repurposing a soda blast system to sand might be okay, but the reverse just asks to get a little sand grit mixed-in with the soda – bad juju! Without special dust collection equipment installed, a blast cabinet purposely recycles the grit since the grit falls back into the hopper after it hits the working surface. Soda particles break down into dust when they hit the working surface, so recycling them through a blast cabinet system would rapidly result in a massive FAIL, with no work done on the surface by the blasting medium.
In the following explanation, I give links to items online at the time I wrote this, but the sellers may no longer have the items, so this information is for comparison purposes only.
To grit blast, you need a hopper for the grit, a source of high-pressure air, and a nozzle system that draws the grit into the air stream and then accelerates the air/grit mix toward the working surface. The simplest blasting system consists of the hopper and nozzle system, combined.
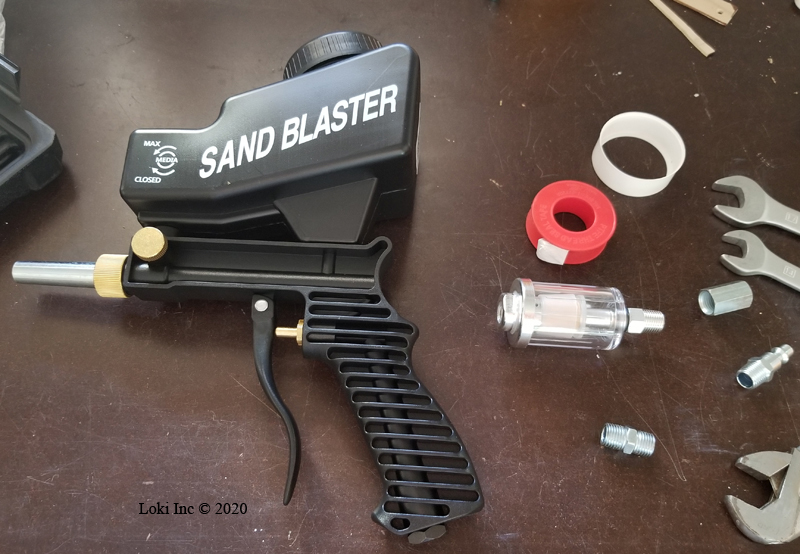
Soda blast gun, inline dryer, parts and tools
I ordered a simple one online, along with an air dryer since I planned to use the blaster with a large air compressor that usually pushes some water into the air hoses.
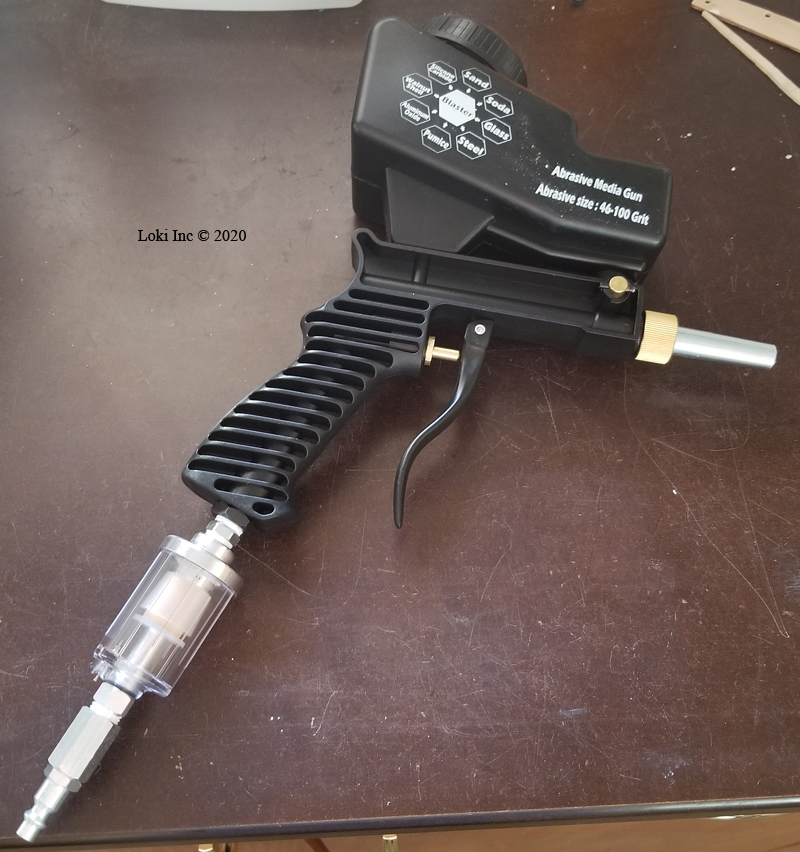
Blast gun and inline dryer, assembled
Note that the company selling the blaster recommends an air source that can maintain 90 to 150 psi pressure at a minimum 4 cubic feet per minute volume. With this blaster, the hopper sits above the nozzle and trigger assembly so the grit gravity feeds into the mix. Other blasters might use a hopper or reservoir that draws the grit up through a tube into the nozzle assembly.
At the time I purchased the grit blaster, the soda blasting media was out of stock everywhere I looked so I bought three 1-lb boxes of baking soda at the local grocery store to use as media for my evaluation of the method.
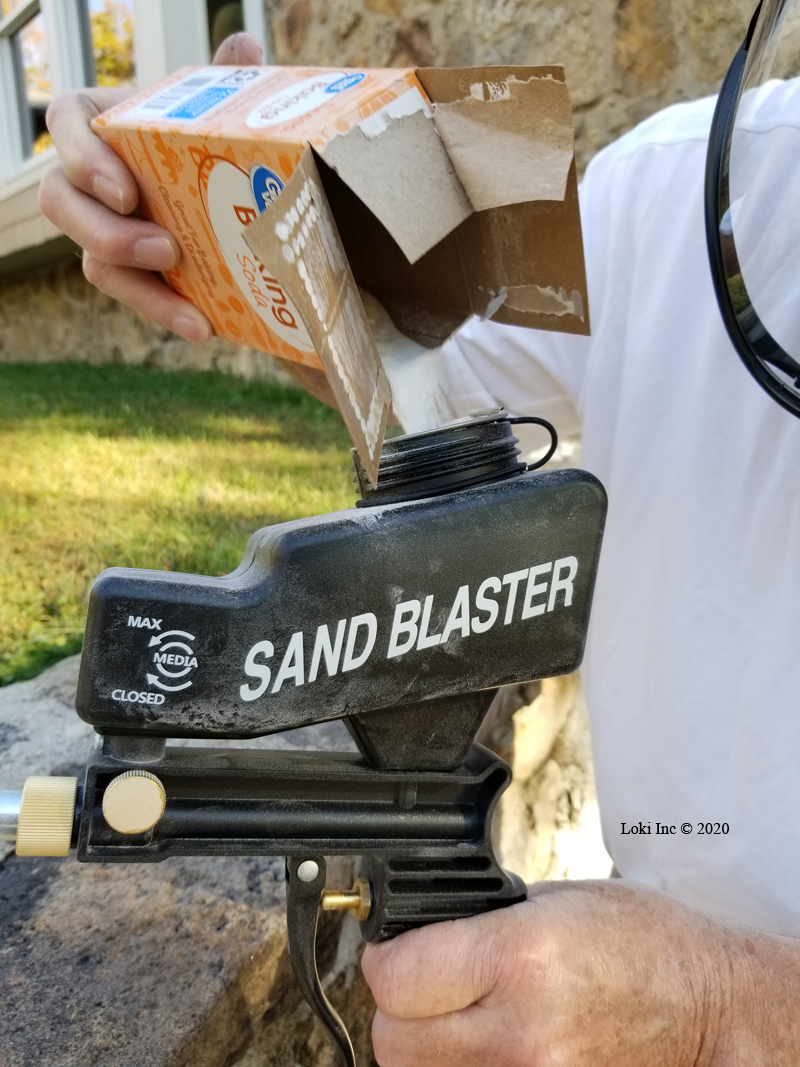
Loading soda into the blast gun – even plain baking soda worked!
Even though most online references say not to use baking soda because of its small particle size, it worked well for me in my soda blaster (see the results, below). Later, I was able to get a deal on soda blast media online – I’ll give you the source, but shop around as the prices and deals change constantly. In fact, if you have one of the big chain home improvement or farm and home stores nearby (I don’t) you may find the soda blasting media at one of those places for less than online prices.
Okay, but does soda-blasting work? Yes, it does, and quickly! First caveat – you must have access to compressed air that meets the requirements to operate whatever soda blaster you use. Second caveat – soda blasting removes paint and surface finishes, so do not use it on suppressor parts that have some sort of coating or finish that is not part of the metal. Exercise some common sense. Do not use abrasive grit more aggressive (harder) than soda! If you are cleaning a .22 cal suppressor, you should be able to disassemble it by design. Use soda blasting to clean internal parts, but do not attempt to clean exterior parts that have a coating or finish. Third caveat – Use the proper PPE for your process! Soda blasting creates a nuisance dust cloud of sodium bicarbonate, the impact of the abrasive particles on your skin stings, and the escaping air from the blasting process can be loud. So, wear safety glasses or a face shield, hearing protection if required, a filter mask that stops nuisance dust if you are indoors or in a situation outdoors (no wind) that keeps the dust cloud around you, and protective gloves because you’ll have to hold the small parts as you blast them. After you are done, unless you use an enclosed cabinet you will likely have soda dust on parts of your body, so brush or rinse it off. In our litigious world, realize that no matter what you use to clean the bullet metals off your suppressor you will have some small amount of lead to dispose of as a residual. Also, realize that soda has a pH of 8, so if you soda blast around acid-loving plants the dust that settles on them may damage them.
If you don’t remember what a dirty Sparrow 22 looks like, take a gander at Part 1 of this blog and you’ll see several photos. Here’s what ours looks like after about 5 minute’s work with my soda blaster.

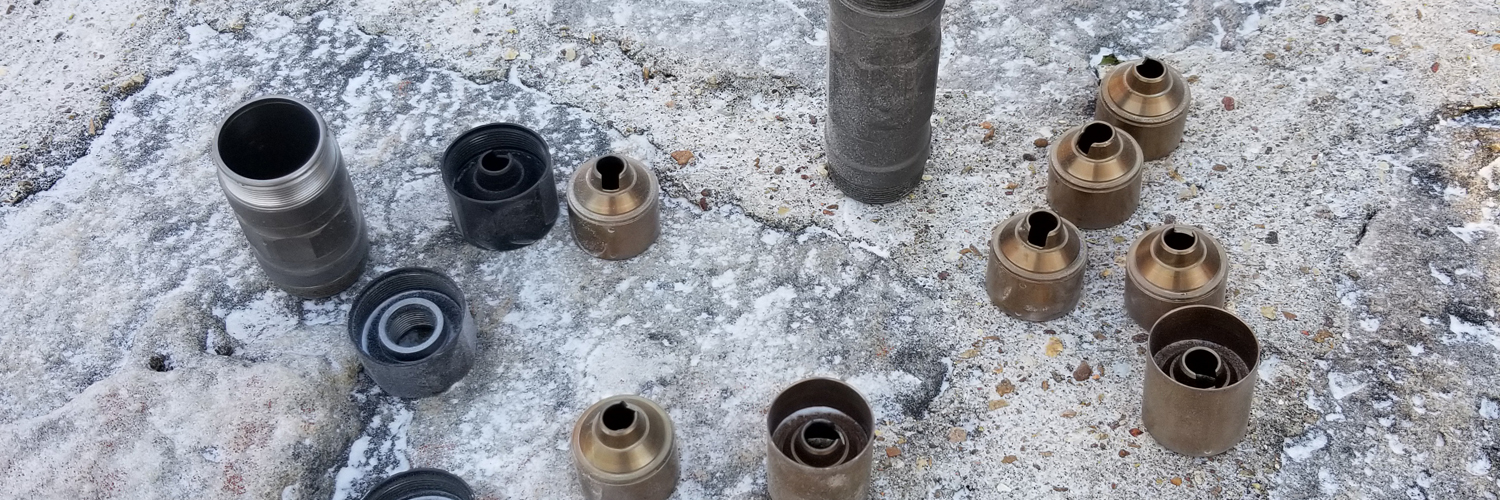
Sparrow after soda blasting – just a little lead to scrape off
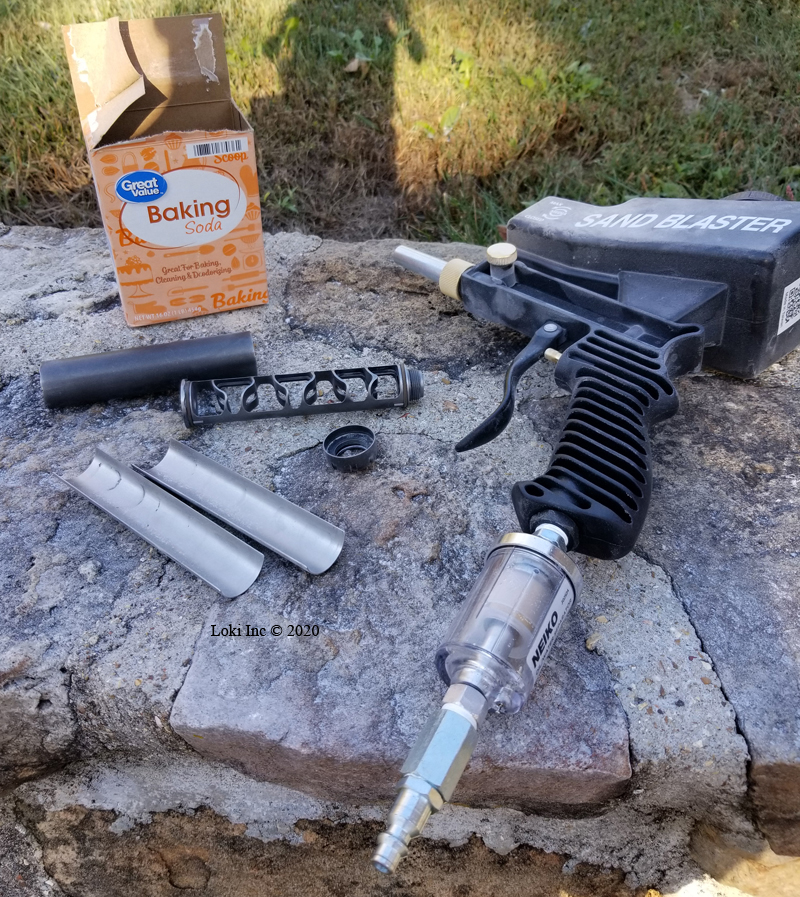
Sparrow, soda blaster, and baking soda
I used it outside with a breeze at my back, in a place where the soda dust wouldn’t damage my grass (it needs to be limed, anyway). What about the assertion that the kitchen baking soda I used is too fine to work very well? It was “dusty,” but I couldn’t tell that it was any dustier than when I used the soda blast media. The baking soda worked fast and cleaned the surfaces well, as you can see from the photos. I also disassembled our Switchback and used the soda blaster on it, too, with great results.
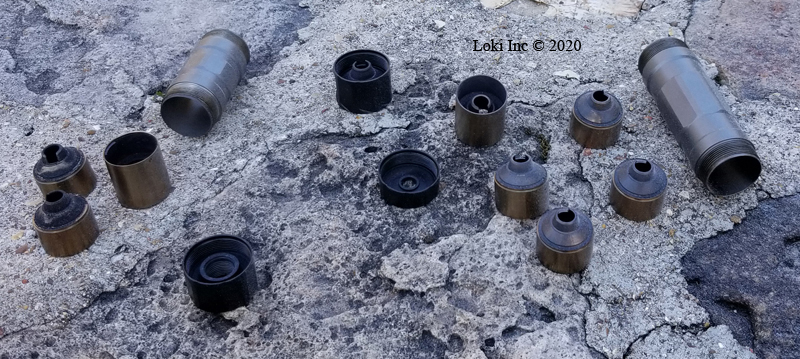
Switchback prior to soda blasting
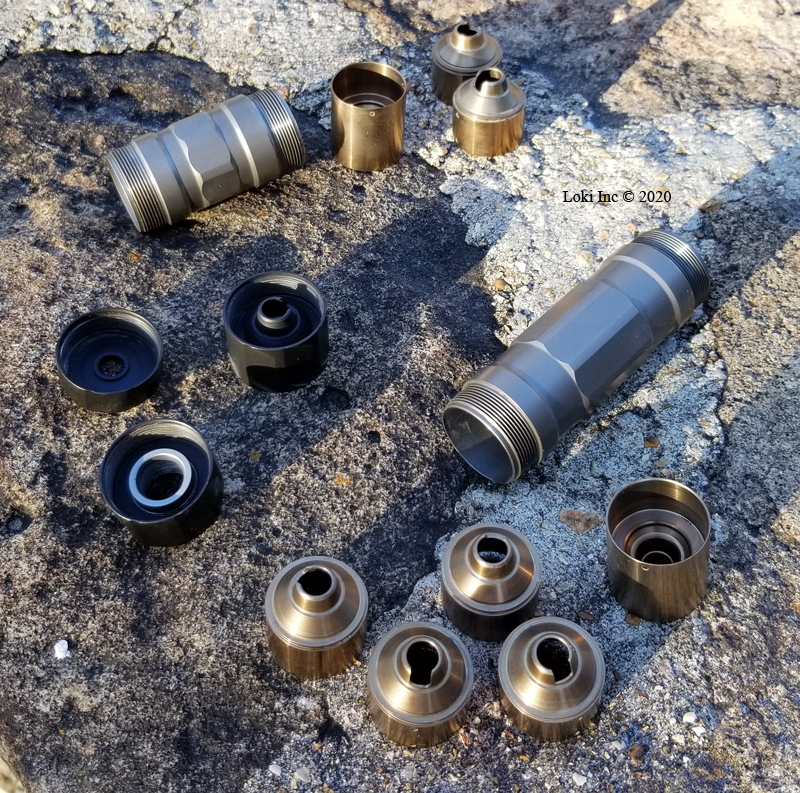
Switchback after soda blasting
I’m sold on .22 caliber suppressor cleaning using a soda blaster!
Recent Posts
September 23, 2025.22 Caliber Suppressor Cleaning
August 20, 2025Trophy Hunting – Is it Ethical?
August 6, 2025 July 25, 2025On-Target Performance of Subsonic Ammo in Suppressed Rifles – Hype Versus Reality
July 24, 2025